The Start Onboarding page allows recruiters to select and start an onboarding workflow for the applicant. When onboarding is started, the applicant is transitioned from applicant to employee. The employee is placed into the job requisition's designated organizational units (OU) and can begin completing their onboarding workflow.
Note: At least one employee onboarding workflow must already be created by the administrator in Onboarding Workflows in order for a workflow to be available for onboarding.
To access the Start Onboarding page, click Start Onboarding from in the Options drop-down on the Applicant Profile page.
| PERMISSION NAME | PERMISSION DESCRIPTION | CATEGORY |
| EMAIL NAME | EMAIL DESCRIPTION | ACTION TYPE |
- Laura has a brand new crop of interns that were hired for an internship program.
- When Laura is ready to initiate the onboarding process for the hired interns, she starts onboarding for each of them.
- As Laura initiates the onboarding for each new hire, she ensures that the OUs they will be moving into are correct.
- After she sets the OUs for a new hire, Laura can select the correct onboarding workflow which the new hire will be going through.
- Once Laura selects the onboarding workflow, she defines the new hire’s Manager and other details.
- Finally, Laura sets the date that the new hire will begin their first day of work.
- After all of this is done, Laura is able to “Start Onboarding” for the new hire.
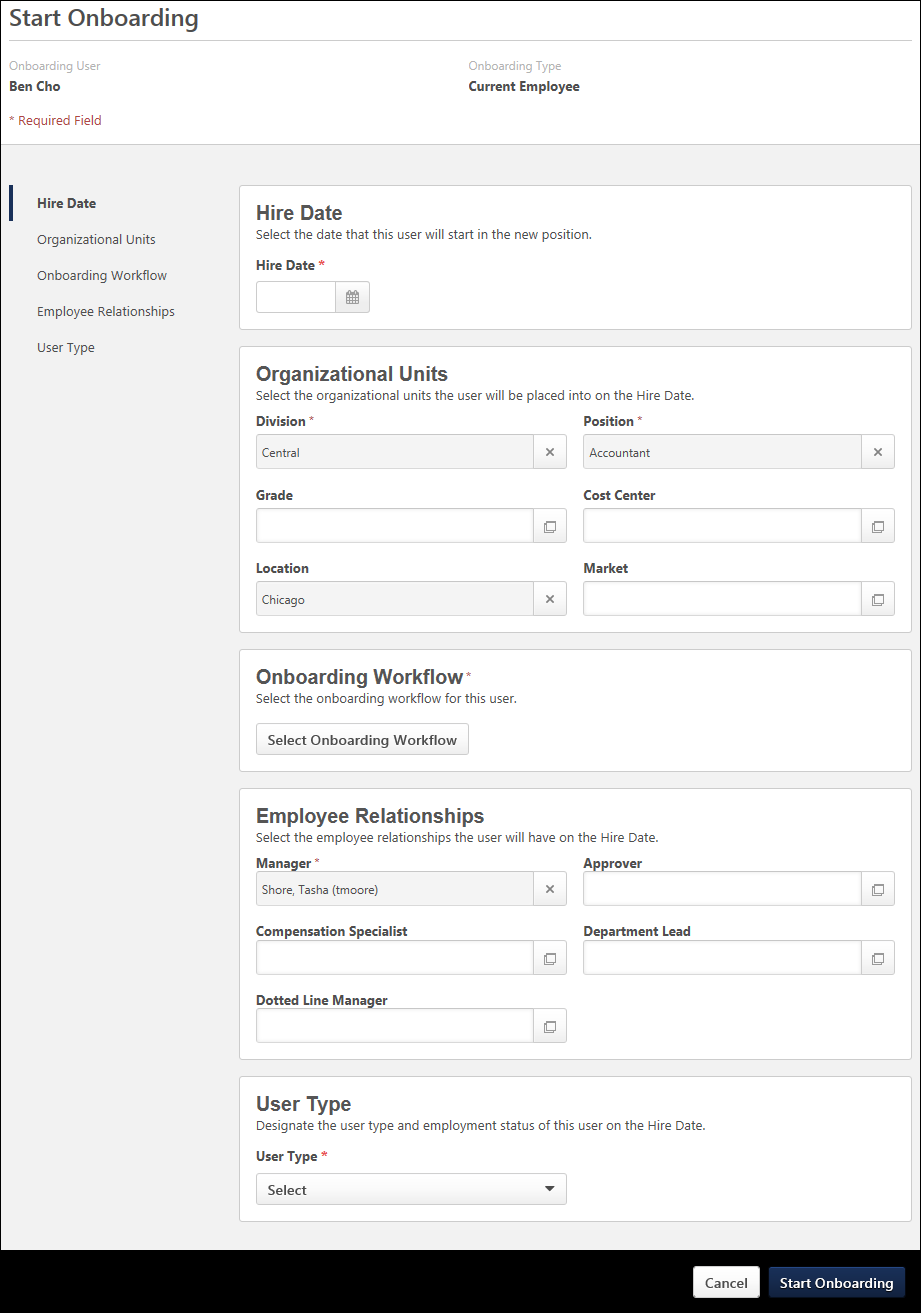
Onboarding User/Type
The name of the onboarding user and the type of onboarding displays at the top of the page.
For the onboarding type, the following are the two possible values:
- Current Employee - This indicates the user is an internal employee and is transitioning into a different role.
- New Employee - This indicates the user is an external employee who is new to the company.
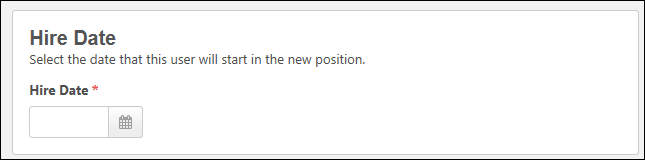
Hire Date
This section requires the recruiter to define the date on which the applicant will start onboarding. Enter a date in the field or use the calendar feature to select a date. The date must be the current date or a date in the future. This is a required field.
Note: For external applicants, when they reach their onboarding start date, their user status changes from Onboarding to Working.
Note: You can change the hire date to a different date on the user record, such as a date in the past, by modifying the Original Hire Date Field. See User Record - General Information.
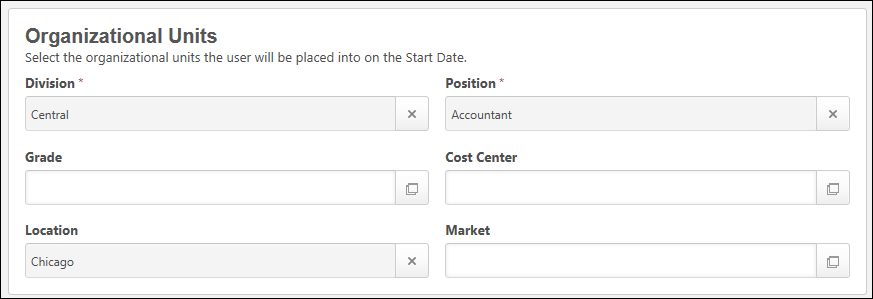
Organizational Units
This section displays the standard and custom OUs that are defined for the job requisition that the recruiter was viewing on the Applicant Profile page or for the most recent requisition to which the applicant has applied. If the Division OU or Location OU was updated to a different value in the offer letter, then the fields are pre-populated with those values but can be modified.
Note: If default values are removed and new OU values are selected, then the OUs that can be selected are constrained by the constraints on the Start Onboarding permission, if applied. The default values are exempt from the OU constraints since they are pre-populated.
You can change the OUs by doing the following:
- Enter the OU name in the predictive search field. Select the OU from the list of matching OUs.
- Or, click the Select icon
 to open the OU pop-up. Then, select the OU from the list.
The OUs that are defined in this section dictate the onboarding workflows that will be available to select in the Onboarding Workflow section.
Location Field for Tracker I-9 and WOTC
If there are onboarding tasks that include either Tracker I-9 or Work Opportunity Tax Credit (WOTC), the Location field must be completed on the Start Onboarding page
Onboarding Workflow
This section allows you to select the onboarding workflow for the user.
To select an onboarding workflow:
- Click . This opens a slide-out menu on the left side of the page, which displays the onboarding workflows that are available to select.
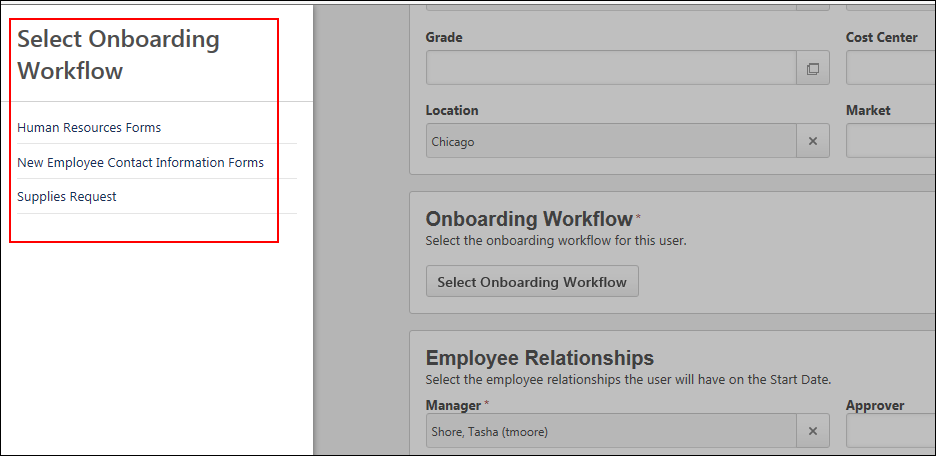
- Click the name of an onboarding workflow to select it. This closes the menu and adds the onboarding workflow to the page.
If the applicant is external, then only workflows that are defined as external-to-internal will be available. If the applicant is internal, then only workflows that are internal-to-internal are available. Selecting a workflow closes the pop-up and assigns the onboarding workflow to the applicant.
If there are no workflows that match the OU criteria, then an error message displays, indicating that there are no workflows available to assign.
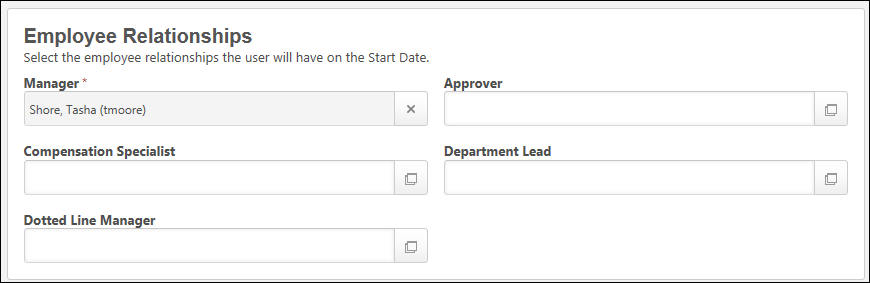
Employee Relationships
This section displays standard and custom employee relationships. You can change the employee relationships by doing the following:
- Enter the employee relationship name in the predictive search field.
- Then, select the relationship from the list of matching relationships based on the predictive search.
- Or, click the Select icon to open the Select Employee Relationship pop-up.
- Then, select the relationship from the list.
The relationships available to select are dependent upon the constraints of the permission needed to start onboarding for applicants.
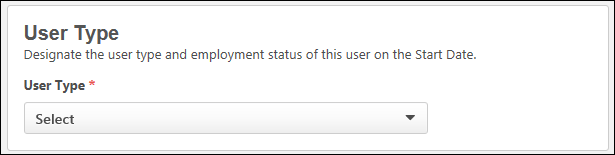
User Type
This section only displays for portals that have Onboarding enabled and User Types and Statuses. This section allows you to define the user type and user subtype, if applicable, for the onboarding user. For clients with onboarding and the user type and employment status feature enabled, any user with access to "Start Onboarding" will be required to set the user type and employment status.
Peter has hired two new hires and is about to launch their onboarding. Evan is an external applicant and Irene is an internal applicant. Peter launches onboarding for both Evan and Irene. He defines the user types and subtypes for Evan and Irene in the User Type section of the Start Onboarding page.
Evan - External Applicant
- Evan will be a full-time employee, so his user type is defined as Employee and his user subtype is defined as Full-Time.
- On the date that onboarding is started, Evan moves into the user type Employee and user subtype Full-Time. His user status is also updated to Onboarding, as he is not yet actively working prior to his hire date.
- On Evan's hire date, his user status is updated to Working, as he is a full-time employee that is actively working.
Irene - Internal Applicant
- Irene is making a transition to become a part-time contractor. Her user type is defined as Contractor and her user subtype is defined as Part-Time.
- On the date that onboarding is started , there is no change to Irene's current user type and subtype, and her user status remains as Working, as she is still actively working during her onboarding period prior to her hire date.
- On Irene's hire date, her user type is updated to Contractor and her user subtype is updated to Part-Time. Her user status remains Working, as she continues to actively work.
To define the user type and subtype, select one of the following user type options from the :
- User Type - This field requires you to define the user type for the onboarding employee. The user types that display in the drop-down are the system-defined user types. Select a user type from the drop-down to define the user type. Once the onboarding user reaches their hire date, they are moved into the user type/subtype that is defined in the User Type section.
-
User Subtype - This field only displays if subtypes have been configured for the user type. To define a subtype, select an option from the drop-down. This is a required field.
Canceled Onboarding for External Applicants
If onboarding is canceled for external applicants, then the user type that was defined in the User Type section is removed. This allows external applicants to have the appropriate user type of external applicant when onboarding is canceled.
In addition, the user's status is canceled so that the external applicant returns to being an external applicant instead of being a user in the system.
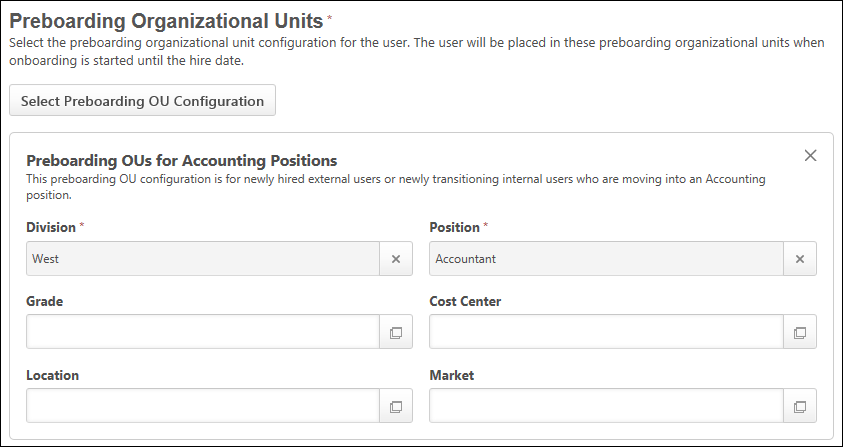
Preboarding Organizational Units
Note: This section only displays for external applicants.
The Preboarding Organizational Units section allows you to select the preboarding OU configuration that contains the OUs in which the user will be placed until their hire date. This section is a required to complete in order to start onboarding for the user.
To select the preboarding OU configuration:
- Click . This opens a slide-out menu on the left side of the page, which displays the configurations that are available to select, based on the OUs defined for the new hire on Start Onboarding page. These OUs are populated on the requisition and/or offer letter but can be changed on the Start Onboarding page.
- Click the name of a configuration to select it. This closes the menu and adds the configuration to the page.
Upon clicking at the bottom of the page, the user is placed into the preboarding OUs.
If enabled by the administrator when creating the preboarding OU configuration, you can change any of the preboarding OU selections by selecting a different OU in the field.
If changes are disabled by the administrator, then the OU selections cannot be modified by the recruiter.
Once the user reaches their hire date, the OUs that are defined in the Organizational Units section on the Start Onboarding page will overwrite the user's preboarding OUs.
When onboarding is canceled for the user, the user is removed from all preboarding OUs to which they were assigned.
Start Onboarding
Click to start the onboarding process for the user. This returns you to the Applicant Profile page.
Or, to close the Start Onboarding page without starting the onboarding process, click . This returns you to the Applicant Profile page and will not keep the settings you configured for the applicant.

Assigned Workflow
Once the workflow is assigned, the following occurs:
- If the applicant is an internal applicant, the applicant is placed into the OUs defined.
- If the applicant is an external applicant, the applicant is transitioned to an employee and placed into the preboarding OUs defined for the workflow.
- The Employee Onboarding Started email is triggered, if configured by the administrator in Email Management.
- The History tab on the Applicant Profile page logs the transition event.
- Dynamic security roles are granted for internal and external applicants.
- Parent tasks that are configured for the workflow are assigned to the applicant. Dependent tasks are assigned once the parent tasks are completed.
Cancel
Click to cancel starting the onboarding process.
Start Onboarding Error Messages
If certain user record fields are not configured properly for onboarding, an error message appears when you click to indicate why the error occurred. Recruiters can provide the message to their system administrator to correct the issue.
The following user record settings apply to these error messages:
- Reason for Change - If this setting is enabled in User Preferences, then you must also have at least one user type and one user status active in User Preferences.
- User Status - The Onboarding status must be active in the User Statuses section in User Preferences. If it is not active, then an error will occur when attempting to start onboarding.
There will also be a notification to the user on the Applicant Profile that onboarding failed, if the onboarding failed to start for any other reason, as well.