Material - Create/Edit - Step 3 - Emails
This topic applies to organizations that are using Versioning with Append for materials.
Design Note: An updated interface is available for this page, which can be enabled by administrators in Feature Activation Preferences. With the new design, the functionality of the page is unchanged.
To create a material, go to . Then, click the button.
To edit a material, go to . Then, click the Edit icon ![]() to the right of the appropriate material.
to the right of the appropriate material.
| PERMISSION NAME | PERMISSION DESCRIPTION | CATEGORY |
Troubleshooting Information
The following pages contain troubleshooting guides for using emails:
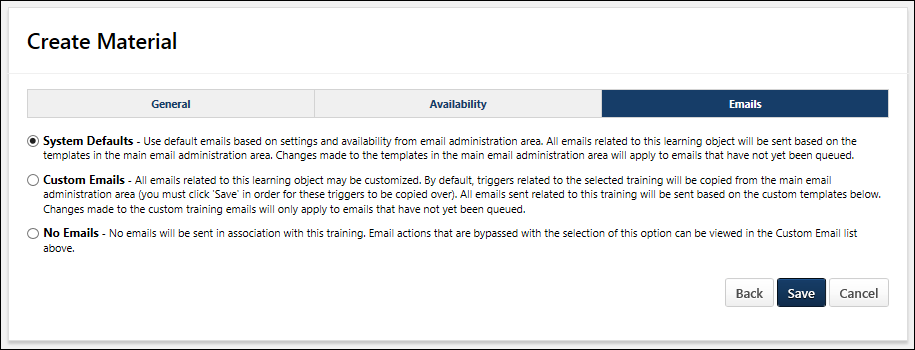
System Defaults
Select this option to use the system default emails. When this option is selected, the following occurs:
- All emails related to material LOs will be triggered based on the active email templates in Email Administration.
- Changes made to the email templates in Email Administration will apply to emails that have not yet been queued.
Custom Emails
Select this option to customize emails for this material. All emails related to this material will be sent based on the custom templates that are configured in this section.
- The Custom Emails section will not display until this option is selected. For default emails to populate here, select Custom Emails, save, and then edit the material again. Then, these emails may be edited, added, or deleted as desired.
- Changes made to the custom emails on this page will only apply to emails that have not yet been queued.
- If an email trigger is not available in the Custom Emails section, it will still be sent from Email Administration if it is configured to do so.
- Both active and inactive templates are available to be customized. However, only the active email templates will be triggered in relation to this material.
- Future custom emails that are configured for the material will be triggered appropriately based on the settings and templates created within the Custom Email section.
No Emails
Select this option to disable emails for the material.
Back, Save, or Cancel
- Click to return to the Availability step. See Material - Create/Edit - Step 2 - Availability (Versioning with Append).
- Click to save the material and return to the Manage Materials page. See Material Administration. Note: If course code functionality has been activated in your portal, when a course code is automatically generated for the LO immediately after the administrator saves the new LO.
- Click to cancel the material creation process and return to the Manage Materials page. This discards the new material. See Material Administration.
When creating a new version, click to proceed to the Reversion Options step. See Material - Create Version - Reversion Options (Versioning with Append).
Modification History
The Modification History section displays a record of each time the material is modified. This includes the modification description, the name of the user who modified the material, and when the modification occurred.
If the material has multiple versions, then this section displays the modification history for all versions of the material.
This section is only available when editing a material and when creating a new version of a material.
The following are examples of how changes appear in Modification History:
- Edit to Material Type - Material Type in English (US) changed from "Publication" to “Book” by Sarah Villamaino (svillamaino) on MM/DD/YYY HH:MM
- Edit to Material Source - Material Source in English (US) changed from "www.test.com" to “www.test1.com” by Sarah Villamaino (svillamaino) on MM/DD/YYY HH:MM
- Material Type for New Material - Material created with English (US) Material Type "Publication" by Sarah Villamaino (svillamaino) on MM/DD/YYYY HH:MM