Recruiters can send a customizable email to an applicant from the Applicant Profile page. Recruiters can use the Send Customizable Email option from the Summary tab. Or, recruiters can send a customizable email from the Email tab.
| PERMISSION NAME | PERMISSION DESCRIPTION | CATEGORY |
| Applicants: View Email Tab | Grants access to view the Email tab within the Applicant Profile page and all of its content. This permission cannot be constrained. | Recruiting |
| Requisition: Reviewer |
Enables reviewer to access requisitions and applicants for requisitions for which they are a reviewer. This permission cannot be constrained. Note: This is a dynamically assigned permission that is not available in Security Role Administration. Once a requisition is in a Closed or Cancelled status or if the user is removed as a reviewer, the permission is revoked for the associated requisition. This permission cannot be manually assigned. Note: If an applicant reviewer is removed as a reviewer via the Applicant Profile page, the Requisition: Reviewer permission is revoked for the associated requisition. However, if the reviewer was also added as a reviewer via the General tab when creating, editing, or copying the requisition, the reviewer still appears on the In Review panel as a duplicate reviewer and retains access to the requisition and applicants from the Requisition: Reviewer permission. See Applicant Profile Page Overview for more information about duplicate reviewer instances. |
Recruiting |
Send Email
To send an email to an applicant:
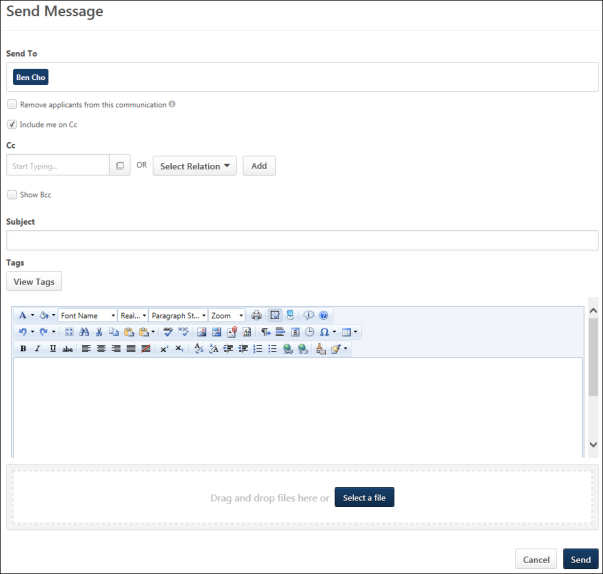
- Click the Send Customizable Email link in the Communication field on Summary tab. Or, click the New Email link on the Email tab. This opens the Send Message page. The Send To field is prepopulated with the applicant and cannot be modified.
- Complete the following fields on the Send Message page:
- Remove applicants from this communication - Check the box to exclude the applicant recipients from the email. The email will only be sent to the users who are copied or blind copied.
- Include me on Cc - This option is selected by default. When selected, the sender is copied on each message that is exchanged with the applicant. Note: The box can be unchecked when replying to applicant messages.
- Cc - Additional users can be copied on the email. To add users, enter a name in the predictive search box or click the Select a user icon
 to search for and select a user from the Select a user pop-up. Recipients must have a valid email address in the system. The sender can also copy themselves. In addition, you can Cc a relationship to the applicant using the Select Relation drop-down. The following relationship options are available:
 - Show Bcc - Check the box to enable the blind copy options. Enter a name in the predictive search box or click the Select a user icon to search for and select a user from the Select a user pop-up. Recipients must have a valid email address in the system. You can also select a relationship from the Select Relation drop-down. The relationships available are defined by the administrator. The sender can also blind copy themselves. The following relationship options are available:
- Applicant Reviewer(s)
- OU Approver
- Hiring Manager
- Next Level Hiring Manager
- Requisition Owner(s)
- Applicant Interviewer(s)
- Subject - Enter the subject in the subject line, up to 250 characters.
- Tags - Click View Tags to view the tags available for the email.
- Message Box - Enter the message for the recipients. There is no character limit. For detailed information about the WYSIWYG options available for configuring emails, see the Email - Create topic in Online Help.
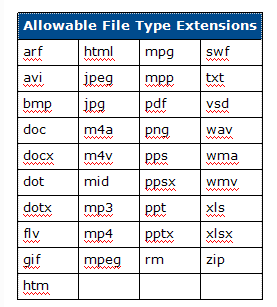
- Attachments - Up to three attachments can be added to the email, with a maximum file size per attachment of 5MB. File names cannot exceed 50 characters and cannot include invalid special characters. Drag and drop a file to the attachment box, or click to select an attachment from your computer. Attachments can be removed by clicking the remove option for the attachment. Click to view the acceptable file types.
You can preview the email by clicking the button at the bottom of the message box, which shows the email with tags rendered. When previewing an email with multiple recipients, only the first applicant in the list of recipients is rendered in the preview.
- Click to send the email to the applicant and other recipients. Or, click to close the email without sending it.
Once the email is sent, the email event is logged on the History tab of the Applicant Profile page. The size of the entire message, including attachments, should not exceed 20MB.
Note: An email notification is not sent to the recruiter indicating that the applicant has responded to the email. The applicant's response is available from the Email tab or History tab on the Applicant Profile page.
Reply to Email
To reply to an email:
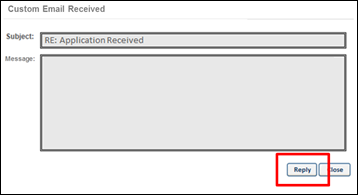
- Open the email by clicking the subject line in the Submit column on the Email tab of the Applicant Profile page. This opens a pop-up of the email.
- Click the button. This opens the Send Message page from which you can enter your message above the email string. You can also add or remove recipients. If the applicant added recipients in their response, then those recipients also display and can also be removed by clicking the remove option for each recipient.