Learning Feature Activation Preferences
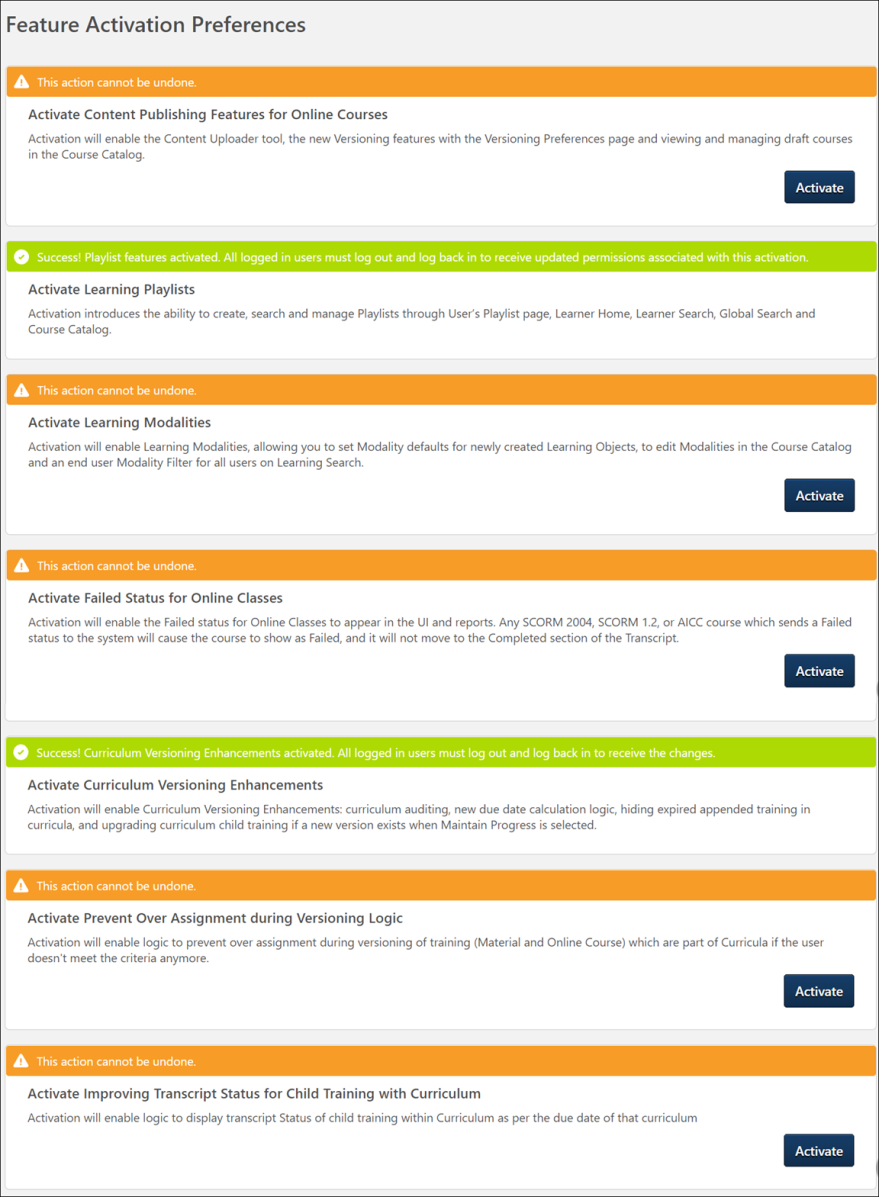
The Feature Activation Preferences page allows administrators to self-enable different system features.
To access Learning Feature Activation Preferences, go to: and click the Feature Activation Preferences link.
Activate Content Publisher Features for Online Courses
In order for Content Publishing functionality to be accessible in the portal, an administrator must activate it. To activate Content Publishing functionality for online courses in your portal:
- Click in the Activate Content Publisher Features section. A warning message appears, asking if you are certain you want to activate Content Publishing functionality in the portal.
- Click to complete the activation of Content Publishing features in the portal. Once activated, this functionality cannot be deactivated, and the old Course Publisher is no longer active or accessible. To exit without activating Content Publishing functionality, click the button.
- Log out of the portal and log in again to receive the permissions associated with the new functionality and begin using the Content Publisher.
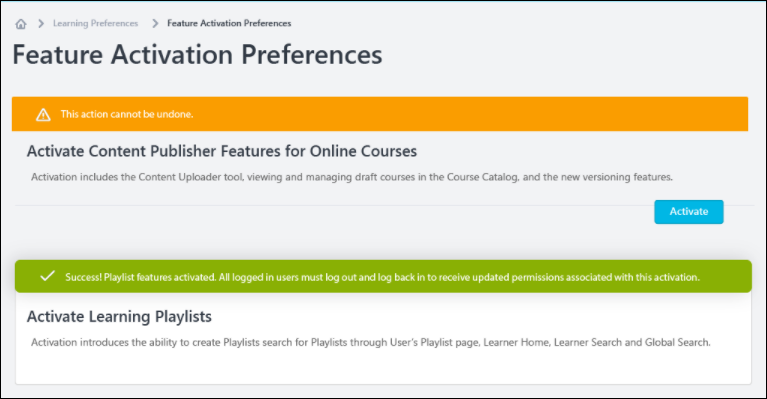
After the feature has been activated, the orange header for the section turns green to indicate the activation was successful. The button is no longer available once the feature has been activated.
See Content Uploader - Create an Online Course - Overview.
See Online Course Versioning vs. Modifying - Overview.
Activate Curriculum Player 2.0 radio button option in Curricula Administration
This setting is only available after the April 5, 2024 patch deployment.
This setting controls whether the Curriculum Player 2.0 radio button option is available in the Curriculum Player setting when creating or editing a curriculum in Curricula Administration. This setting is enabled by default.
Activate Learning Playlists
Learning Playlists functionality will be released in a post-February release patch. Once the functionality is available, administrators can activate playlists using the following steps:
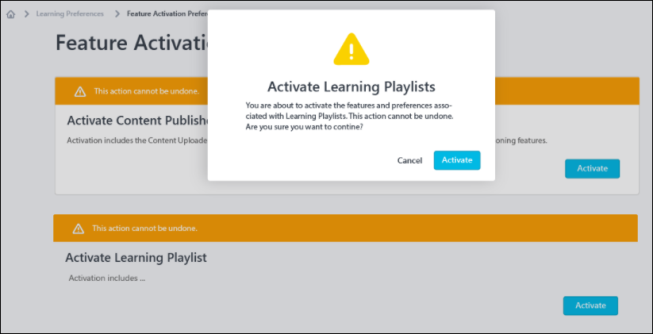
- Click in the Activate Learning Playlists section. A warning message appears, asking if you are certain you want to activate Learning Playlists functionality in the portal.
- Click to complete the activation of Learning Playlists in the portal. Once activated, this functionality cannot be deactivated. To exit without activating playlists, click .
- Log out of the portal and log in again to receive the permissions associated with the new functionality and begin using playlists.
After the feature has been activated, the orange header for the section turns green to indicate the activation was successful. The button is no longer available once the feature has been activated.
Note: Documentation for Learning Playlists will be made available when the functionality is released.
Activate Learning Modalities
In order for Learning Modalities functionality to be accessible in the portal, an administrator must activate it. To activate modalities in your portal:
- Click in the Learning Modalities section. A warning message appears, asking if you are certain you want to activate Learning Modalities functionality in the portal.
- Click to complete the activation of Learning Modalities features in the portal. Once activated, this functionality cannot be deactivated. To exit without activating Learning Modalities, click .
- Log out of the portal and log in again to receive the permissions associated with the new functionality and begin using Learning Modalities.
After the feature has been activated, the orange header for the section turns green to indicate the activation was successful. The button is no longer available once the feature has been activated.
Learning Modalities functionality will be available in the following system areas after the activation:
- Learning Search
- Learning Search Preferences (learning modalities can be modified for individual organizational units (OUs) here)
- Course Catalog
- Course Console
- Modality Preferences
Activate Failed Status for Online Classes
In order for the Failed status to be available for online classes in a portal, an administrator must activate it. To activate this functionality in your portal:
- Click in the Activate Failed Status for Online Classes section. A warning message appears, asking if you are certain you want to activate this functionality in the portal.
- Click to complete the activation of curriculum compliance features in the portal. Once activated, this functionality cannot be deactivated. To exit without activating this functionality, click .
- Log out of the portal and log in again to receive the new functionality and begin using the Failed status for online classes.
After the feature has been activated, the orange header for the section turns green to indicate the activation was successful. The button is no longer available once the feature has been activated.
Activate Prevent Over Assignment During Versioning Logic
To activate the logic that prevents the overassignment of versioned materials and online courses, click in the Activate Prevent Over Assignment During Versioning Logic section of the Learning Feature Activation Preferences page. Note: Once this logic has been activated in a portal, it cannot be deactivated.
This setting prevents the unintended overassignment of versioned materials and online courses in the following scenarios:
The material or online course was versioned, and the Assign To option is set to Users Assigned by Dynamic Assignment. Then:
- The versioned material or online course was contained within a curriculum that was assigned to the learner in the past, but the material or online course is no longer part of that curriculum, and the learner has already completed the material or online course.
- A child material or online course contained within multiple curricula is assigned to a learner via different assignment criteria and the learner completes both curricula. If the learner is removed from one of the assignment criteria and the child training is versioned, the learner receives both curricula even though they are not part of all the assignment criteria anymore.
Activate Improving Transcript Status for Child Training with Curriculum
When this logic is enabled, the transcript status of child training will be in sync with the due date displayed in the curriculum that the user is currently viewing. For example, if the curriculum's minimum due date is in the past and the user views a training item within the curriculum whose due date is in the future, the user will see the child training item in a status of Registered. The minimum due date of the curriculum does not cause child training items to display as Past Due. This updated behavior will also be accurately reflected in reporting. Click the button for this option to activate the logic.
When this logic is NOT enabled, when viewing child training in a curriculum on a learner’s transcript, the curriculum transcript status of the child training is based on the earliest due date for that child training in all the curricula on that learner’s transcript, even if the due date for the child training is set to a future due date inside of this curriculum. For example, if a curriculum's minimum due date was in the past and the user views a training item within the curriculum whose due date is in the future, the user will see the child training item in a status of Registered/Past Due.
Activate Retention of the Applicable Due Date for Child Training Object Upon Removal
A preference that will cause the due date of completed training items within one or more curricula to be retained when the curriculum is removed from the user's transcript can be activated on the Learning Feature Activation Preferences page. Click to enable the due date retention behavior for child training items contained within one or more curricula. Once activated, this preference cannot be deactivated. For more information: See Curriculum Child Training - Retain Due Date Upon Removal.

User Interface Modifications
By default, the UI Modifications and Enhancements functionality is disabled for all organizations.
The preference can be enabled and disabled, if necessary, to change whether the portal uses the updated interface or the legacy interface. However, the user must log out, then log in for the change to take effect.
This setting impacts the following areas:
- Course Catalog
- Curricula - Edit and Create
- Deep Links Administration
- ILT Create and Edit New Sessions and Events
- Materials Administration
- Training Request Approval
Note: The new user interfaces for the above pages will be automatically enabled in production, stage, and pilot portals with the Q3 2024 Release and the legacy user interface pages will no longer be available. Therefore, the User Interface Modifications feature activation may no longer exist after Q3 2024 release.

Disable Auto-Populating Results in Administrative Search
This preference is enabled by default. When the preference is enabled, various administrative search pages display an “empty state” upon initial load. It helps the administrators to search faster as they are not forced to wait for all the results to load before they can perform a search. The administrators can still search for the full catalog by conducting an “empty search.” Click to enable the initial loading time of learning administration pages with a large amount of training objects.
The list of administrative pages includes the following:
- Manage Sessions
- Curriculum Administration
- Material Administration
- Test Administration
- Question Administration
- Certification Administration
- Video Administration
Note: The Manage Events page is not affected by the functionality of the preference.
Disable Auto Populating Results in Administrative Search - Learning Assignment Tool - Manage Assignments
This preference is disabled by default. Click to enable this preference. When the preference is enabled, the Manage Learning Assignment page within the Learning Assignment Tool displays an “empty state” upon initial load.

Activate New Versioning Enhancements
Click to ensure that Curriculum Versioning workflows are consistent and reliable whenever a Curriculum Child LO is versioned, or Curriculum structure is modified simultaneously so that the right users get the right training at the right time maintaining compliance for tracking training completions.
Activate Learning Transcript Deletion Mechanism for Compliance
Note: This functionality is off by default. Contact Global Customer Support (GCS) to enable.
Click to automatically delete User Transcript Data based on a defined retention period for inactive users in accordance with various regulations, such the EU GDPR and the Right to be Forgotten policy. After activation, the following applies:
- Data deletion respects the retention rule set at the Legal Entity Organizational Unit (OU) which users are part of at the time of the deletion.
- Automatic deletion applies to the transcript of inactive users who are terminated.
The following transcript data is deleted:
Deleted Data
The following Essential Transcript Data is deleted:
Time-based Data Deletion
The following applies to time-based data deletion:
- Before opting-in for this process Customers must request via GCS one-time historical data cleanup for previously anonymized/ deleted Users if they already use User anonymization/ deletion mechanism in their portal.
- Time-based deletion occurs automatically after a certain period. The execution itself is triggered on daily basis for Inactive User’s Learning Transcript Data based on the User’s termination date.
- The user must belong to a Legal Entity OU and must be inactive. Users should be assigned to the Legal Entity before their termination date.
- Data is erased permanently from the database and cannot be recovered. Data is also removed from the Reports.
- Customers must enable User data anonymization/ deletion prior to Time based activation for Transcript for each Legal Entity OU.
User Interface Modifications - ILT Roster pages
Click to activate or deactivate the new user interface for the ILT Roster pages, ILT administrator waitlist pages, and the ILT administrator exception request pages.
Note: The new user interface for ILT Roster pages will be automatically enabled in production, stage, and pilot portals with the Q3 2024 Release and the legacy user interface pages will no longer be available. Therefore, the User Interface Modifications - ILT Roster pages feature activation may no longer exist after Q3 2024 release.
Test Administration User Interface Modifications
Click to activate or deactivate the new user interface for the Test Engine Administration pages.
Note: The new user interface for Test Administration will be automatically enabled in production, stage, and pilot portals with the Q3 2024 Release and the legacy user interface pages will no longer be available. Therefore, the Test Administration User Interface Modifications feature activation may no longer exist after Q3 2024 release.
Activate Required Training Tagging
Click to introduce the ability to set a learning assignments as required, create and manage required training reasons and categories. Once activated, this preference cannot be deactivated.
Activate Recurrence Fix to include Greater than Consideration for Dynamic Recurring Learning Assignments
With this feature enabled, the Learning Assignment Tool (LAT) assigns the training to users who have surpassed the recurrence date criteria of dynamic assignments but still satisfy the training assignment criteria, if dynamically recurring Learning Assignments have the recurrence date set as “Relative” or “Annually”. It also allows Learning Assignments to search for all users who have missed the recurrence date of trainings in the past.
Certification Administration User Interface Modifications
Click to activate or deactivate the new user interface for the Certification Administration pages.
Note: The new user interface for Certification Administration will be automatically enabled in production, stage, and pilot portals with the Q3 2024 Release and the legacy user interface pages will no longer be available. Therefore, the Certification Administration User Interface Modifications feature activation may no longer exist after Q3 2024 release.
Activate Video Auto-Completion
Click to activate the video auto-completion feature. When enabled, it allows videos to auto-complete without any user involvement after the user has watched the entire video. Enabling this functionality removes the ‘Mark Complete’ button from the following areas to maintain consistency:
- The ellipsis menu on the user transcript page.
- The Learning Details page when the video is already on the learner’s transcript.
- The “Continue Learning” carousel and training side panel in the Learner Home.
The auto-completion feature adds a supporting text under the video player to inform learners that the video automatically marks as complete once watched until the end. The text message is displayed in standalone videos and is localized based on the learner’s display language.

Here are the points to consider when enabling auto-completion feature:
- This is a portal-wide setting. When enabled, the auto-completion logic applies to all existing and new videos. It cannot be configured separately for individual videos.
- This feature encompasses both standalone videos and videos within curricula. (Curriculum Player 2.0 is currently not in scope).
- Videos in Programs and Cohorts are excluded and must be manually marked as complete.
- Auto-completion does not prevent fast-forwarding.
- The percentage viewed to achieve a completion cannot be configured. Once the video's progress time in the progress bar reaches the video duration, the video is automatically marked as complete.
- This enhancement does not include video auto-completions within the Cornerstone CSX app.
Note: No activation is required if the video auto-completion functionality is already enabled.
Allow Revert for Sessions which are part of Curricula
Click to activate the Allow Revert for Sessions which are part of Curricula feature. When enabled, it allows administrators to revert ILT session completions where the session is part of one or more curricula. Reverting sessions, that are part of curricula, can impact Curriculum transcript status and recalculate progress.
Note: This functionality only supports the ability to revert a session completion where sessions are part of the curricula. It does not revert session completions if the session relates to prework, postwork, prerequisites, programs, cohorts, or certifications.
Activate Version Equivalence Alignment - Materials And Online Course
This preference is activated by default. Click to enable this preference. When enabled, users who have completed the previous version, have a version equivalence received for the previous version, or should be entitled to have received one can get a version equivalence status for the newly created version. This feature enables the enhanced version equivalence flow for online courses and materials always to respect the basic business logic of applying version equivalence with the previous version. Once activated, this preference cannot be deactivated.