The Sessions page allows administrators to add sessions and session parts to an interview event. From here, administrators can also add interviewers to the entire session as a whole or to each individual session part.
Note: At least one session must be added in order for the interview event to be available to select when inviting applicants to the event from the Applicant Profile page or the Manage ApplicantsManage Applicants page. If there are no sessions for the event, then the event will not display in the pop-up when selecting events.
To create an interview event, go to . Then, click the Create New Event link on the Interview Events & Sessions page.
| PERMISSION NAME | PERMISSION DESCRIPTION | CATEGORY |
Session Details
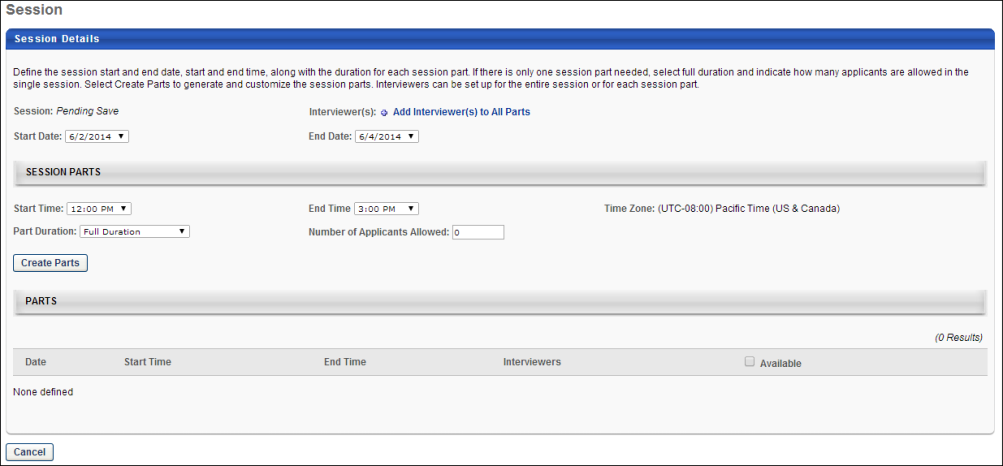
In the Session Details section, administrators configure the start and end date for the session. An option is also available to add interviewers to all of the session parts. This section also displays the system-defined session number.
- Session - This field displays the system-defined session number. The session number is generated when the session is saved. If the session has not yet been saved, then this field displays "Pending Save."
- Interviewer - This is a required field. This field enables administrators to add interviewers to the entire session as a whole. To add interviewers:
- Click Add Interviewer(s) to All Parts. This opens the Select Interviewer pop-up.
- Select the interviewers.
- Click . This adds the interviewers to all session parts.
There is no limit to the number of interviewers that can be added.Once added, an interviewer can be removed by clicking the Delete icon
 to the left of the interviewer's name. This removes the interviewer from all session parts.
 - Start Date - Enter the date on which the session starts. Or, use the calendar feature to select a date from the calendar. This is a required field.
- End Date - Enter the date on which the session ends. Or, use the calendar feature to select a date from the calendar. This is a required field.
For single-day events, the field displays the event start date by default.
For single-day events, the field displays the event end date by default.
Session Parts
In the Session Parts section, administrators can configure the session parts. Adding parts is not required when creating sessions.
- Start Time - Select the session part start time from the drop-down. The times are listed in 15-minute intervals.
- End Time - Select the session part end time from the drop-down. The times are listed in 15-minute intervals.
- Time Zone - This field displays the time zone in which the event occurs. This field can only be modified from the Event Details page.
- Part Duration - Select the duration of the parts from the drop-down. The options are 15-minute intervals for the first hour, and then 30-minute intervals for the remaining hours.
- Number of Applicants Allowed - This option only displays when Full Duration is selected in the Part Duration field. This is a required field.
- Create Parts - Click the button to create the parts. This populates the Parts table with the information for each part.
A Full Duration option is also available. When selected, the session part occurs for the full duration between the start and end time of the session.
Note: If the sum time of the session part is longer than the duration, then any remaining time is discarded. For example, the duration of each part in a session is 45 minutes. The total session time is five hours. The session would have six 45-minute parts, and the remaining 30 minutes of the session would be discarded.
This option allows administrators to define the maximum number of applicants that can be scheduled for the part. This field accepts up to three numeric characters.
Note: Once at least one applicant has been scheduled, the value in this field cannot be changed to a value lower than the number of scheduled applicants.
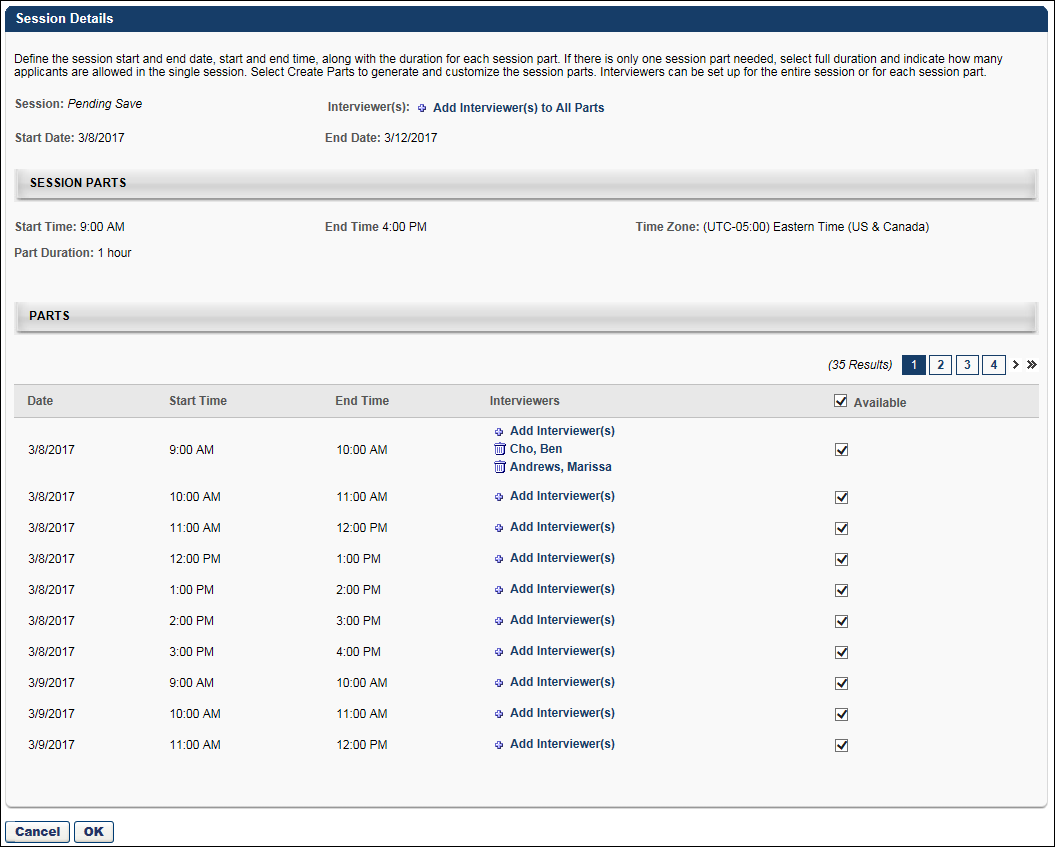
Parts Table
The Parts table lists all of the session parts. From here, administrators can add and remove interviewers. Individual parts cannot be deleted once they are created.
The following information displays for each part:
- Date - This column displays the date of the part.
- Start Time - This column displays the start time of the part.
- End Time - This column displays the end time of the part.
- Interviewers - This column allows administrators to add interviewers to the part. To add interviewers:
- Click Add Interviewer(s). This opens the Select Interviewer pop-up.
- Select the interviewers.
- Click . This adds the interviewers to the part.
There is no limit to the number of interviewers that can be added.
If interviewers are selected in the Interviewer(s) field in the Session Details section, then those interviewers display by default in this column.
Hovering over the interviewer's name opens an information pop-up that displays the interviewer's image if available, name, position, phone number, and a linked email address. Click the interviewer's email address to send an email to the interviewer, using your organization's email provider.
Interviewers can be deleted by clicking the Delete icon
 to the left of the interviewer's name. This includes default interviewers who are added to the part via the Add Interviewer(s) to All Parts option in the Session Details section.
 - Available - This column displays the availability for the part. The following values and options that display are dependent upon the option selected in the Part Duration field:
- Specified Duration - If a specific duration is selected in the Part Duration field, then the Available column displays a checkbox for each part. The box is checked by default, which indicates that the part is available. When unchecked, the part is not available.
- Full Duration - If the Full Duration option is selected in the Part Duration field, then the Available column displays the number of parts remaining to be scheduled vs. the total number of parts scheduled.
Save/Cancel
Click to create the session or confirm the changes to the session. This returns you to the interview event configuration page.
Click to cancel creating or editing the session. This returns you to the interview event configuration page.
Editing Considerations
The following rules apply to editing the Session Details for an interview event:
- The event dates can only be modified if session parts have not been scheduled.
- Session part times can only be modified if session parts have not been scheduled.
- Events and sessions can be deleted at any time.
- Session parts cannot be deleted.
- For session parts defined as Full Duration, the Number of Applicants field can be modified. However, the value in this field cannot be changed to a value lower than the number of scheduled applicants.
- A session part that is defined as Full Duration cannot be removed if the part is already scheduled.
- Session parts for parts with a specified duration can be made unavailable by unchecking the box in the Available column. Note: If a session part is already scheduled, then the applicant who is scheduled for the session should first be rescheduled for a different part, and then uncheck the box in the Available column.