Create Job Requisition - Job Ad
The Create Job Requisition - Job Ad step enables the administrator to define the appearance of the job ad. Two job ads are defined for the job requisition:
- External Site - This job ad is for the purpose of posting the job requisition to an external career board, where the audience is people outside the organization.
- Internal Site - This job ad is for the purpose of posting the job requisition to an internal career board, where the audience is the organization's employee base.
- Mobile - This job ad is for the purpose of posting the job requisition to mobile optimized career sites. Note: As part of the deprecation process for Standard career sites, for clients whose portals were created prior to the May '19 release, when the Enable Mobile Site option on the Career Site Settings page for Standard career sites has been unchecked from all Standard career sites, the Mobile Job Ad tab will be hidden when configuring job requisitions.
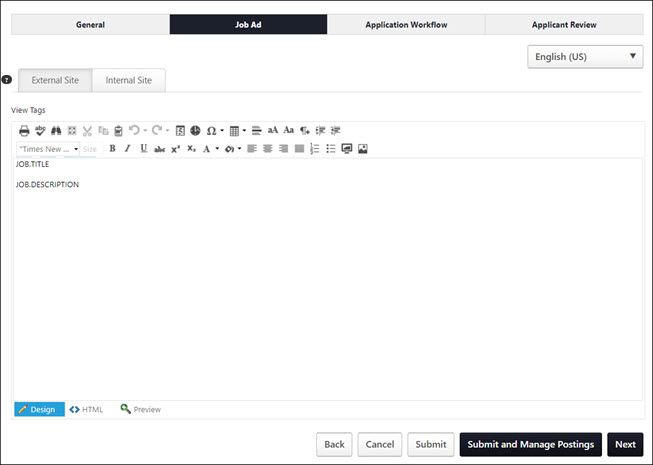
To switch between editing the External Site job ad and Internal Site job ad, click the appropriate tab at the top of the editor.
There is no limit to the number of characters that can be entered in the external or internal job ads; however, a maximum of 30,000 characters can be entered in the Mobile job ad.
| PERMISSION NAME | PERMISSION DESCRIPTION | CATEGORY |
| Requisition: Edit Job Ad | Grants ability to edit the Job Ad tab of the Edit Requisition page. This permission cannot be constrained. | Recruiting |
Language
The language option allows you to localize the job ad for external and internal sites, as well as mobile. Tags are also localized. Note: When viewing the Job Ad page, the language in the language drop-down is the most recently selected language in the View In field on the General tab.
To localize the job ad, select the language from the drop-down, and then enter the translated text into the job ad.
To translate the job ad into additional languages, select a different language from the drop-down and enter the translated text into the job ad.
When the job ad is viewed, the ad displays in the language of the viewer. If a translation is not available in their language, then the ad displays in the language of the user who created the ad.
Job Ad Editor
When creating or editing a job ad, a Telerik RadEditor is used. For additional information about the editor, visit http://www.telerik.com/help/aspnet-ajax/editor-toolbar-intro.html.
In the editor, there are two editing modes: Design and HTML. When in Design mode, you can use the standard editing tools to format your text, similar to your word processor application. When in HTML mode, the standard editing tools are disabled and you are able to view and modify the HTML code that is used to design the ad. To switch between modes, click the appropriate tab in the lower-left corner of the editor. The system only accepts certain customizable HTML elements in the WYSIWYG Editor. Elements that are not acceptable display as text. See Safe Listed Customizable Elements.
Click the Toggle Full Screen Mode icon ![]() to view the Description or Qualifications section in full screen mode. Click the icon again to return to the default view.
to view the Description or Qualifications section in full screen mode. Click the icon again to return to the default view.
When viewing in full screen, you must be in the Design mode in order to exit the full screen view.
Job Ad Tags
To view the available tags for the ad, click the View Tags link in the upper-left corner. This includes all available standard tags and custom field tags that may exist in your portal. To use one of the tags, copy and paste the tag into the editor. All custom fields must be referenced in all capital letters. The field name must be placed within square brackets ("[ ]"). The following custom fields are available:
- [COMPENSATION.CURRENCY] - Currency type defined on job requisition form.
- [COMPENSATION.RANGE] - Payment range for the job. Note: This tag is only available to users who have permission to view and edit the salary range for requisitions. For users who do not have salary range permission, the tag is not visible in the tags pop-up.
- [COMPENSATION.TYPE] - Compensation type selected on job requisition form.
- [EMPLOYMENT.TYPE] - Employment type defined on job requisition form.
- [JOB.DESCRIPTION] - External or internal job description defined on job requisition form.
- [JOB.MINIMUM.QUALIFICATIONS) - Minimum qualifications defined for the job requisition.
- [JOB.OPENINGS] - Number of job openings defined on job requisition form.
- [JOB.OU.GRADE.TITLE] - Displays the Grade OU associated with the requisition. Note: The tag is only available for portals that have Grade OUs enabled. In addition, the tag is only visible to users who have permission to view Grade OUs.
- [JOB.REFERRAL.BONUS] - Referral bonus defined for the job requisition. Note: Referral Suite must be enabled.
- [JOB.RESPONSIBILITIES] - Job responsibilities defined for the position OU.
- [JOB.TITLE] - Display job title defined on job requisition form.
- [OU.DIVISION] - Division selected on job requisition form.
- [OU.LOCATION] - Location selected on job requisition form.
- [OU.LOCATION.ADDRESS] - Facility address defined for the location on job requisition form.
- [REQUISITION.ADDRESS] - Displays the location address defined in the Address field on the General tab of the template.
- [REQUISITION.ID] - Displays the requisition ID.
- [TARGET.HIRE.DATE] - Target hire date defined on job requisition form.
JOB.DESCRIPTION Tag
The JOB.DESCRIPTION tag displays the content that is in the Internal or External tab in the Description and Qualifications > Description section on the General tab of the requisition. If you include the JOB.DESCRIPTION tag on the job ad, then the internal or external description will display for applicants when they view the job.
If you do not want this information to appear for applicants, then be sure that the job ad does not include the JOB.DESCRIPTION tag.
Custom fields for Recruiting can be added to the Job Ad. The custom fields are added via tags, which can be viewed by clicking the View Tags link. This opens the View Tags pop-up. The custom fields that display in the tags pop-up are the fields for which the administrator meets the availability criteria. If the user does not have availability to see the custom field, the tag is hidden in the tags pop-up.
Clone External Site
When viewing the Internal Site tab, the job ad on the External Site tab can be cloned by checking the Clone External Site option. This allows the requisition creator to easily duplicate content from the External Site job ad to the Internal Site job ad without having to copy and paste the content. Because this option is selected by default, the content is duplicated automatically for users who wish to use the same content for both sites.
The Clone External Site option only appears on the Internal Site tab.
- When selected, the Internal Site job ad content is an exact clone of the External Site job ad and the job ad field cannot be edited. If the Clone External Site option is deselected and then later selected again, any content that is in the Internal Site job ad field is discarded and is replaced with the External Site job ad content.
- When deselected, the Internal Site job ad may contain different content than the External Site job ad. Both job ads can be edited.
Mobile Tab
From the Mobile tab, a mobile job ad can be created. When a mobile job ad is defined, the ad displays on mobile optimized career sites. If an ad is not defined on the Mobile tab, then the job description and job details display as the mobile job ad.
To create the job ad, enter the job ad in the editor, up to 30,000 characters. If the ad is copied and pasted from another source, the editor only accepts up to 3000 of the pasted characters.
For mobile ads, the following editing options are available:
- Bold
- Italics
- Underline
- Bullets
- Numbering
Tags can also be included in mobile job ads. Available tags can be viewed by selecting the View Tags link.
Back/Cancel/Save/Next
After completing all sections, click to validate that all required information is entered on this page and proceed to the next step. Or, click to save any changes made to any of the steps. Or, click to return to the Manage Job Requisitions page without saving the requisition.
Click to return to the previous step of the requisition.
Note: With integration with Broadbean, clicking executes the Call Channels API call to Broadbean to populate the Postings page with available jobs.
Submit/Submit and Manage Postings Buttons
Once all mandatory fields are completed you can use the following buttons:
- - Submits the requisition.
- - Submits the requisition and opens the Manage Posting page.
Submit Changes
When editing a requisition that has been submitted for approval, a button is available. Click this button to save the changes made on all pages of the requisition form and resubmit the requisition for approval.