Use the Form Task Administration page to view, create, edit, copy, and delete form tasks. From this page, administrators can also access details of the form task from the Form Task Snapshot page.
The form tasks that display on the Form Task Administration page are within the administrator's permission constraints for the permission needed to access the Form Task Administration page. Form tasks that are not within the administrator's permission constraints do not display.
Forms are available to organizations that are using Onboarding or Cornerstone HR. For information on Training Forms, select the following link: See Training Forms Administration.
Note: Launching form tasks can only be done from the Actions tab in Universal Profile. Therefore, Universal Profile must be enabled in the portal in order for users to complete forms.
To access the Form Task Administration page, go to .
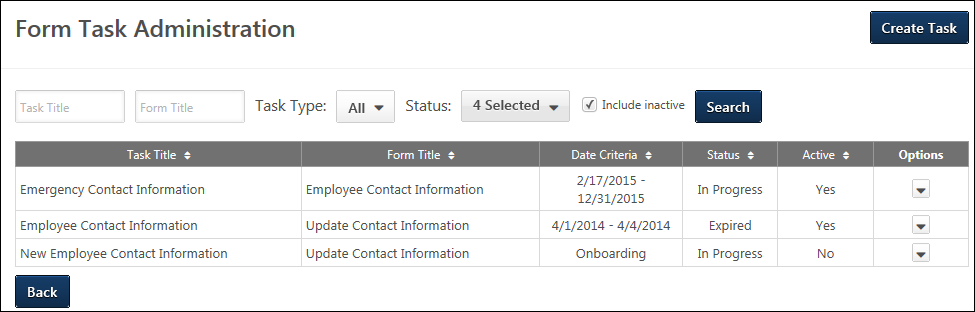
Create Task
Click the button to create a form task. See Create Form Task - General Information.
Search
Use the Search feature to filter the results in the Form Task table by full or partial task title, task type, task status, and task date range. Click to update the results in the table to display matching tasks. Note: If the Employee Onboarding functionality is enabled for the portal, then the date range filter does not display.
If the Employee Onboarding functionality is enabled for the portal, then the following additional filters are available:
- Status - This filter allows the administrator to filter the search results by the status of the task. The following options are available:
- Completed
- Expired
- In Progress
- Queued
- Include Inactive - Check the box to include inactive form tasks in the task table. When the box is not checked, the task table only displays active form tasks.
Form Task Table
The following information displays in the table:
- Task Title - This column displays the title of the task.
- Form Title - This column displays the title of the form included in the task. Note: Only one form can be included in a task, so this column only displays one form title.
- Start Date - This column only displays if the Employee Onboarding functionality is disabled. This column displays the start date for the task.
- Due Date - This column only displays if the Employee Onboarding functionality is disabled. This column displays the due date for the task.
- Date Criteria - This column only displays if the Employee Onboarding functionality is enabled. The information in this column is dependent upon the task type. The following information displays by task type:
- Standard Task Type - For Standard task types, this column displays the assignment from date to the assignment due date.
- Onboarding Task Type - For Onboarding task types, this column displays "Onboarding."
- Status - This column displays the current status of the task. The following are the possible statuses:
- Expired - This status indicates that the task due date has passed.
- In Progress - This status indicates that the task has started but the due date has not yet passed.
- Queued - This status indicates that the task has been saved and is being processed.
- Pending - This status indicates that the task start date has not yet occurred.
- Active - This column indicates whether or not a task is active. The column displays "Yes" for active tasks and "No" for inactive tasks.
- Options - The following are available in the Options drop-down:
- Copy - Click Copy to copy the task. The values in all fields are copied but can be modified.
- Delete - This option is only available if the start date has not yet occurred. Click Delete to edit the task. This opens a confirmation pop-up. Click to delete the task, or click to cancel the delete action.
- Edit - This option is only available if the start date has not yet occurred. Click Edit to edit the task. See Create Form Task - General Information.
- Inactivate - This option displays if the task is active. Click the Inactivate option to inactivate the task. This opens a warning message pop-up that indicates that inactivating the task removes the task for users who are in an In Progress status. Click to inactivate the task, or click to cancel the action. For onboarding tasks, if the task is currently assigned and not yet completed, the task is not inactivated for the assignee. For standard tasks, the task is removed from users who have not yet completed the task. For users who have completed the task, the task remains as a completed task. Inactive tasks are not assigned as part of future assignments that include the task. Tasks that are in a Queued status cannot be inactivated.
- Reactivate - This option only displays if the task is inactive. Click the Activate option to move the task to an In Progress status. This reactivates the associated inactive tasks and re-assigns the tasks to users who were previously assigned the task.
- Snapshot - This option is only available once the form is in an In Progress status and is only visible for administrators who have permission to access the Form Task Snapshot page. Click Snapshot to view the Form Task Snapshot page. See Form Task Snapshot.
Back
Click to return to the Form Management page.