Once an integration is purchased or enabled, the Integrations service enables administrators to configure, enable, and disable their integrations. This greatly simplifies the implementation process by reducing implementation times and enabling administrators to enable and configure the integrations.
To configure an Edge integration, go to . Then from the Integrations page, select the button to the right of the appropriate Edge integration.
When using any of the Edge services, such as Marketplace or Integrations, administrators can navigate between the services by clicking the Menu icon ![]() in the upper-right corner of the page and selecting the desired service:
in the upper-right corner of the page and selecting the desired service:
- Marketplace - See Marketplace - Browse Edge Integrations.
- Integrations - See Integrations - View and Manage My Edge Integrations.
| PERMISSION NAME | PERMISSION DESCRIPTION | CATEGORY |
| Edge Integrations - Manage | Grants access to the Integrations service for Edge Integrate, where the administrator can configure, enable, and disable their third-party integrations used within the Cornerstone system. This permission cannot be constrained. This is an administrator permission. | Edge |
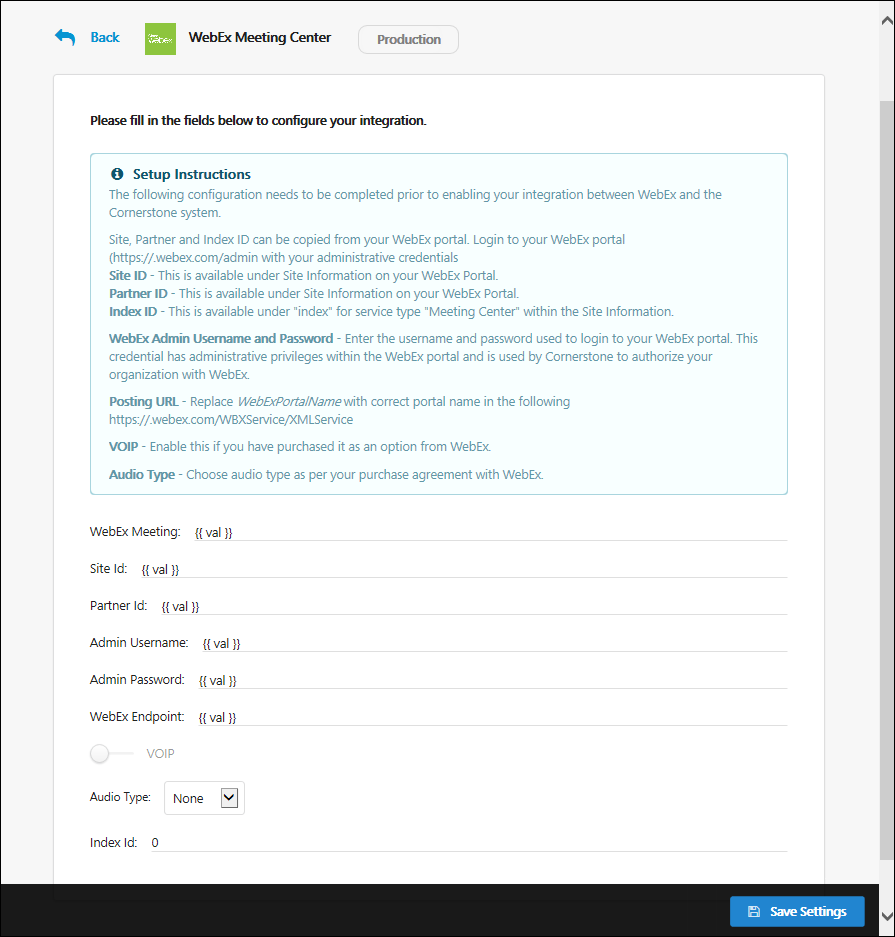
Setup Instructions
The Setup Instruction section contains detailed information regarding how to configure the integration.
To view the setup instructions, click the Setup Instructions link. The section expands to display the instructions.
Configuration Settings
Complete all of the fields to configure the integration. For information on the configuration fields, click the Setup Instructions link.
Important: The configuration settings only apply to the current portal. If the integration is used in multiple portals, then the integration must be configured and enabled in each portal. The current portal type is displayed at the top of the page.
Save Settings
After completing the configuration fields or copying the configuration settings from another environment, click the button at the bottom of the page to save any changes to the settings.
Important: After saving the configuration settings, the integration must be enabled on the Integrations page before the functionality is available in the portal. See Integrations - View and Manage My Edge Integrations.