Cornerstone HR - Load User Data - Step 2 - Upload
Use the Upload tab to upload data using a template, existing data, or to match custom fields to the data in your file.
This functionality only applies to organizations that are using Cornerstone HR.
User and OU Loads Deprecation: Ability to perform organizational unit and user data loads using Data Load Wizard was deprecated with and end-of-life in the May '22 Release for most customers. Edge Import replaces this functionality.
- For more information on organizational unit loads deprecation, See Load OU Data Overview.
- For more information on user loads deprecation, See User Data Load Overview.
- For information about Edge Import, See Edge Import Homepage.
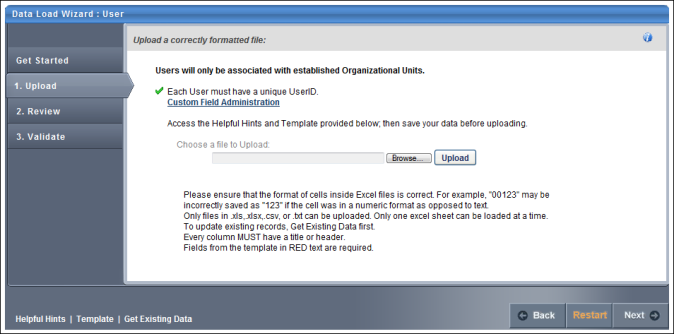
Custom Field Administration Link
If you need to add custom fields to the system in order to match them with a data field in your file, click the Custom Field Administration link. This takes you to Custom Field Administration for the selected data type. You can add the necessary custom fields and then return to the Data Load Wizard. Note: This link is only available to users with access to Custom Field Administration.
Template Link
If you are uploading new data to the system, first select a template by clicking the Template link in the lower-left corner. This ensures the proper data is included and that it is in the proper format. In the template, columns that are red are required. See Load Data - Select Data Load Template.
Get Existing Data Link
If you are updating existing data from the system, first download the existing data by clicking the Get Existing Data link in the lower-left corner. This ensures that you have the latest data as it exists in the system. Note: The existing data you are able to export may be restricted by your permission constraints. See Load Data - Get Existing Data.
Helpful Hints Link
As you are updating and formatting your data, prior to uploading the file click the Helpful Hints link in the lower-left corner. This document provides you with all of the proper formatting information for the data as well as necessary information for uploading a data file. When formatting the file of data, each column must have a title or header, which will be associated with a data field in the system. This document can also be used as a guide to adjust a report you may be generating from your HRIS in order to simplify the load process.
To upload a file of data
- Click the button and locate the file.
- You can only upload the following file types: .xls, .xlsx, .csv, .txt.
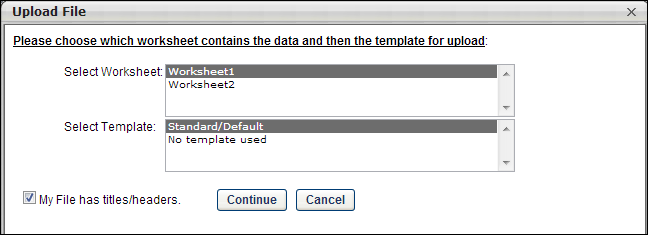
- Once the file is selected, click the button. An Upload File pop-up appears with different options depending on the type of file that is uploaded.
- Excel File (.xls, .xlsx). Select Worksheet (Excel files only) - Only one worksheet can be uploaded at a time, so if the Excel file has multiple worksheets, you must select the worksheet that you are uploading.
- Text, Comma, or Pipe Separated File (.txt, .csv). Select Delimiter (Tab, Comma, or Pipe Separated files only) - Select what delimiter (e.g., tab, comma, pipe) is used to separate records within the file. This enables the system to properly extract the data from the file.
-
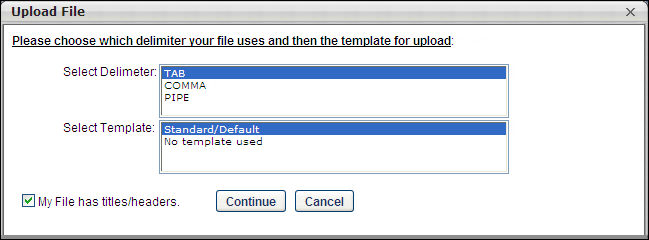
- Select Template - If you used a template to create the file, select the appropriate template. If no template is used, select the "No template used" option. If you have used the Data Load Wizard in the past and saved a template for this file type, that template is available here.
- My File has titles/headers - Data files should have titles or headers for each column of data. If the file you uploaded does not have titles or headers, deselect this option. Deselecting this option modifies the next step in the review process.
- After selecting the appropriate options, click . The file is uploaded and listed on the page.
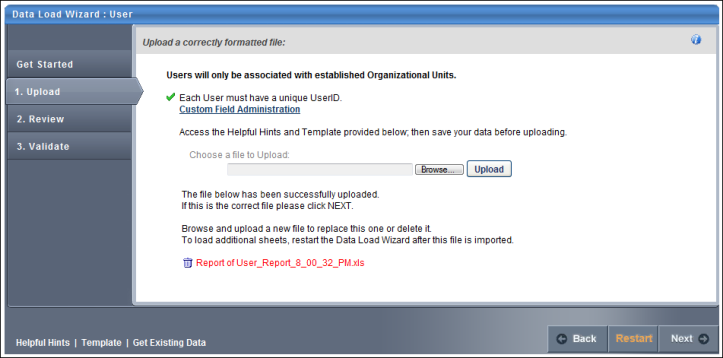
If this is the wrong file or the wrong worksheet within the file, you can delete it by clicking the Remove icon ![]() to the left of the file title and upload another file. Alternatively, you can browse and upload a new file. When the correct file is uploaded, click to proceed to the Review step. See Cornerstone HR - Load User Data - Step 3 - Review .
to the left of the file title and upload another file. Alternatively, you can browse and upload a new file. When the correct file is uploaded, click to proceed to the Review step. See Cornerstone HR - Load User Data - Step 3 - Review .