User and OU Loads Deprecation: Ability to perform organizational unit and user data loads using Data Load Wizard was deprecated with and end-of-life in the May '22 Release for most customers. Edge Import replaces this functionality.
- For more information on organizational unit loads deprecation, See Load OU Data Overview.
- For more information on user loads deprecation, See User Data Load Overview.
- For information about Edge Import, See Edge Import Homepage.
The Review step of the load process allows you to match the uploaded data to the appropriate data elements within the system.
The wizard automatically reads the headers from the uploaded file and matches some of the data fields to the appropriate system fields. You may adjust the data fields as necessary and also move any unmatched fields to the appropriate system field. Once the fields are all matched, you have the option to save the settings as a template for future uploads.
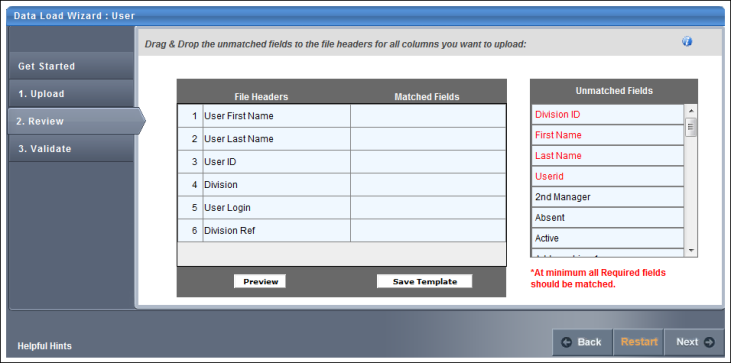
After uploading the file and proceeding to the Review page, the wizard reads the file and displays the column headers from the file. Some data fields may be automatically matched to a file header. If this is the case, the system field is listed in the Matched Fields column immediately to the right of the matching file header. All unmatched system fields are listed on the right in the Unmatched Fields column. Also, fields that the system has mismatched can be moved to the correct file header.
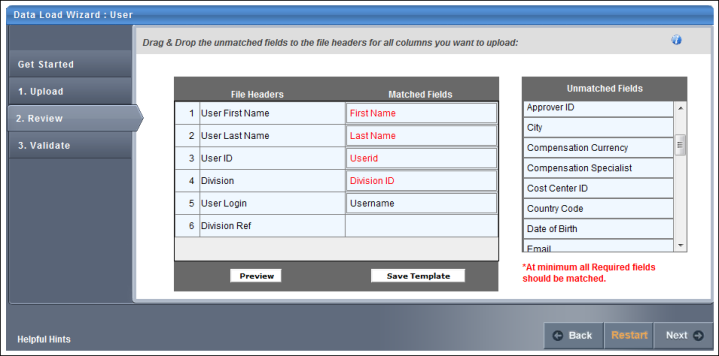
To match the system fields to the file headers, click them from the Unmatched Fields list and drag them to the appropriate row in the Matched Fields column. The items in the Matched Fields column should be directly to the right of the appropriate item in the File Headers column. Once a system field is matched to a file header, it is removed from the Unmatched Fields list.
If the uploaded file does not have titles or headers and the administrator deselected the "My file has titles/headers" option in the Upload step, then each column of data is given a generic header name (e.g., Column 1, Column 2). This enables you to match the data, even though it does not have headers.
All required fields must be paired with one of the file headers in order to proceed. The required system fields are displayed in red, while optional system fields are displayed in black.
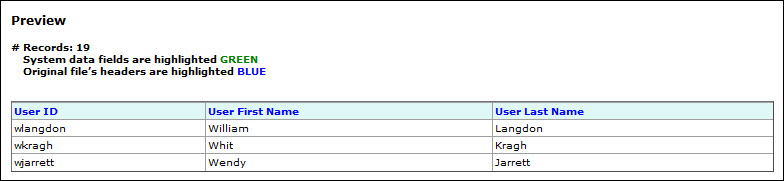
Once all items in the File Headers column are matched to the appropriate system field, click the button to verify that the data is properly matched. This displays a preview of up to 20 rows of the data in a pop-up window. The system data field titles are displayed in green, and the uploaded file headers are displayed in blue. If some data is not properly matched, you can then reorganize the fields prior to proceeding. The preview is also helpful to view a sample of the data within a column if you are unsure with what field the file header should be matched.
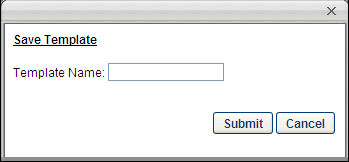
If all fields are properly matched, you may save the pairings as a template. This may be useful if your organization performs multiple data loads of the same file format. In that case, saving the pairings as a template saves you the effort of matching the fields each time. To save the pairings as a template, click the button. A pop-up appears where you can enter a name for the template. The character limit for template names is 150. Changing the name of a previously saved template creates a new template in the system. Note: All fields that are required by the system must be matched in order to save the parings as a template.
After all fields are properly matched, click the button. If all required fields are paired with a file header, some additional options appear prior to moving to the next step. Note: All fields that are required by the system must be matched in order to proceed to the next step.
The Processing Options pop-up appears with additional options. See Load User Data - Step 4 - Processing Options.
After selecting the appropriate options, click to proceed to the Validate step. See Load User Data - Step 5 - Validate.