Program - Create/Edit - Step 3 - Structure
To create a program, go to . Then, click the Create New Program link.
| PERMISSION NAME | PERMISSION DESCRIPTION | CATEGORY |
| Social Learning Cohorts - Edit | Grants ability to access the Manage Cohorts page and to edit existing cohort learning objects. This permission cannot be constrained. This is an administrator permission. | Learning - Administration |
| Social Learning Cohorts - Manage | Grants ability to access the Manage Cohorts page and to view, create, and edit cohort learning objects. This permission cannot be constrained. This is an administrator permission. | Learning - Administration |
| Social Learning Programs - Edit | Grants ability to access the Manage Programs & Cohorts page and edit existing program learning objects. This permission cannot be constrained. This is an administrator permission. | Learning - Administration |
| Social Learning Programs - Manage | Grants ability to access the Manage Programs & Cohorts page and view, create, and edit program learning objects. This permission cannot be constrained. This is an administrator permission. | Learning - Administration |

Update Sequence
Click the Update Sequence icon ![]() to the right of the program title to update any changes made to the sequence value of items added to the program structure. See the Item Sequence section below for more information about configuring the sequence value of an item.
to the right of the program title to update any changes made to the sequence value of items added to the program structure. See the Item Sequence section below for more information about configuring the sequence value of an item.
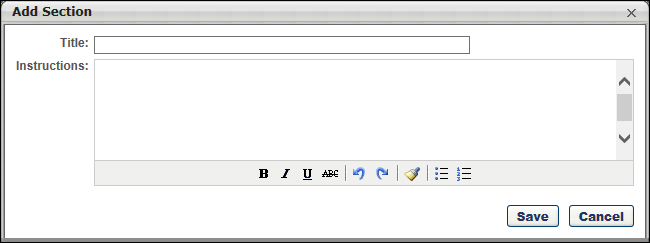
Add Section to Structure
Click the Add Section icon ![]() to add a section to the structure. A section can be used to differentiate or organize groups of learning objects.
to add a section to the structure. A section can be used to differentiate or organize groups of learning objects.
Enter a name and instructions for the section and click to add the section to the structure.
Add Training to Section
Click the Add Training icon ![]() in the section heading to add a training item to the section.
in the section heading to add a training item to the section.
- Use the search criteria to select the desired training. You can search by training type, title, and description. Note: Only postings in Old Connect can be added to a curriculum as a learning object. New Connect postings cannot be added.
- You can also add free form training. To add free form training, enter a training title and click the button. This acts as an external training item in the user's transcript.
After selecting the training, click .
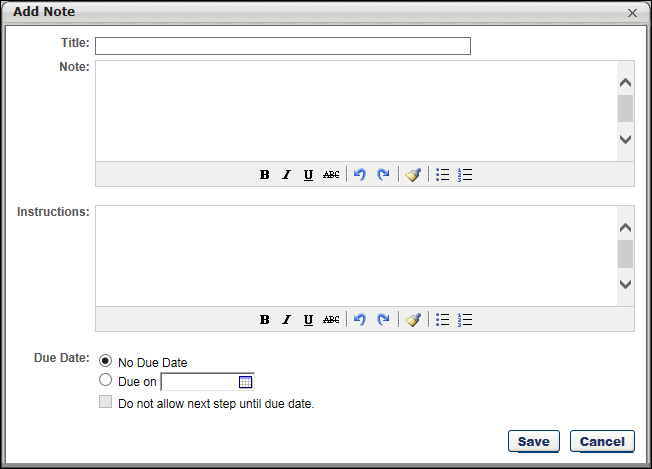
Add Note to Section
Click the Add Note icon ![]() in the section heading to add a note to the section. Then enter a title, note text, instruction text, and a due date for the note.
in the section heading to add a note to the section. Then enter a title, note text, instruction text, and a due date for the note.
Edit Item Details
Click the Edit icon ![]() to edit the title and instructions.
to edit the title and instructions.
For sections, you can also set the number of items that are required for the section (i.e., the number of items the user must complete to complete the section).
For LOs, you can also edit the due date options for the LO. Within programs and cohorts, only fixed due dates for LOs may be applied. Relative due dates are excluded.
- Do not allow next step until due date - When a due date is set for the item, this option is enabled. When this option is selected, a user does not have the option to launch the next item in the program until the due date of the previous item has passed. This functionality should only be used if items within a section each have a unique sequence value. This functionality will not work properly if multiple items have the same sequence value.
Remove Item
Click the Remove icon ![]() to remove the item or section from the structure.
to remove the item or section from the structure.
Item Sequence
Next to each section and LO, there is a sequence value. This sequence value determines the order in which a user must complete the items in the structure. Items with a sequence number of 1 are completed first. In addition, the system always displays items in their sequence order.
- Entering sequential numbers mandates that the sections or LOs be completed in a set order.
- Entering the same number for multiple sections or LOs allows users to complete the items in any order.
Item and Section Display Order
Drag and drop the items and sections to define the display order of the sections, LOs, and other items such as notes.
The system always displays items in their sequence order. Because of this, the display order can only be changed for items that have the same sequence values within a section. For example, if all items in a section have a sequence value of 1, then the display order can be modified because the user can complete them in any sequence. If all items have different sequence values (e.g., 1, 2, 3, 4), then the display order cannot be modified for these items.
Item Options
Next to each item the following options may be available:
- Pre-Approve - Select this option to exempt users from requiring approvals to register for training within this program once the program is approved. If this option is selected, it overrides the approval settings for the course. Note: This option is not available for notes because there is no approval process associated with these items.
- Auto-Register - Select this option to allow the LO to be automatically approved and registered so that the user can launch it immediately without having to activate it. The Pre-Approve option must be selected for this option to be available. Note: If the Auto-Register option is selected for at least one LO within a cohort and a user is assigned to the cohort via a learning assignment, then the user's cohort status is immediately set to In Progress. This is because the user is automatically registered for at least one LO within the cohort.
- Auto-Launch - Selecting this option automatically launches that LO following the completion of the previous item. This feature does not function if two LOs in a section have the same sequence number. The Auto-Register option must be selected for this option to be available. This option is not available for the following LO types:
Next or Cancel
- Click to proceed to the Community step. See Program - Create/Edit - Step 4 - Community.
- Click to discard any unsaved changes and return to the Manage Programs and Cohorts page. See Manage Programs and Cohorts.
- Click to return to the Availability step. See Program - Create/Edit - Step 2 - Availability.
- Click to save any unsaved changes and return to the Manage Programs and Cohorts page. This button is only available when editing a program. See Manage Programs and Cohorts.