Organizational Units (OUs) form the administrative foundation of Cornerstone. You can think of OUs as distinct information containers that capture, store and categorize all client data within the system.
To create an OU, go to . Then, click the Manage Organizational Unit Hierarchy link.
Select the Location OU type from the Select Organizational Unit drop-down list. Then, click the Add Location link.
| PERMISSION NAME | PERMISSION DESCRIPTION | CATEGORY |
General
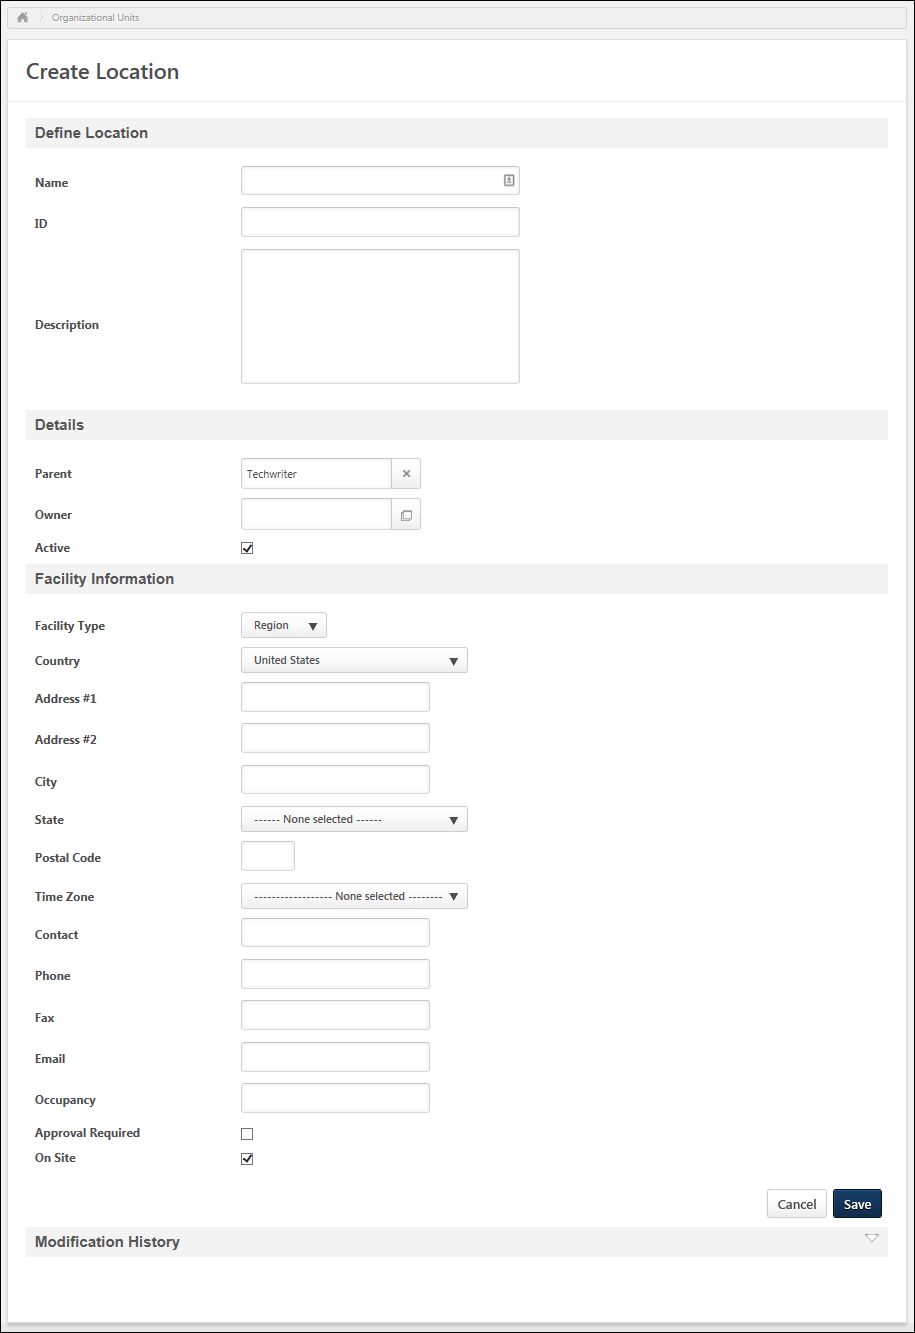
In the General section, enter the following information:
- Name - Enter the name of OU. This is required. If OU Localization is enabled for your portal, click the Translate icon
 to translate the field into other available languages. A translation for the OU's default language is required for this field.
 - ID - Enter an ID for the OU. This is required if the Allow Reconciliation option is selected. See the Helpful Hints - Data Feeds and Reconciliation section for additional information.
- Description - Enter the OU description. If OU Localization is enabled for your portal, click the Translate icon to translate the field into other available languages.
Details
In the Details section, enter the following information:
- Parent - Select the OU parent. This enables administrators to create an OU hierarchy. This is required and it defaults to the corporate OU/root parent for the entire hierarchy.
- Owner - Select the user who serves as the owner of the Location OU. Location Owners are responsible for granting ILT facility requests for this location. When a facility is requested, the Facility Request email is sent to the Location Owner, if the email is enabled.
- Active - Select this option to make the OU active.
Facility Information
Generally, facility information is used to set up locations which are rooms or buildings to be used for instructor led training (ILT). In the Facility Information section, enter the following information:
- Facility Type - Select the type from the drop-down list.
- Country - From the drop-down, select the appropriate country for the location. The default value for this field is United States.
- Address #1 - Enter the first line of the facility's address. The address for a location is used to show a map for that location via Google when a user clicks the View Map link for that location on the ILT Training Details page.
- Address #2 - Enter the second line of the facility's address.
- City - Enter the city in which the facility is located.
- State - From the drop-down menu, select the state in which the facility is located.
- Postal Code - Enter the postal code that corresponds with the facility's location.
- Time Zone - From the drop-down menu, select the time zone that corresponds with the facility's location. This is required. The time zone entered for a location will automatically populate the time zone for all ILT session start dates that are scheduled at that location. The time zone that is applied to a user is dependent on a set of rules. See Time Zone Application Rules.
- Contact - Enter the name of the user who serves as the contact for the facility. If an email is provided in the Email field, the facility contact can be notified when the facility is selected for a session. If the contact is an active user in the system and if the location is configured to require approvals during the session creation process, then an email can be sent to the contact user for approvals.
- Phone - Enter the contact person's phone number.
- Fax - Enter the contact person's fax number.
- Email - Enter the contact person's email address.
- Occupancy - Enter the enter maximum number of users who can safely occupy the room during a training session.
- Approval Required - Select this option if approval is required from the location owner for sessions scheduled at this location.
- On Site - Select this option if this location is on-site. This is a label to help distinguish which facilities are on or off-site based on the company's definition of an on or off-site course.
Reason for Change
This option is only available for organizations using Cornerstone HR or Enhanced Auditing.
When modifying a standard field for an OU, the Reason for Change field enables administrators to specify why the OU is being modified. This option is only available when editing an OU, and this field is required when modifying a standard field. The character limit for this field is 250.
When an OU is modified, the Reason for Change value is stored in the Modification History section.
Save/Cancel
Click to save the OU.
Click to discard any unsaved changes.
Modification History
Modifications to the following standard fields are tracked in the Modification History:
- Name
- ID
- Description
- Parent - This displays the Parent OU name and ID
- Owner - This displays the OU Owner's name and ID
- Allow Reconciliation
For organizations that are not using Cornerstone HR or Enhanced Auditing, the Modification History section displays the following details for each modification:
- Modifier
- Date Changed
For organizations that are using Cornerstone HR or Enhanced Auditing, the Modification History section also tracks changes to custom OU fields and displays the following details for each modification. The Modification History table respects the Availability settings for custom fields, so administrators can only view modifications to custom OU fields if they are within the field's availability.
- Date Changed
- Field Changed
- Field Type
- Changed From
- Changed To
- Changed By
- Reason For Change - If an OU is created or modified via the Data Load Wizard, then the Reason for Change is set to Data Load Feed for all related entries.
Helpful Hints - Data Feeds and Reconciliation
- If the Allow Reconciliation option is selected for an OU, then the OU will be automatically deactivated in the system if this OU is not present in the data feed.
- OU IDs are required for OUs which have the Allow Reconciliation option selected and are being updated by the data feed.
Helpful Hints - Inactive OUs
- If an OU is deactivated, its subordinate OUs will remain active. Since the parent OU is inactive, the system will not readily display its child OUs. In order to see active child OUs to an inactive parent, search for the OU by name or ID.
- If an OU is inactive, the users within that OU will remain active. If an OU is inactive and contains active users, search for the users by name OR use another OU type that is currently active.
- Inactive OUs cannot be used as reporting filters or to set availability.