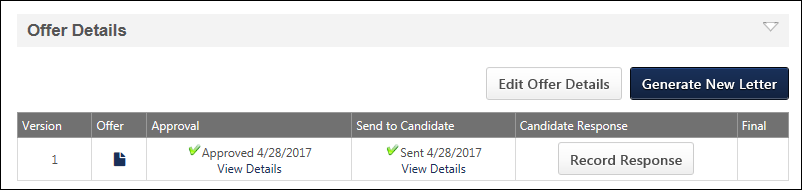
The Candidate Response column on the offer letter status type panel on the Applicant Profile > Statuses tab enables you to record the candidate's response to the offer.
The options in the Candidate Response column only appear after the offer is successfully sent to the candidate and are only available if the Email or Paper Mail option is selected as a send method. If the offer is sent to the candidate's My Profile page and the candidate responds via their profile, then the Candidate Response column is automatically populated.
Note: If the Paper Mail send option is selected when sending the offer to the candidate, the system assumes the offer is successfully sent.
Record Response
The button opens the Record Candidate Response pop-up, which enables you to enter the candidate's response to the offer.
Note: The button only appears if a response is not received through the candidate's My Profile page.
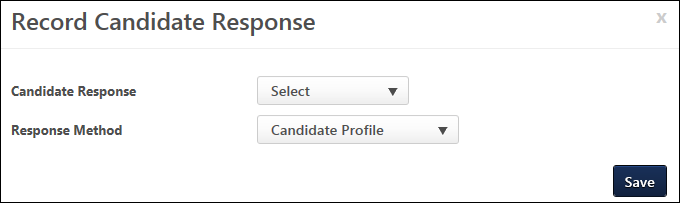
Enter the following information in the pop-up:
- Candidate Response - Select "Accepted" or "Declined" from the drop-down. This is a required field.
- Response Method - Select the response method from the drop-down. This is a required field. The options available are configured by the administrator in Offer Letter Preferences.
- Upload Final - This option only appears if "Accepted" is selected in the Candidate Response field. The Upload Final option enables you to upload the final offer letter to the Record Candidate Response pop-up. The file appears below the field and can be viewed by clicking the file name. This is a required field. You can delete the file from the pop-up by clicking the Trash Can icon to the right of the file name.
- Decline Reason - This option only appears if "Decline" is selected in the Candidate Response field. Select one or more decline reasons from the drop-down. The options available are configured by the administrator in Offer Letter Preferences. This is a required field.
- Notes - This option only appears after "Accepted" or "Declined" is selected in the Candidate Response field. There is no character limit. The field does not accept HTML. This is not a required field.
Once all fields are completed, click to save the candidate response details. If the candidate accepted the offer, then the attachment is added to the Additional Attachments section of the Send Offer pop-up. See Offer Letter Workflow - Send to Candidate.
In addition, saving the response details enables the Final column to appear on the Offer Management table. For accepted offers, the column displays a linked icon to view the attachment.
View Details
The View Details link displays in the Candidate Response column after the candidate's response to the offer is saved on the Record Candidate Response pop-up. In addition, the column displays the candidate's response, as well as the date on which the response details were most recently saved.
Clicking the link opens the Record Candidate Response pop-up as read-only. To edit the response details, click the button on the pop-up. This enables the fields for editing. Click once all changes are made.
Note: Each time edits are saved, the History tab on the Applicant Profile page records a new Offer Accepted/Denied history event. If a new document is added, then the document is included with the event.