When creating a vILT session for Webex Training Center vendors, on the Details tab administrators have the ability to reserve computers in a hands-on lab. This option is only available if Hands-on Lab is also enabled. Note: This functionality requires that your Webex is integrated with the system ILT.
Design Note: An updated interface is available for this page, which can be enabled by administrators in Feature Activation Preferences. With the new design, the functionality of the page is unchanged.
To enable Hands on Lab, contact Global Customer Support. This can also be enabled during implementation.
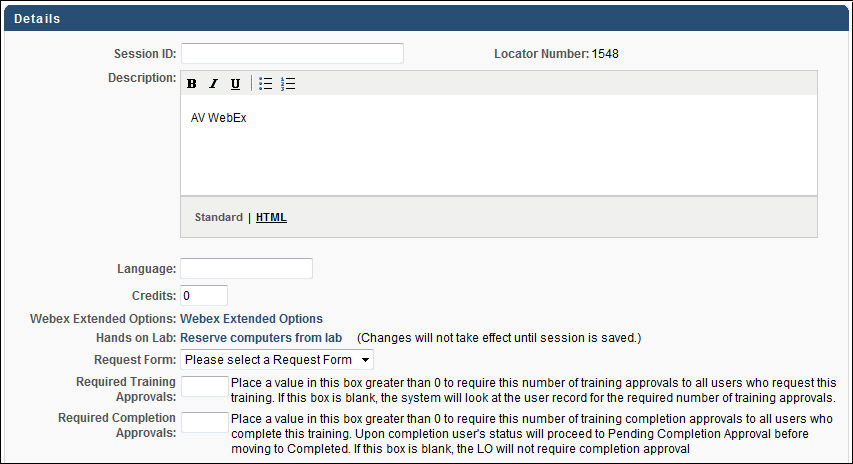
To reserve computers from a hands-on lab when creating a session, on the Details tab click the Reserve computers from lab link. This opens the Hands on Lab: Reserve Computers pop-up.
- This option is only available when creating sessions for Webex Training Centers.
- Hands on Lab must be enabled in ILT preferences and a Webex hands-on lab must be set up outside of the system prior to creating the session.
- From the drop-down list, select the appropriate Hands-on Lab in which you are reserving computers. Hands-on labs must be set up in Webex prior to creating the session. All previously set up hands-on labs are included in the drop-down list. If no labs have been set up, no labs appear in this list.
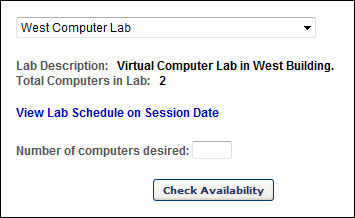
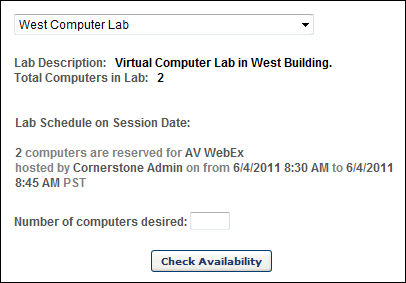
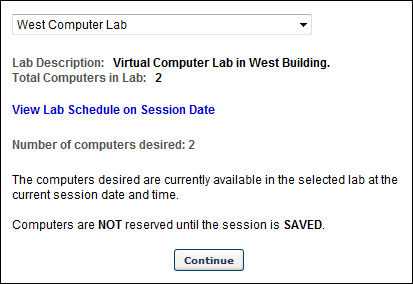
- Once a lab is selected, a description of the lab is displayed along with the total number of computers in the lab. Note: This information is specified within Webex. To view the lab schedule for the selected lab on the session date, click the View Lab Schedule on Session Date link. This displays the number of computers that are already reserved for the lab (if any) as well as the instructor that reserved them and the time at which they are reserved for the date specified in the Parts schedule.
- In the Number of computers desired field, enter the number of computers you are reserving and click the button.
- If the requested quantity of computers is available, click to continue creating the session. Note: The computers are not yet reserved. The computers are reserved once session is saved.
- If the requested quantity of computers is not available, an error message displays. You may then edit the number of computers desired and check for availability again, or you may select another lab from the drop-down list and check for availability at that lab.
- Once you successfully select a lab with a sufficient number of available computers, continue creating the session. The computers are not reserved until the session is saved. When you save the session, the system requests the computers from Webex. If the computers are still available, the session is saved. If the computers are no longer available, the administrator is able to select another lab or modify the number of computers desired and attempt to save the session once more.
- Once the session is saved and the computers are reserved, when viewing the Details section of the session, the number of reserved computers is displayed along with the lab name and the time during which they are reserved.
- When editing the session later, there are options to edit and cancel the Hands on Lab reservation.