From the Storage tab, administrators define the Universal Profile > Snapshot > Documents storage destination for the completed form. Administrators can also modify the Title field from this page.
To create a form, go to . Then, from the Manage Forms page, select the button.
| PERMISSION NAME | PERMISSION DESCRIPTION | CATEGORY |
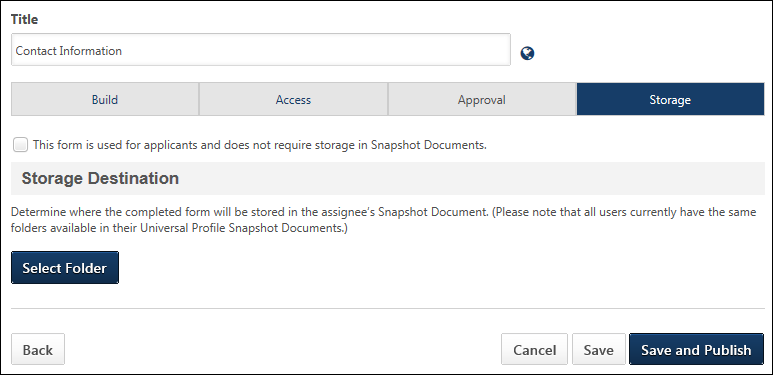
This Form Is Used for Applicants
Storage Destination
The Storage Destination section allows administrators to select the folder in Universal Profile where the form will be automatically stored when submitted. This section is not required to be completed if the form is configured as an applicant form.
To define the storage destination:
- Click the button. This opens the Select Folder pop-up. All folders that are available display in the Folder Name table. The Folder Name filter can be used to filter the list of folders. Note: The folders that are available to select are defined by the administrator in Documents Preferences.
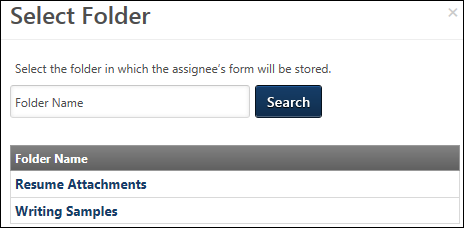
- Click the desired folder from the Folder Name table. This closes the pop-up and populates the Storage Destination section with the folder name.
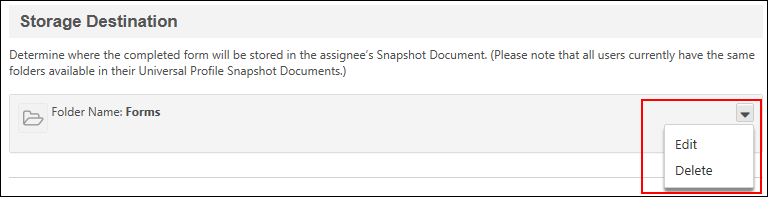
Selected Folder Options
Once the folder is selected, options are available in the options drop-down to change or delete the folder selection.
- Edit - To change the folder selection after the form is published, select the Edit option from the options drop-down. This opens the Select Folder pop-up from which to select a different folder.
- Delete - To delete the selected folder as the storage destination, select the Delete option from the options drop-down. This re-enables the button.
Cancel/Save/Save and Publish
Click to save the form and make it available for use in tasks. This button only displays on the Storage tab. Clicking opens a confirmation pop-up. Click to publish the form, or click to cancel the publish action. Once the form is published, only certain fields can be modified.
Click to save the form without publishing and return to the Manage Forms page. The form settings are saved, and the administrator can return to the form to add or change settings, and then publish the form.
Click to cancel creating the form.
View Previous Tab
To view the Build or Access tab, click the tab name to view the contents.