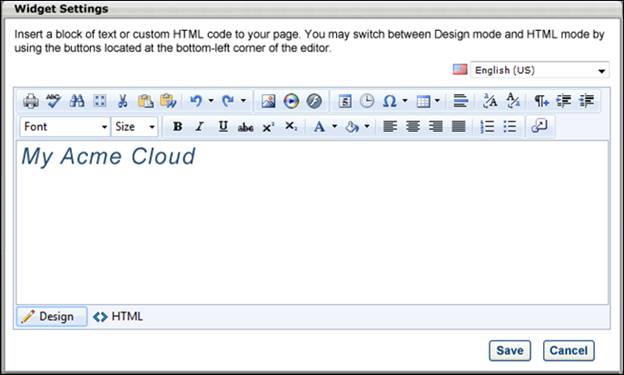
When you add an HTML Widget to the Layout frame, the Widget Settings pop-up appears with an HTML editor. In the editor, there are two editing modes: Design and HTML. When in Design mode, you can use the standard editing tools to format your text, similar to your word processor application. When in HTML mode, the standard editing tools are disabled and you are able to view and modify the HTML code that is used to design the certificate. To switch between modes, click the appropriate tab in the lower-left corner of the editor.
The system only accepts certain customizable HTML elements in the WYSIWYG Editor. Elements that are not acceptable display as text. See Safe Listed Customizable Elements.
Note: Because of the security risks associated with JavaScript, it is disabled in this editor by default. To embed JavaScript within this widget, contact Global Customer Support. Global Customer Support does not troubleshoot Java or HTML issues.
When adding an image to the widget, the image must be uploaded to the Image Manager in order to appear properly in the certificate. However, there are currently no constraints available, so any image that is loaded can be viewed by any user with permission to manage custom certificates. To open the Image Manager, click the Image Manager icon  . This opens the Image Manager. Click the Upload button to select the image to upload. The maximum file size is 1,024KB, and the accepted file types are .gif, .png, .jpg, .bmp. Warning: Files uploaded through the Image or Document Manager are stored on a publicly accessible server.
All custom fields must be referenced in all capital letters. The field name must be placed within brackets ("{ }"). The following custom fields are available:
As previously stated, in Design mode, the standard editing tools are available to format the text. The final option in the bottom right corner of the editing toolbar is the Import Field option  . Click this option to view and import the available custom fields.
For portals with multiple languages enabled, a language drop-down is available in the upper-right corner. Select the appropriate language to translate the widget text into other available languages. If no translation is provided for a language, the widget title is blank when viewed in that language.
Click to save the widget settings and add the widget to the Layout frame. If a script is included in the widget, the script is not applied in the Layout view. It is only run when the page is implemented or previewed. The widget can be added more than once.