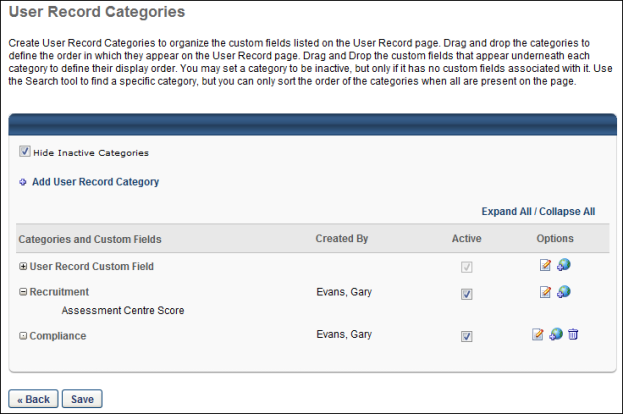
The User Record Categories page enables administrators to create and edit categories in which to organize custom fields. Administrators can also delete and translate existing categories, as well as manage the order in which categories display on the User Record page.
To access the User Record Categories page, go to . Then, click User Record from the left navigation panel. In the User Record and Self Registration Custom Fields table, click the Manage Categories and Display Order link.
Administrators can change the category with which a field is associated. See User Record Custom Field - Add/Edit.
| PERMISSION NAME | PERMISSION DESCRIPTION | CATEGORY |
The following fields display on the User Record Categories page:
| Feature | Description |
|---|---|
| Hide Inactive Categories | When checked, only active categories display on the User Record Categories page. Unchecking the box displays both active and inactive categories. The box is checked by default. |
| Add User Record Category | Allows you to add a new category. |
| Categories and Custom Fields | Lists the custom field categories and the custom fields within the categories. Custom fields are indented under the category name. |
| User Record Custom Field | The default user record category. All fields are defined under this category unless configured to be defined under a different category. If no additional categories are configured on the Manage Categories and Display Order page, all fields display under the default category on the User Record page. |
| Created By | Displays the name of the user who created the category by last name, first name. A Created By name does not display for the User Record Custom Field category, even if the category name is changed. |
| Active | Indicates the category's active status. The box is checked by default when a new category is added. Unchecking the box inactivates the category, hiding it on the User Record and Self Registration Custom Fields page. If you inactivate a category that contains at least one custom field, the fields contained within the category will then be associated with the User Record Custom Field default category. |
| Options |
The following actions are available under the Options column:
|
| Save | Saves any changes made to the category or custom field order, the Active column, or the deletion of a category. Upon saving, the user is returned to the User Record and Self Registration Custom Fields page. If the user does not click , any changes made to these areas will not be saved. |
| Back | Returns the user to the User Record and Self Registration Custom Fields page. |
Add New Category
To add a category:
- Click the Add User Record Category link.
- The Add User Record Category pop-up opens. Enter the category name in the Name field (character limit of 50).
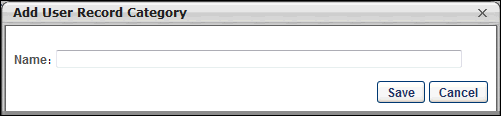
- Click to save the category.
- Click to cancel the action.
Edit Category
- Click the Edit icon.
- The Edit User Record Category pop-up opens, displaying the current name. Edit the name in the Name field (character limit of 50).
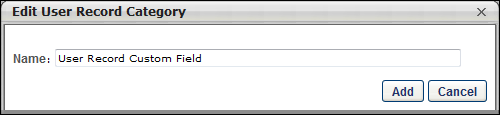
- Click to save the changes.
- Click to cancel the edit action.
Reorder Categories
Categories can be placed in any order. To reorder a category:
- Hover over the row. The mouse changes to a compass view.
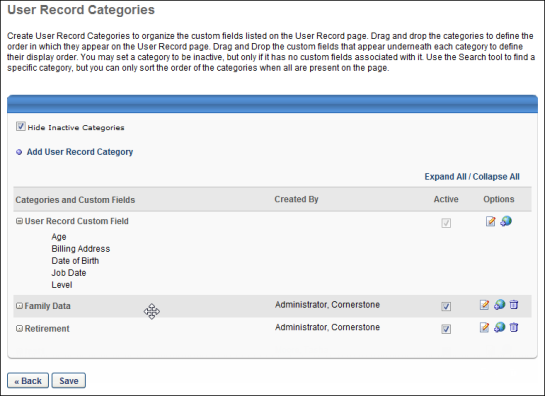
- Drag and drop the row to the desired position. Note: All fields within a category move with it.
Reorder Fields within a Category
Custom fields within a category can be placed in any order. To reorder custom fields within a category:
- Hover over the name of the custom field. The mouse changes to a compass view.
- Drag and drop the field to the desired position. Note: A field can only be reordered within its respective category. A field cannot be moved into a different category by dragging and dropping.