The administrator can define custom fields that can be added to a user's development plan. Administrators can also determine a type for each custom field, i.e. numeric, drop-down, radio button, text. This functionality allows the administrator to create more specific development plan templates for OUs by including certain custom fields. The user also has the flexibility to use the custom fields created and included by the administrator when the user creates their own development plan.
Custom fields must be created in Custom Field Administration before they can be added to a development plan or development plan template.
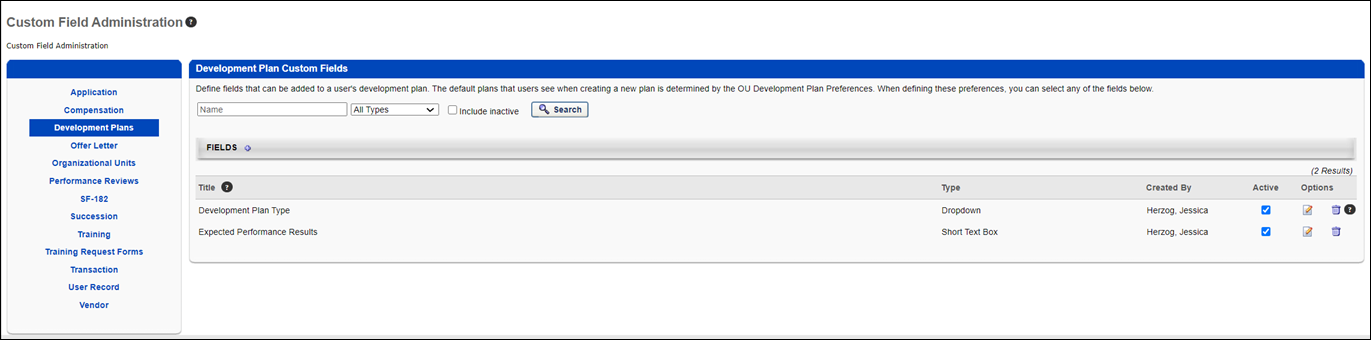
To manage custom fields, go to . Then select the Development Plans link on the left.
| PERMISSION NAME | PERMISSION DESCRIPTION | CATEGORY |
| Development Plan Custom Fields - Manage | Grants access to create and edit custom fields used in development plans and templates. This is an administrator permission. | Performance - Administration |
Note: If you have the permission to manage development plan templates, you will automatically have the permission to manage development plan custom fields.
Add Custom Fields
Note: When adding development plan custom fields to development plans, the custom fields are displayed in the order in which they are created in Custom Field Administration.
To add a new custom field:
- Select the Add Field icon
 . The Define Field page opens.
 - Complete the following fields:
- Name - Enter a name for the custom field that will be visible to end user. The character limit for this field is 50. If multiple languages are enabled for your portal, select the Translate icon to translate the field into other available languages.
- Type - Select the appropriate custom field type from the drop-down menu. For development plans, Date, Drop-down, Numeric, Radio Button, Scrolling Text Box, and Short Text Box type fields can be created. See Custom Field Admin - Custom Field Type Options..
- Active - Select this option to make the field active.
- Availability - Define which users have the ability to view and access the custom field. The administrator must set the availability of the field if the field is to appear for other administrators and end users in the application. If availability is not set, then the field will not appear in administrator and end user areas of the application. See Setting Availability Overview.
- Click .
Search for a Field
The following filters are available to search for an existing custom field:
- Name - Enter search terms in the filter. The field displays results for a partial or exact match to the search terms.
- Field Type - Select a field type from the drop-down.
- Include Inactive - Check the box to include inactive custom fields in the search.
Once all filters are defined, click . This refreshes the fields table with the filtered results.
Add Custom Field
To create a custom field, click the Add Field ![]() icon. This opens the Define field page. From here, you can select the type of field you want to create and define the options for the field if applicable. Information about how to create the specific types of custom fields (i.e., branched dropdown, checkbox, etc.) is available on the "Custom Field Type Options" page in Online Help. See Custom Field Admin - Custom Field Type Options.
icon. This opens the Define field page. From here, you can select the type of field you want to create and define the options for the field if applicable. Information about how to create the specific types of custom fields (i.e., branched dropdown, checkbox, etc.) is available on the "Custom Field Type Options" page in Online Help. See Custom Field Admin - Custom Field Type Options.
Fields Table
This table displays all existing custom fields for the field area. The table is sorted in alphabetical order by name. The Title and Created By columns are sortable. The following information displays in the table:
- Title - This column displays the title of the custom field.
- Type - This column displays the field type, such as radio button or short text box.
- Created By - This column displays the name of the administrator who created the field by last name, first name.
- Active - This column defines the active status of the field. To activate the field, check the box in the Active column. To inactivate the field, uncheck the box.
- Options - The following options are available in the Options column:
- Edit - Click the Edit icon
 to edit the field. The field type cannot be modified when editing the field. See Custom Field Admin - Custom Field Type Options.
 - Delete - Click the Trash Can icon
 to delete the field. This option is only available if the custom field has not been used. If a field has been used, then it cannot be deleted and the Trash Can icon does not display. There is no audit history available to view custom fields that were deleted. Please reach out to Global Customer Support if additional details are needed for a deleted custom field.
- Edit - Click the Edit icon
When active, the custom field is available to use by administrators who meet the field's availability requirements. Inactive custom fields are not available to use.