Within My Account, the user's photo displays to the left of their name and organizational information. If the user has not uploaded a photo, a ghost image displays in the corporate color.
Users with the appropriate permissions are able to upload, edit, or remove their photo from the Preferences tab within My Account.
To access My Account:
- Select the Settings icon
 in the screen's upper-right corner and select the My Account link.
 - Select the Navigation icon in the screen's upper-right corner and select the My Account link.
Select the Preferences tab on the left.
The tab name may appear differently in your portal, depending on the display name configured by the administrator in My Account Preferences.
Note: Users must have permission to manage My Account in order to have access to the Preferences tab.
| PERMISSION NAME | PERMISSION DESCRIPTION | CATEGORY |
| My Account - Manage | Allow users to view and modify their preferences on the My Account screen. The user must have this permission to access My Account. This permission cannot be constrained. This is an end user permission. | Core |
| User Upload Photo | Enables users to upload their photo to their user record, via the My Account screen. This is an end user permission. | Core |
Change Photo
To manage the photo:
- Hover over the upper-right corner of the photo to enable the options drop-down to appear. Important: You must have permission to upload a photo in order to manage your photo in My Account. If you need to update your photo and you do not have the necessary permission, please contact your manager or system administrator.
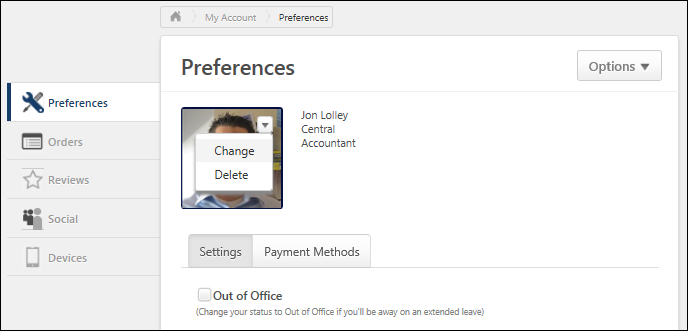
- Select the Change link. This opens the Upload Photo pop-up.
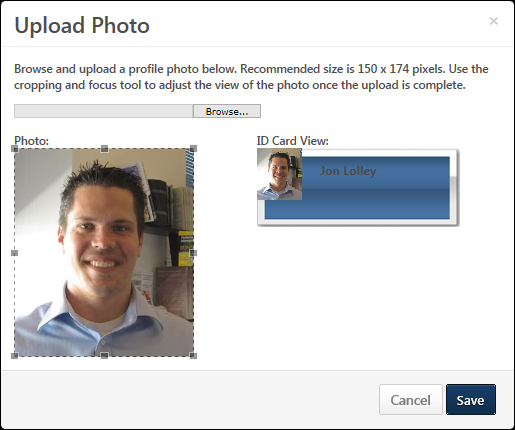
- Select the button to select the photo. Once the file is selected, an button displays to the right of the button. The acceptable file types are .png, .gif, .jpg, or .bmp.
- Select . This uploads the photo.
- Select . This updates the photo image on the Preferences tab.
Delete Photo
To delete your photo:
- Hover over the upper-right corner of the photo to enable the options drop-down to appear.
- Select the Delete link. This deletes the photo. Note: The Delete option only displays once a photo has been uploaded.