To view the Connect profile:
- Select Connect > Connect and click the My Profile link on the upper-left side.
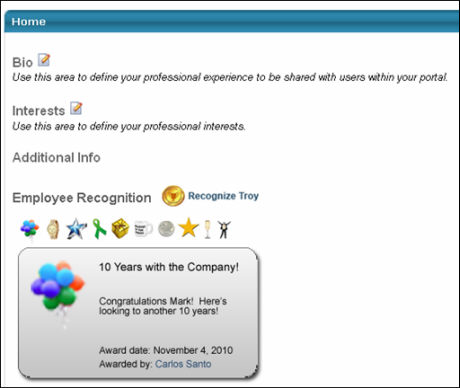
- Bio -
- Edit icon - click to enter text. If you have entered text previously, text will be pre-populated in box. Character limit of 3500 applies to this text box.
- Spell Check
 - click to spell check text
 - Save - click to save changes
- Interests -
- Edit icon - click to enter text. If you have entered text previously, text will be pre-populated in box. Character limit of 3500 applies to this text box. Each interest is a link to search results for that tag.
- Spell Check - click to spell check text
- Save - click to save changes
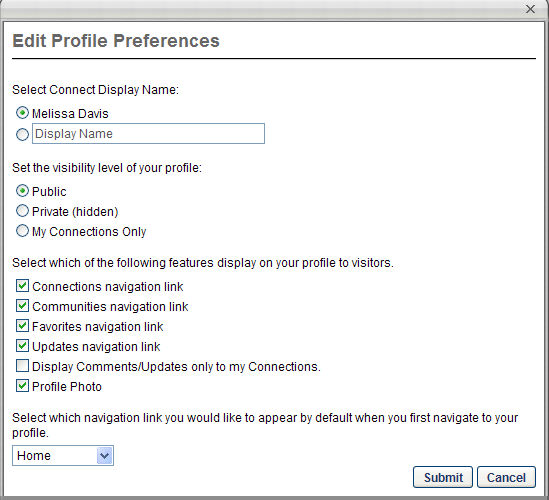
- Edit My Preferences - click to select what other user's are able to view on your profile.
- Connect Display Name - select to display system known name, or define a new connect display name.
- Visibility Level - select the visibility level of your profile (Public, Private (hidden) or My Connections Only).
- Features display on your profile for visitors - select what you want displayed on your profile (Connections navigation link, Communities navigation link, Favorites navigation link, Comments navigation link, Display Comments/Updates to My Connections Only, Profile Photo, Phone or Email)
- Default Navigation link - choose which navigation link should be the default from the drop-down list
- Click Submit button to save changes
Left Panel - contains link to navigate to Connect main page, Search functionality and individual links to other sections in Connect. Numbers in red circles called Alerts![]() visually display the number of new pending connections, new questions, etc in each section.
visually display the number of new pending connections, new questions, etc in each section.
- Back to Connect link - click to navigate to Connect Main page
- Search Connect - enter text and use drop-down list to search Connect
- ViewPosting - click title or name of posting to view or open posting
- Apply As Training button
 - click to add posting to your transcript
 - Ratings (stars)
 - click on star to rate posting. You can also re-rate a posting. This does not increase the number of ratings, it replaces your original rating.
 - Thumbs Up/Thumbs Down
 - click on icons to vote for suggestion
 - Comment - enter comments for posting
- Updates - click to post a comment (updates) or comment on others' comments. Comments/updates can be deleted at any time by clicking on the Delete icon. If you delete an update, child comments by others are deleted also.
- Enter comments in the Any updates? comment box (max of 450 characters)
- Click Post button
- Connections - click to view all pending connections and existing connections.
- Name/Photo - click to view user's Connect Profile
- Approve Connection Request icon
 - click to approve connection
 - Deny Connection Request icon
 - click to deny the connection
 - Follow Updates - click to follow user's updates in Live Feed
- Remove Connection - click to delete connection
- Communities - click to navigate to community's main page
- Tag Cloud - display the tags associated with the postings of the topics tied to the Community. When you select a tag, you will navigate to the Community's posting page. That page is pre-filtered returning only the postings that have the selected tag.
- Favorites - click to view favorites by sub tabs in the following order: Topics, Authors, and Postings
- Postings - click to view postings that you have authored or create a new posting
- Create New link - click to create a new posting (see below)
- RSS Feeds - this will navigate to the feed page where you can manage feed items and subscriptions
- Feed Items tab
- Search Input box
 - can search the last most recent 1000 feed updates
 - Feed Title - click on posting title to link to posting. You can also select the name of the author of the posting (If the author allows users to access his/her profile, and navigate to the author's profile page.
- Feed URL Button - select to navigate to the Feed preview. Copy the URL in the Feed URL to paste into an outside feed reader.
- Manage Subscriptions tab
- Select the Title, author's name, or topic name and navigate to its corresponding page.
- Cancel icon
 - select to cancel individual subscriptions. The item No longer appears on the RSS Feed page in a user's profile, in either the Fee Item tab or the Manage Subscription tab. Depending on the rules of the outside feed reader, either all postings associated with the cancelled description will disappear, or no new postings will display, or selecting Cancel will not cancel the feed for the outside feed reader.
 - Expert Q & A - this link will display if you are designated as a Topic Expert.
- Click to view questions that have been asked. Alerts will appear, if a question is currently unanswered. The Alert will remain until there are no unanswered questions for topics the user is an expert for. Alert count can be reduced or removed if the user (expert) answers a question, or another expert for the same topic answers the question.
- Respond/Answer - click to enter a response to a question. Respond displays if there are no answers yet. Answer displays if an answer has been added and you can add an additional response. Click Post button to post answer.
- View - click to change view to Only Answered Questions or All Questions
Create a new Posting
- Click Create New link
- Choose Posting Type
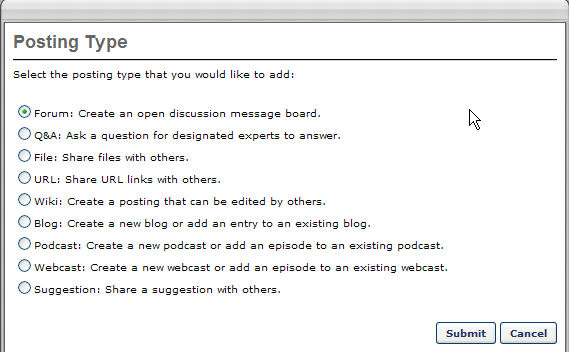
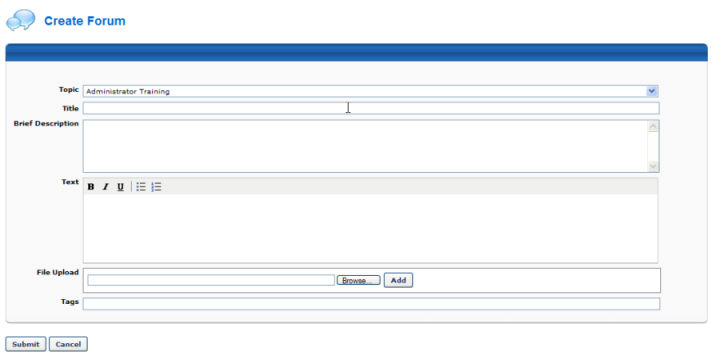
Forum - an open discussion message board
- Topic - select topic from list
- Title - enter title
- Brief Description (optional)
- Text - enter text
- File Upload - add an Attachment (Optional) by selecting the Browse button to find your attachment and then click the Add button
- Tags - enter tags that are used when searching
- Click Submit button
Q&A
- Topic - select topic from list
- Title - enter title
- Brief Description (optional)
- Text - enter text
- File Upload - add an Attachment (Optional) by selecting the Browse button to find your attachment and then click the Add button
- Tags - enter tags that are used when searching
- Click Submit button

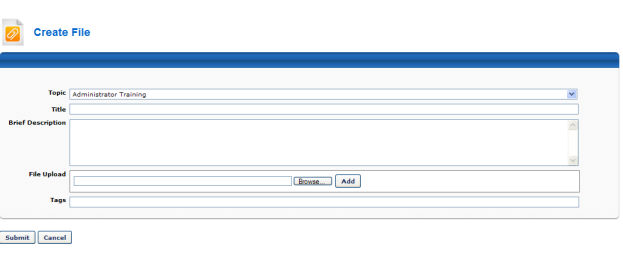
File
- Topic - select topic from list
- Title - enter title
- Brief Description (optional)
- File Upload - add an Attachment by selecting the Browse button to find your attachment and then click the Add button. Multiple files may be uploaded.
- Tags - enter tags that are used when searching
- Click Submit button
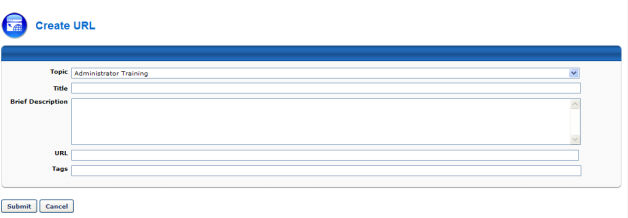
URL
- Topic - select topic from list
- Title - enter title of forum
- Brief Description (optional)
- URL - - enter URL address
- Tags - enter tags that are used when searching
- Click Submit button
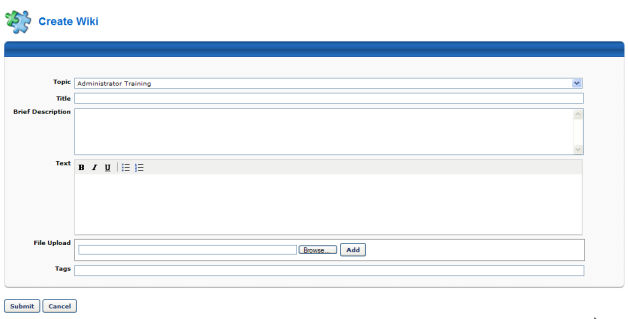
Wiki
- Topic - select topic from list
- Title - enter title
- Brief Description (optional)
- Text - enter text
- File Upload - add an Attachment (Optional) by selecting the Browse button to find your attachment and then click the Add button
- Tags - enter tags that are used when searching
- Click Submit button
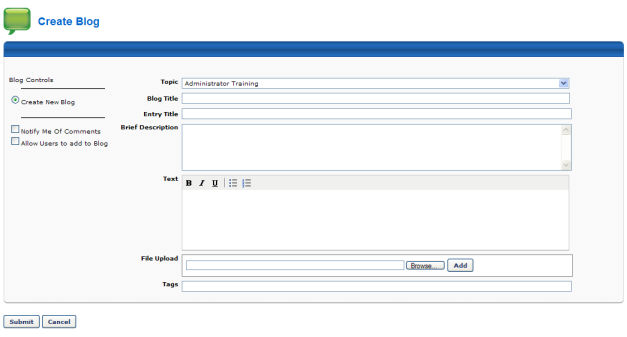
Blog
- Blog Controls:
- Create New blog - default selection
- Notify Me of Comments - check to be notified of comments
- Allow users to add to Blog - check to allow users to add to blog
- Add Blog:
- Topic - select topic from list
- Blog Title - enter title
- Entry Title - enter entry title
- Brief Description (optional)
- Text - enter text (required field)
- File Upload - add an Attachment (Optional) by selecting the Browse button to find your attachment and then click the Upload button
- Tags - enter tags that are used when searching
- Click Submit
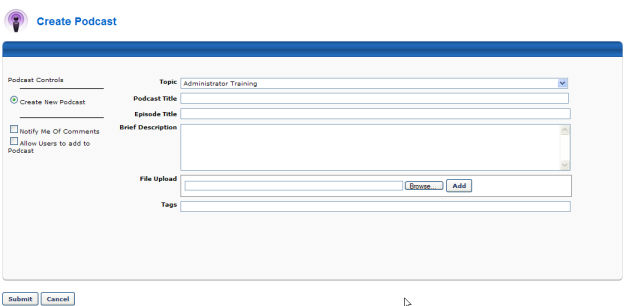
Podcast
- Podcast Controls:
- Create New Podcast - default selection
- Notify Me Of Comments - check to be notified of comments
- Allow users to add to Podcast - check to allow users to add to podcast
- Add Podcast:
- Topic - select topic from list
- Podcast Title - enter title
- Episode Title - enter entry title
- Brief Description (optional)
- File Upload - select Browse button to find your file upload and then click the Add button
- Tags - enter tags that are used when searching
- Click Submit
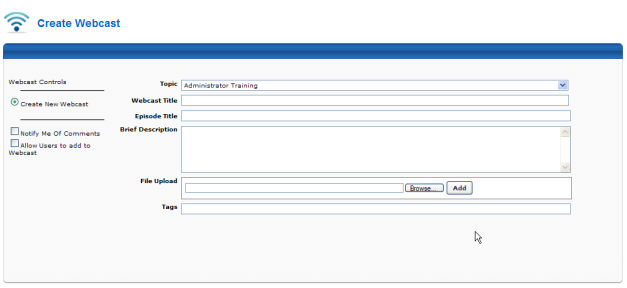
Webcast
- Webcast Controls:
- Create New Webcast - default selection
- Notify Me of Comments - check to be notified of comments
- Allow Users to add to Webcast - check to allow users to add to webcast
- Add Webcast:
- Topic - select topic from list
- Webcast Title - enter title
- Episode Title - enter entry title
- Brief Description (optional)
- File Upload - select Browse button to find your file and then click the Add button
- Tags - enter tags that are used when searching
- Click Submit
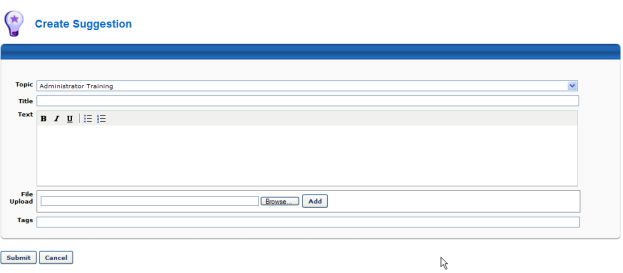
Suggest
- Topic - select topic from list
- Title - enter title
- Text
- File Upload - select Browse button to find your file and then click the Add button
- Tags - enter tags that are used when searching
- Click Submit