Users can create a new check-in meeting, add participants, select a meeting template, add and modify topics, and schedule meeting dates.
To create a new Check-In, go to .
- If this is the first time creating a check-in meeting, click the button on the main page.
- If this is not the first time creating a check-in meeting, click the button on the main page.
Note: Your administrator can change the name of these buttons, so your button names may be different.
| PERMISSION NAME | PERMISSION DESCRIPTION | CATEGORY |
Create a New Check-In Meeting
- On the Create a new check-in page, search for and select the user you want to include in this meeting, and then select the button. You can only create a meeting with users who are within your permission constraints. Note: Search results may include inactive users. You cannot create check-ins with inactive users.
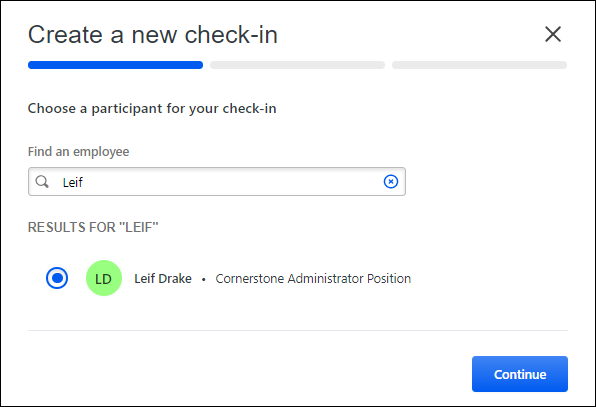
Note: If the selected participant currently exists in this meeting, a notification message appears. Select the button to review the existing series.
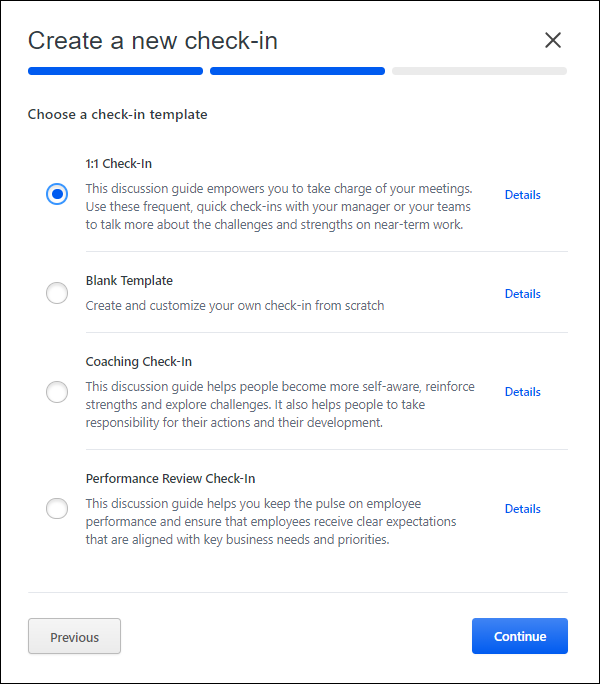
- Select the button for the template you want to use in this meeting and click . Click to view general information and topics for the template. You can only view and select templates to which you have access.
- Complete the meeting schedule:
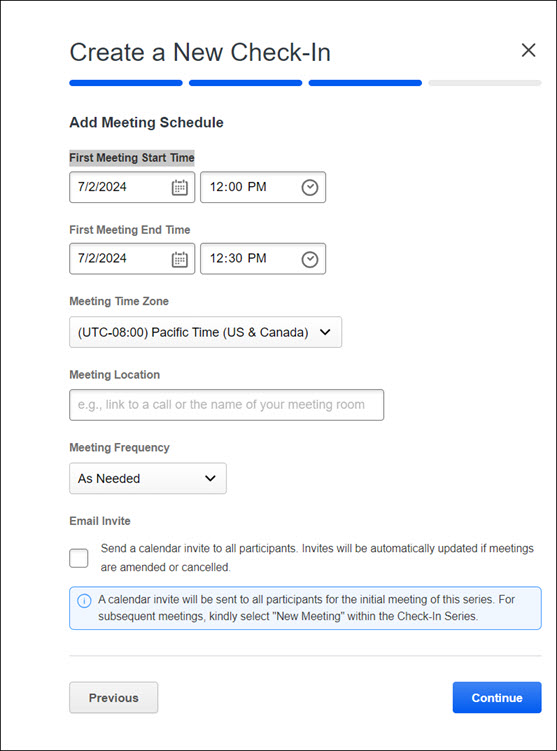
- *First Meeting Start Time and First Meeting End Time - Select meeting times for recurring meetings.
- *Meeting Time Zone - Select the default time zone for this meeting. This is a required field.
- *Meeting Location - Select a location for the meeting series. Add a link to a MSTeams or Zoom call or the name of the meeting room.
- *Meeting Frequency - Select weekly or monthly recurrence options.
- *End - Select to end the meeting series on a specific date. Options are On to end on a specific date, No End to continue indefinitely, or After to end after a specific number of occurrences.
- Email Invite - Check to send a calendar invite to both participant in the Check-Ins meeting series. The meeting invite is updated if there are changes to the meeting series. Email invites can be sent on desktop or mobile. Complete these fields to send a calendar invite to participants when creating a new Check-Ins meeting series or for an existing series. Once the meeting is confirmed, the invite is automatically sent to the calendar for both participants.
- Click review the meeting details.
- Click to save the meeting.