The Status Change Emails option is available for all status types when creating, editing, and copying requisition templates. This option enables administrators to include one or more Applicant Status Change emails to each status in the applicant status workflow. When included for a status, the emails trigger when an applicant moves into the associated status. Configuring applicant status emails for requisition templates helps ensure that the right people are notified of changes to an applicant's status.
To access requisition templates, go to . Then, click the Manage Requisition Template icon ![]() in the Options column for the Position organizational unit (OU). This opens the Requisition Templates page for a Position OU for which at least one template has been created.
in the Options column for the Position organizational unit (OU). This opens the Requisition Templates page for a Position OU for which at least one template has been created.
Note: If the Manage Requisition Template icon is gray ![]() , this means a requisition template has not yet been created for the Position OU. Clicking the icon when it is gray opens a blank requisition template to create for the Position OU. Once the template is saved, you are redirected to the Requisition Templates page.
, this means a requisition template has not yet been created for the Position OU. Clicking the icon when it is gray opens a blank requisition template to create for the Position OU. Once the template is saved, you are redirected to the Requisition Templates page.
| PERMISSION NAME | PERMISSION DESCRIPTION | CATEGORY |
| Requisition Template - Manage | Grants ability to access and view Requisition Templates. This permission cannot be constrained. This is an administrator permission. | Recruiting Administration |
| Requisition Template - View | Grants ability to access and view Requisition Templates. This is an administrator permission. | Recruiting Administration |
Note: Additional position management functionality is available for users with the permission to manage OU hierarchy.
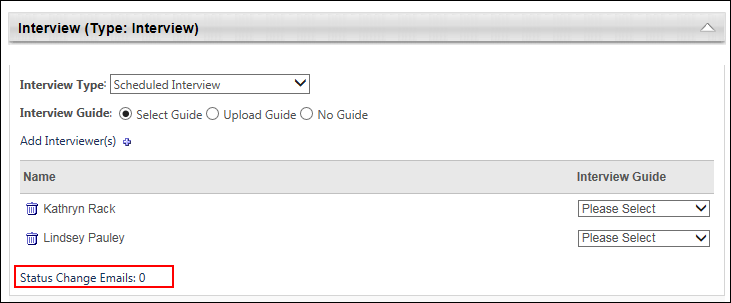
Status Change Emails Option
All status panels include an option to add one or more Applicant Status Change emails to the status. Administrators can define which emails are triggered for each status in the applicant status workflow. The selected Applicant Status Change emails are triggered when the applicant moves into the associated status. Selecting Applicant Status Change emails for a status is not required.
An applicant is currently in a status of Phone Interview. The applicant completes the phone interview, and the recruiter updates her status to Onsite Interview. When the Phone Interview status is changed to Onsite Interview, the Applicant Status Change email that is defined for the Onsite Interview status is triggered. The email is sent to all users who are defined as interviewers for the onsite interview.
Define Applicant Status Change Email
To select the status change emails:
- Click Status Change Emails in the status panel. This opens the Status Change Emails pop-up. The pop-up displays the list of email templates that are defined for the associated status. Note: The email templates in the pop-up are configured by the administrator in Email Management.
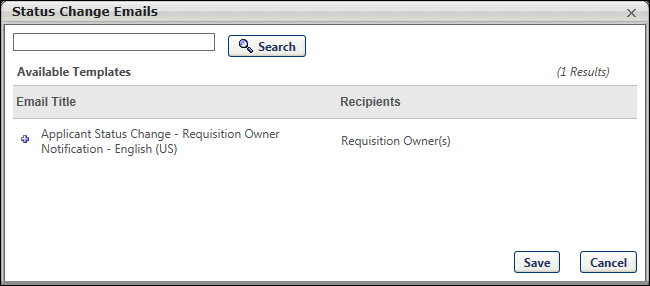
- Select one or more email templates. The selected emails display in the Selected Templates table in the pop-up. You can delete an email from the Selected Templates table by clicking the Delete icon to the left of the template name.
- Click . This adds the email templates to the status. Note: The content of the emails cannot be modified from the requisition template. The emails can only be modified by the administrator in Email Management.
Once the emails are added to the status, the number of emails that are added displays to the right of the Status Change Emails link.