Tax Preferences
The Tax Preferences page is controlled by a backend setting that is disabled by default. To enable this functionality, contact Global Customer Support.
To access the Tax Preferences page, go to . Then, click the Taxes link in the Shopping Cart and Billing Preferences section.
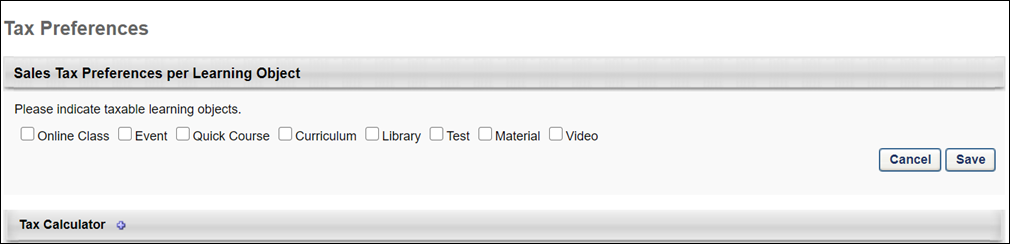
Sales Tax Preferences per Learning Object
In the Sales Tax Preferences per Learning Object section, administrators define which LOs will be taxable. Check or uncheck the following LO types to set the type as taxable:
Once the options are selected, click to save the changes. Or, click to cancel the changes made to the settings.
Note: The Video option LO type does not currently support sales tax. This LO type is included as an option to support the possibility of future updates to this feature. The Video option can be selected but has no functionality.
Tax Calculator
In this section, administrators can view and add tax calculators to the Tax Preferences page. Tax calculators are used to look up and calculate the tax.
Tax calculators are only used for CCH, not for Cybersource.
Add Tax Calculator
To add a tax calculator, click the plus icon ![]() to the right of the Tax Calculator heading. This opens the Add Tax Calculator pop-up.
to the right of the Tax Calculator heading. This opens the Add Tax Calculator pop-up.
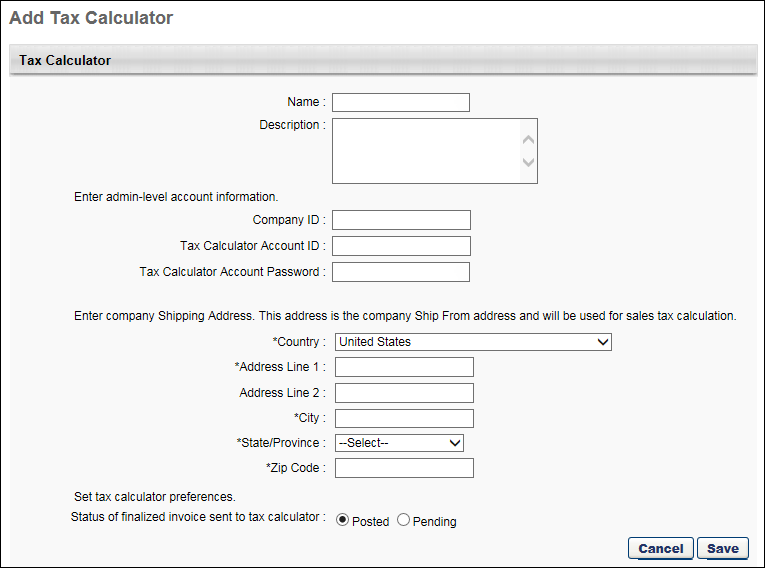
Complete the following fields in the pop-up:
- Name - Enter the name used to identify the tax calculator, up to 30 characters. This is a required field.
- Description - Enter a description for the tax calculator, up to 250 characters. The description is for the administrator's use only and does not display in any other area of the system.
- Tax Calculator Account ID - Enter your administrator-level account ID, up to 50 characters. This is a required field. Note: When updating both the account ID and password, update the account ID first and then the password.
- Tax Calculator Account Password - Enter your administrator-level account password, up to 50 characters. This is a required field. While entering the password, the characters are hidden. Once the password is entered and the button is clicked, the Tax Calculator Account Password field changes to an Update Password link. Note: When updating both the account ID and password, update the account ID first and then the password.
- Update Password - This link displays when a submitted tax calculator is being edited. Click the Update Password link to change the password. This opens the Update Password pop-up. Enter the new password, up to 50 characters. Then, click . This closes the pop-up. Click at the bottom of the Edit Tax Calculator pop-up to submit the changes.
- Country - From the drop-down, select the country for which the sales tax will be calculated. This is a required field.
- Address Line 1 - Enter the street address for the organization for which the sales tax will be calculated, up to 60 characters. This is a required field.
- Address Line 2 - Enter additional address information for the organization for which the sales tax will be calculated, up to 60 characters.
- City - Enter the city for the organization for which the sales tax will be calculated, up to 50 characters. This is a required field.
- State - From the drop-down, select the state/province/territory for which the sales tax will be calculated. This is a required field.
- Zip - Enter the Zip code for the organization for which the sales tax will be calculated, up to 10 characters. This is a required field.
- Status of Finalized Invoice Sent to Tax Calculator - The following options are available:
- Posted - When this option is selected, the finalized invoices that are sent to the tax calculator when a transaction is completed will be in a Posted status. Note: This is a status used by the vendor.
- Pending - When this option is selected, the finalized invoices that are sent to the tax calculator when a transaction is completed will be in a Pending status. Note: This is a status used by the vendor.
Click the button to submit and save the tax calculator. To discard the tax calculator without saving it, click instead.
Tax Calculator Table
The Tax Calculator table displays the tax calculators that have been added to Tax Preferences. From here, administrators can access the details of a tax calculator and edit the tax calculator's settings.
The following information displays in the table:
- Name - This column displays the name of the tax calculator.
- Options - This column displays an Edit option. Click the Edit icon
 to edit the details of the tax calculator. This opens the Edit Tax Calculator pop-up. See the Add Tax Calculator section above for information about the settings available in the pop-up.
Note: The settings in the Tax Calculator section are saved automatically. The and buttons in the Sales Tax Preferences per Learning Object section do not impact the settings in the Tax Calculator section.