Background Check Connector - Settings
On the Settings tab of Edge integrations created using the Background Check connector, a Field Configuration section is available. The Field Configuration section allows administrators to determine which fields are and are not communicated to background check vendors via the integration.
To access the Field Configuration section for an integration created using the Background Check connector, go to and search for and select the integration. Then, click the Settings tab.
Integration Guide
Select this link to download the Background Check Connector Integration Guide.
| PERMISSION NAME | PERMISSION DESCRIPTION | CATEGORY |
| Edge Integrations - Manage | Grants access to the Integrations service for Edge Integrate, where the administrator can configure, enable, and disable their third-party integrations used within the Cornerstone system. This permission cannot be constrained. This is an administrator permission. | Edge |
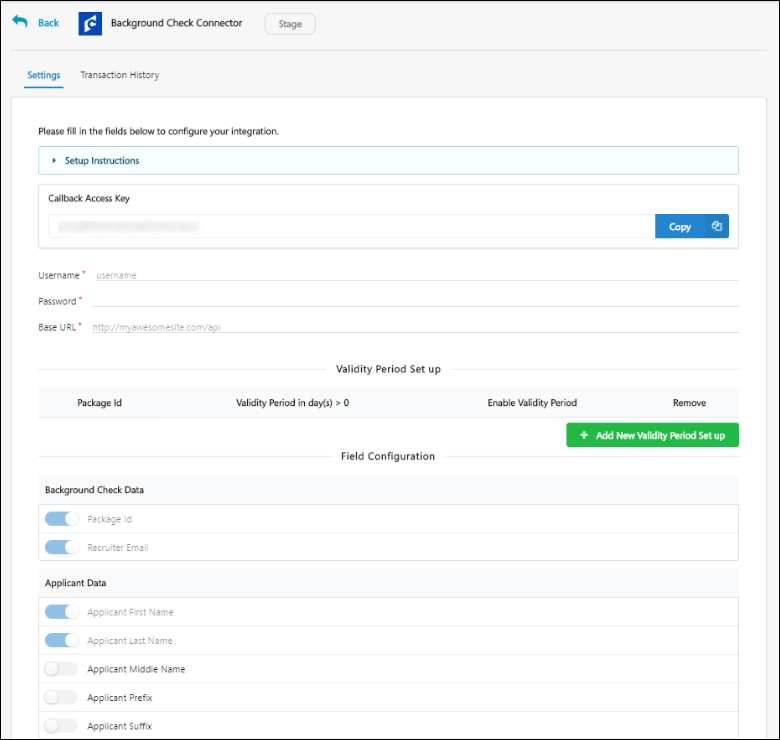
Field Configuration
The fields in the Field Configuration section are categorized into two field types: Background Check Data and Applicant Data. For organizations already using a background check integration created using the Background Check connector, all the available fields are enabled by default. For organizations planning to use a background check integration created using the Background Check connector in the future, only the following four fields in the Field Configuration section are turned on by default:
Background check vendors require the above four fields at minimum in order to conduct background checks. Therefore, these fields are enabled by default and cannot be disabled.
For organizations planning to use a background check integration in the future, the remaining fields in the Field Configuration section are NOT enabled by default, and the administrator can enable any other desired fields by toggling the switch next to each field to the On position.
To disable any enabled field, simply toggle the corresponding switch to the Off position.
Note: Your background check provider must be notified BEFORE making any changes to the selected fields to ensure that the integration remains functional. This will allow them to make the necessary changes in their system, if needed.
Validity Periods
Validity periods can be configured for background check connector integrations on a per package ID basis. Setting a validity period means that you only need one background check for the same candidate during the validity period. If the candidate applies to multiple requisitions during the validity period and completes a background check, then the same background check will be used for all of the requisitions.
Default Validity Settings Note: By default, the validity period for background checks is 0 days. Any package that is not added in the Validity Period Set up section on the Background Check Connector page in Edge will be treated as if the package does not have a validity period. For example, if your background check vendor has three packages, and you only add two of those packages to the Validity Period Set up section, then the third package will default to a validity period of zero days.
Acme Company receives 40,000 unique applicants per month. Each of their jobs require a Motor Vehicle Screening and a Drug Screening because of their large workforce of drivers. Each of these screenings, however, is valid for 30 days. Approximately 60% of their applicants apply to multiple roles, which significantly increases screening costs.
Because of their high volume, recruiters do not have time to review each applicant individually, so they need their Applicant Tracking System to block any new requests to their background check vendor, and they want to be able to see the results of valid background check screenings across all requisitions for each candidate.
By being able to see the results across requisitions, as well as putting systematic blockers in place, Acme is able to reduce costs, as well as enhance their candidate experience.
- No Duplicate Background Checks
- Background Checks Appear Across All of a Candidate's Applications
- Reduces Cost
- Saves Time
Employment background checks take significant time for candidates and cost organizations money. Candidates applying to multiple jobs have to complete the same background check multiple times if a validity period is not set for the background check, which results in a time consuming and expensive process.
When you set a validity period for background checks developed using the Edge Background Check Connector, candidates applying to multiple positions only need to complete background checks initially and upon expiration.
A candidate's background check is visible across all requisitions, which saves recruiters time in having to look through the candidate's other jobs to see if they completed a screening.
This feature is ideal for organizations that use the same background check screenings across many requisitions and have candidates who apply to multiple requisitions.
Set Validity Period
- Enter the package ID in the Package Id field. You will need to obtain the package IDs 3. Enter the package ID in the Background Check Package ID field. You will have to obtain the package IDs from your background check vendor. This is the same ID that a vendor passes back to Cornerstone when Cornerstone requests the list of Packages from the vendor as part of the connector flow.
- Enter a validity period in the Validity Period (Number of Days) field. A validity period can be entered for each package ID. Note: The validity period end date for each background check order will not be calculated until the result is returned from the background check vendor. Cornerstone does not calculate a validity period for a background check that is in an In Progress status. However, background checks will be prevented from triggering when the background check is in an In Progress status if a validity period is configured.
- Use the Enable Validity Period toggle for individual records to enable the validity period for specific packages.
- Use the Enable Validity Periods for all Background Check Packages option to enable the validity periods for all the packages.
- Click .
Background check results are displayed on the Manage Applicants page and the Applicant Profile during the validity period across all non-closed requisitions that are applicable for the candidate.
Additional background check requests for the same package will be prohibited during the validity period.
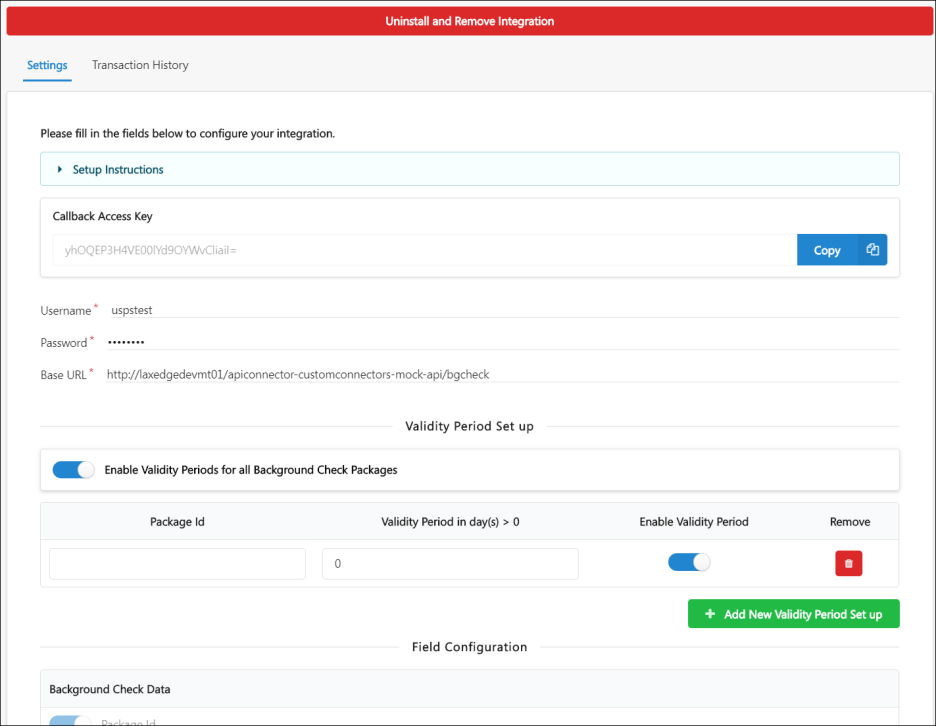
Deactivate Validity Period
You can deactivate a validity period by clicking the Remove icon ![]() in the Remove column.
in the Remove column.
If you deactivate a validity period for a package, then all results after deactivation will no longer have a validity period. All background checks for the package ID that were assigned prior to deactivation will still display the validity period expiration, but there will no longer be a prevention of triggering a background check. Once a new background check has been triggered for that candidate, following the deactivation, the results of the background check will no longer apply across requisitions.