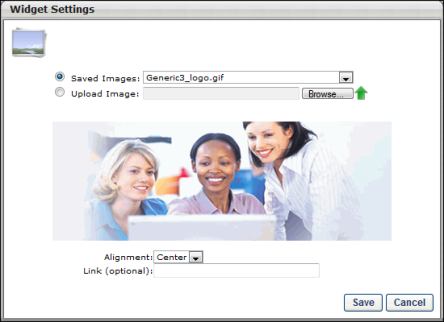
When you add an Image Widget to the Layout frame, the Widget Settings pop-up appears, allowing you to select an existing image or upload an image.
To select an image that was previously uploaded for a custom page and saved in the system, select the Saved Images option. Then, select the appropriate image from the drop-down list to the right of the option.
To select a new image that exists on your computer, select the Upload Image option. Then, click the Browse button to locate and select the image on your computer. Then, click the Upload button to upload the image to the system. The maximum file size is 1,024KB, and the accepted file types are .gif, .png, .jpg, .bmp.
Note: There is currently no way to delete an image that has been uploaded to the Image Manager.
After selecting the appropriate image, a preview of the image is displayed in the pop-up.
Select the following settings for the image:
- Alignment - This setting determines the image alignment within the cell. The available options are Left, Center, and Right. Center is selected by default.
- Link - This setting enables the image to be associated with a link. If an image is associated with a link, users can click the image to navigate to the provided URL.
Click the button to save the widget settings. The widget can be added more than once.
Sample Image Widget