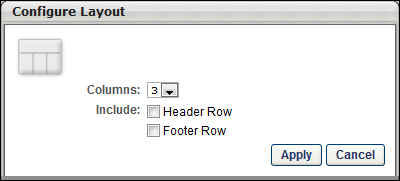
The Configure Layout pop-up enables administrators to set the number of columns on the page and add a header and footer row. This pop-up appears when creating a new custom page and can be accessed via the Options menu in the Layout Configuration section.
The Configure Layout options work in conjunction with the Cell Split functionality.
To manage custom pages, go to , and under Cross-Platform Preferences, select Custom Pages.
| PERMISSION NAME | PERMISSION DESCRIPTION | CATEGORY |
| Custom Pages - Manage | Grants access to create and edit custom pages for the portal. This permission cannot be constrained. This is an administrator permission. | Core Administration |
To configure the page layout from the Options menu:
- Click the Options menu in the upper-left corner of the page layout editor.
- Select the option. The Configure Layout pop-up opens with the following options:
- Columns - From the drop-down list, select the number of columns that should appear in the page layout. The available options are 1-4 and the default is 3. When the Columns value is applied, the page is divided into the selected number of columns with each column having an equal width.
- Include Header Row - Select this option to include a header row at the top of the page layout. The header row appears above the other columns on the page.
- Include Footer Row - Select this option to include a footer row at the bottom of the page layout. The footer row appears below the other columns on the page.
- After selecting the appropriate options, click the button. If any widgets or other content have been added to the page layout already, applying changes within the Configure Layout pop-up will clear the contents of the page layout. A confirmation message appears before the contents are cleared.
- After configuring the layout, the layout can then be further manipulated using the existing Cell Split functionality.
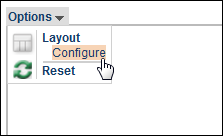
Reset Layout
Within the Options menu, there is a Reset option, which undoes all changes that were made to the page after the most recent Save operation. This includes the name, width, alignment, header, and description fields as well as layout and content changes.
To reset the page layout:
- Click the Options menu in the upper-left corner of the page layout editor.
- Select the Reset option. If any changes have been made to the page following the most recent Save, a confirmation message appears before the page is reset.
