View People Page - My Lists
The My Lists page displays the lists that you have created and the lists that have been shared with you. From this page, you can:
- Create a new list
- Share an existing list
- Delete a list
- View a shared list
- Add a list of employees to a talent pool
To access the View People page, go to the associated navigation tab and click View People. The location of the View People link is based on the configuration by the administrator. To access the My Lists page, click the List Mode ![]() icon.
icon.
| PERMISSION NAME | PERMISSION DESCRIPTION | CATEGORY |
| View People: View | Grants access to open View People to see results and share lists. This permission can be constrained by OU, User's OU, User, User Self and Subordinates, and User's Subordinates. | View |
New List
You can create a new list directly from the My Lists page. This allows you to develop a collection of lists so that you can add employees to the list from other areas of View People.
To create a new list:
- Click to create a new list. This opens the Create New List pop-up.
- Enter a name for the list, up to 100 characters.
- Click to save the list.
Once the list is saved, it will not contain any employees. You can add employees from other areas of View People.
Sorting By
The following sorting options are available:
- Sort By - By default, the lists display in order of most to least recently modified. The following sorting options are available:
- Last Modified Date - This allows you to sort by the date on which the lists were most recently modified.
- Title - This allows you to sort by list title.
- Order Ascending/Descending - You can sort the lists in ascending or descending order. The order is based on the Sort By option you have selected. For example, if Title is selected, then the list is sorted in ascending or descending order by list title.
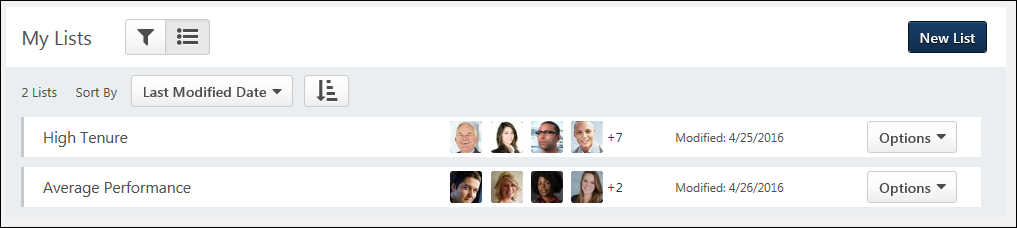
Lists
Each list displays in a separate row. The following information displays for the lists:
- List Title - The name of the list.
- Shared Status - Click the Shared icon
 icon to view the users with whom you shared the list. If the list was shared with you, then you can click the icon to view who shared the list.
 - Employee Thumbnails - Picture of the employees in this list. Up to four thumbnails appear. If you have more than four employees in the list, then the number of additional employees displays to the right of the fourth image. Clicking a thumbnail opens the list details page.
- Modified - Date on which the list was most recently modified.
- Options - The following options are available in the drop-down:
- Share - Click Share to share the list. This opens the Share List with Others pop-up. Select the users with whom to share the list. Enter a message that will display to the users with whom the list is shared. Note: You can only share lists that you own. You cannot share a list that was shared with you.
- Delete - Click Delete to delete the list. If this is a list that you have shared, then the list is also deleted from the users with whom the list was shared.
View List Details

The details of the list can be viewed by clicking the list name. This opens the details page for the list. The list details shows the name of the list, the last updated date, and options for adding to a talent pool and sharing the list. You can also apply filters and access an employee's profile page.
Click Back to return to the My Lists page.
Updated Date
The date that the list was most recently updated displays to the right of the list title. If this is a shared list, it will show the date on which the list was shared and the user that shared the list.
Sorting/Succession Options
The following sort options are available:
- Sort By - Sort the list by last name or first name. If tenure is enabled by the administrator in View People Preferences, then you can also sort by tenure. The list is sorted by last name by default.
- Order Ascending/Descending - Sort in ascending or descending order. The order is based on the Sort By option you have selected. For example, if Title is selected, then the list is sorted in ascending or descending order by list title.
- Color by - For portals with Succession, you can identify employees by a succession metric. The metrics that display are the default metrics defined by the administrator in View People Preferences. When a metric is selected, the results are colorized to identify each employee by their rating for the metric. If an employee is not rated, then they display with gray diagonal stripes in the color bar. Note: As with existing functionality, the colors for succession metrics are defined in Custom Field Administration when configuring the Succession custom field.
Add to Talent Pool
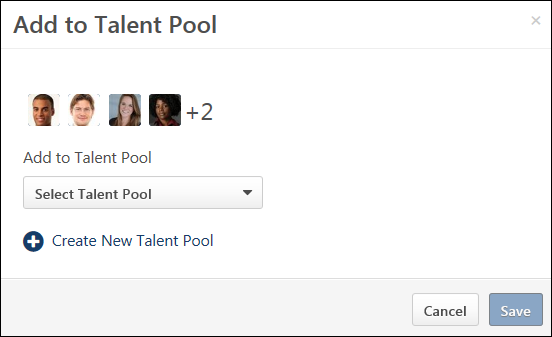
Add the employees in the list to a talent pool. You must have permission to manage talent pools in order to add employees to a talent pool.
Note: Before adding employees to the talent pool, you can remove any employees that you do not want to include on the list by clicking the Remove icon ![]() in the upper-right corner of their employee card.
in the upper-right corner of their employee card.
To add to a talent pool:
- Click . This opens the Add to Talent Pool pop-up.
- Select one of the following options:
- Select an existing talent pool from the Select Talent Pool drop-down, if there is at least one talent pool created.
- Or, click Create New Talent Pool to create a new talent pool. Enter a title for your talent pool in the title text box, up to 100 characters.
- Click to add the employees to the talent pool.
Note: Once a talent pool is created or users are added to a talent pool, you can view the talent pool from the Manage Talent Pools page. This page can be accessed from the associated navigation tab, which is configured by an administrator.
Share List
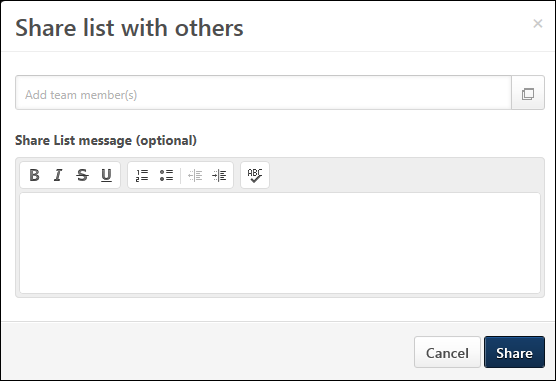
This option allows you to share the list with other users. You must have permission to view View People in order to share lists.
To share a list:
- Click . This opens the Share List with Others pop-up. If the list has been shared before, then the users with whom the list has been shared displays at the top of the pop-up, and you can click View All to view all the users with whom the list has been shared.
- Select the users to add by entering key words into the predictive search field and selecting the users. Or, search for and select users from the Select A User pop-up. Users must be added to the recipient list one at a time. Note: The users that are available to select are the users that are within your permission constraints.
- Check the Notify All box to send the email to all users with whom you are currently sharing the list and have previously shared the list. If you do not check the box, then the email is only sent to the users with whom you have just selected to share the list. Note: This option only displays if a list has already been shared.
- Enter a message in the Share List Message field. This is optional.
- Click to share the list. An email is sent to the users in the shared list. If you included a message, then the message displays in the email. The subject of the email is hard-coded as "I Shared [Name of List] on View People." A link to the shared list is automatically included in the email. Recipients cannot modify the list. Recipients can view the employee profile page of the employees in the list, as well as any succession metrics and the team hierarchy.
Lists can be shared multiple times. Follow the steps above to share the list again.
Once a list is shared, a Shared with icon ![]() displays on the My Lists page. Hover over the link to view the users with whom the list has been shared.
displays on the My Lists page. Hover over the link to view the users with whom the list has been shared.
Remove Shared Users
Remove users with whom you shared the list by clicking the View All link in the pop-up. Then, click the X to the right of the user's name. This removes the shared user from list.
Delete Shared List
If you delete the list, the list is also removed from any users with whom you shared the list.
Employee Cards
Each employee in the list displays on the page. The employee cards can be viewed as small or large.
Small Cards
The following information displays in the small employee cards:
- Photo - Photograph of the employee.
- Name - Name of the employee.
- [Organizational Unit 1] - Displays if an organizational unit (OU) is configured to display by the administrator in View People Preferences. The OU will be an active OU for the portal.
- [Organizational Unit 2] - Displays if an organizational unit (OU) is configured to display by the administrator in View People Preferences. The OU will be an active OU for the portal.
- Checkbox - Select the employee to add to a list or talent pool. When checked, the employee's thumbnail image displays in the upper-right of the page. The thumbnails update to display the most recently selected employees. Deselecting the checkbox removes the thumbnail, and the employee can only be added to a list or talent pool if the box is checked again.
- Tenure - Tenure displays as a number of years and is calculated from the user's hire date to the current date. Tenure displays in the lower-right corner of the card.
- Color Bar - Color that displays corresponds to the employee's metric rating for the succession metric that is selected in the Color by filter. If the Color by filter is set, then a color displays on the right side of the card.
Expand All/Collapse All
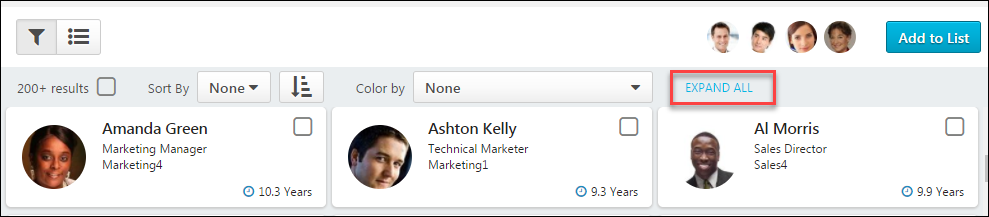
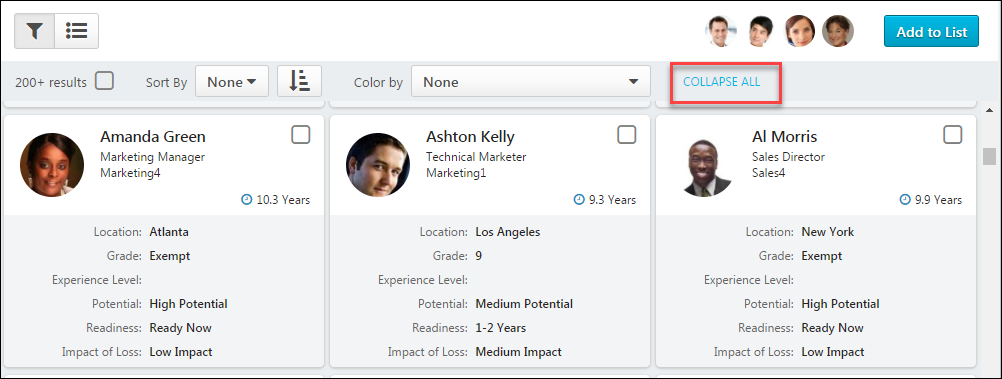
View an expanded version of the cards by clicking the EXPAND ALL option for at the top of the page. All user cards expand.
The data in the expanded card is configured by the administrator in the Employee Cards section of View People Preferences. Administrators can add up to six additional OUs, OU custom fields, User Record custom fields, and Performance and Succession metrics, including any career preferences that are selected in the Career Preferences Attributes section of the preferences page.
To collapse the cards, click COLLAPSE ALL. Individual user cards cannot be expanded.
Custom Field Availability Note: The custom fields that display are based on a user's availability to view the field and its value. If a user at any point does not meet the availability criteria for a custom field, then the field and value will not appear.
View Employee Profile Page
You can view the employee's profile page by clicking anywhere in the card except for on the remove option. This opens the profile page for the employee.