The Documents - Folder Details page enables users, managers, and administrators to attach, view, and delete files that supplement the user's profile. The availability of functionality is determined by the user's permissions.
To access the Folder Details page, click the Documents widget on the Universal Profile - Snapshot page. Then, click a folder title.
| PERMISSION NAME | PERMISSION DESCRIPTION | CATEGORY |
| Documents - Delete | Enables user to delete a file that has been uploaded to the Snapshot - Documents page. The constraints on this permission determine which documents the user can delete. This permission can be constrained by Employee Relationship, OU, User's OU, User Self and Subordinates, Self and Direct Reports, User's Self, User's Manager, User's Superiors, User's Subordinates, and User's Direct Reports. | Universal Profile |
| Snapshot Documents - View | Grants ability to view the Documents widget and subpage within the Universal Profile - Snapshot page. This permission can be constrained by Employee Relationship, OU, User's OU, User's Self and Subordinates, User, User's Self, User's Manager, User's Superiors, User's Subordinates, and User's Direct Reports. This is an end user permission. | Universal Profile |
| Snapshot Main - View | Enables user to view the Snapshot page for users within their permission constraints. This permission can be constrained by Employee Relationship, OU, User's OU, User Self and Subordinates, User, User's Self, User's Manager, User's Superiors, User's Subordinates, and User's Direct Reports. Best Practice: For most users, this permission should be constrained by User Self and Subordinates. | Universal Profile |
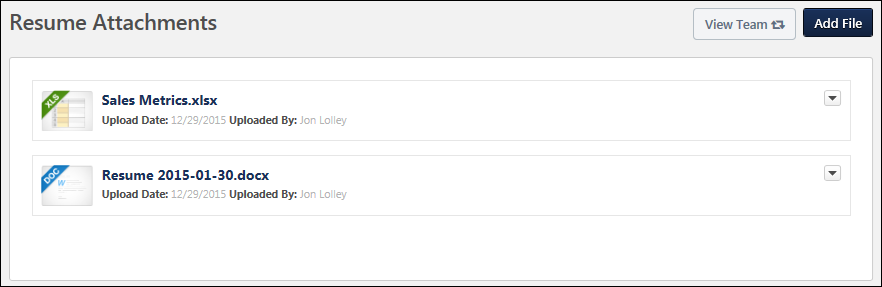
The Folder Details page displays all of the documents that have been uploaded to the folder. The documents are displayed in alphabetical order.
Note: Based on the folders created by the administrator and added here, documents such as offer letters and resumes may be automatically uploaded.
The following information is displayed for each document:
- Document Type Icon - The icon to the left of the document title displays the document type (e.g., PDF, DOC).
- Document Title - The document title is displayed to the right of the document type icon. Users can click the document title to download the file.
- Upload Date - This displays the date on which the document was uploaded.
- Uploaded By - This displays the name of the user who uploaded the document.
- Attachments - When a user completes a form and adds one or more attachments to a User Attachment field within the form, then the number of files attached to the form is displayed.
- Effective Date - If a completed form has effective dating enabled, then the completed form's effective date is displayed. If the completed effective dated form is opened, the form's effective date is displayed at the top of the form.
- Actions - The following actions may be available in the Actions drop-down
 to the right of the document information:
- Open - Select this option to open the document. This action can also be performed by clicking the document title.
- Delete - Select this option to delete the document. This option is only available to users with the appropriate permissions. See the Delete File section for additional information.
Note: For form documents that are e-signed, the form cannot be deleted.
View Team
The View Team flyout allows managers
The button displays if enabled in the portal.
See Universal Profile - View Team Flyout.
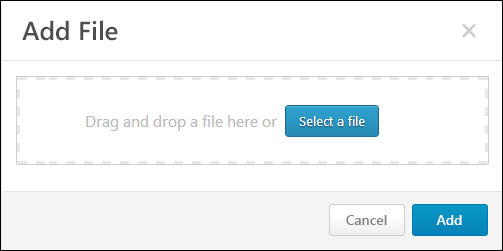
Add File
To add a file to the folder, click the button in the upper-right corner of the document list. This button is only available for users who are designated as Contributors or Owners for the folder. This button is not available for users who are designated as Viewers for the folder.
You can add a file by dragging and dropping a file into the Select a File area. You can also attach a file by clicking the button and select a file from your computer. Note: The drag-and-drop functionality is not supported by Internet Explorer browsers.
After a file is selected, the progress bar displays as the file is uploaded. After the file has loaded, the file appears below the Select a File box. See the File Restrictions section for additional information.
After the file has loaded, click to add the files, or click to cancel the add action.
Open File
A file can be opened in the following manners:
- Click the document title.
- From the Actions drop-down to the right of the document information, click the Open option.
Note: When viewing a form that contains encrypted fields, the data entered in the encrypted short text box fields is encrypted and displays as *****. For the user who completed the form and any other user who can access the form, the original data entered in the field is not visible and is encrypted. Even if the form is returned to the user for approval, the data that was originally entered into the field is encrypted. In addition, the field is only visible on the form if the user is within the availability criteria defined for the custom field in Custom Field Administration and the field is active in Custom Field Administration.
Forms with Approval Workflows
When a user submits a form that requires approval, the user can view the form's approval status by opening the submitted form from their Universal Profile > Snapshot Documents folder. The top of the form will display one of the following approval statuses:
- Approved - This status indicates that the submitted form has been approved. The form is now considered completed. A form that requires approval is not considered completed until the form is approved or denied.
- Denied - This status indicates that the submitted form has been denied. The approver may have included comments to explain why the form was denied. When a form is denied, the user cannot make changes to the form and resubmit it for approval. A form that requires approval is not considered completed until the form is approved or denied.
- Denied and Returned - This status indicates that the submitted form has been denied and returned to the user. The user can access the returned form from the Universal Profile > Actions tab, where they can make changes to the form and resubmit it for approval. See Form - Approve or Deny.
- Pending Approval - This status indicates that the submitted form is pending action from the approver to approve, deny, or deny and return the form.

Print Form to PDF
A Print to PDF option displays in the options drop-down for the form. Clicking the option opens the form as a PDF. From the form, click the button at the bottom of the form to save it as a PDF for printing at a later time.
The questions and response options display on the PDF. If an e-signature was used, then the e-signature also displays. If the form title includes special characters, then the special characters are replaced with an underscore.
Forms are downloaded as "[Form Title]_[User Full Name].pdf".
- Laura onboards new hires and ensures they fill out all their new hire forms. After the forms are completed, she needs to print their forms and place them in the employee's file.
- Laura opens the Universal Profile Snapshot Document folder for a user who has new hire forms she would like to view.
- For forms that only required an e-signature to complete, Laura simply clicks Print to PDF in the options drop-down to save the form as a PDF to print at a later time.
- For forms that have question responses that she would like to view, Laura opens the completed form. Then, she clicks the button at the bottom of the form to save it as a PDF for printing at a later time.
Delete File
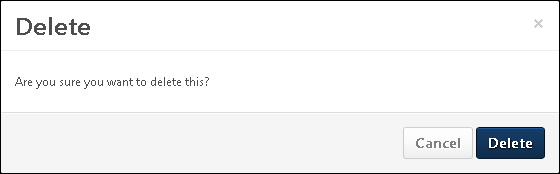
To delete a file, from the Actions drop-down ![]() to the right of the document information, click the Delete option. This opens the Delete confirmation pop-up.
to the right of the document information, click the Delete option. This opens the Delete confirmation pop-up.
- If a user is designated as an Owner for the folder and has permission to delete documents, then the Delete option in the Actions drop-down is available for all files in the folder. Users must have the Documents - Delete permission, and they can only delete documents that were uploaded by users who are within the constraints on this permission.
- If a user is designated as a Contributor for the folder and has permission to delete documents, then the Delete option in the Actions drop-down is available for all files that the user added to the folder. The Contributor cannot delete any files that were added by another user. If multiple people are adding files to a folder, then it is possible that the user can delete some files within the folder but not others.
- If a user is designated as a Viewer for the folder and has permission to delete documents, then the Delete option is not available for any files within the folder.
Click to confirm the document deletion, or click to cancel the deletion.
Note: Forms that are stored in a folder cannot be deleted.
File Restrictions
The following file restrictions apply:
- The maximum file size is 20 MB.
- The file name cannot exceed 50 characters.
- Executable files cannot be uploaded.
- Files cannot have a hidden extension or no extension.
The following file types are allowed: