The General step is used to set the display options and is divided into the following sections:
- General
- Display
- Availability
The Login Message works with the most commonly used landing pages:
- Welcome Page
- Custom Pages
- Learner Home
- Other pages that contain “/ui/” in the URL
- Other pages that contain “/phnx/driver.aspx?” in the URL
To create a login message, go to . On the Login Message Administration page, click the Create Login Message link.
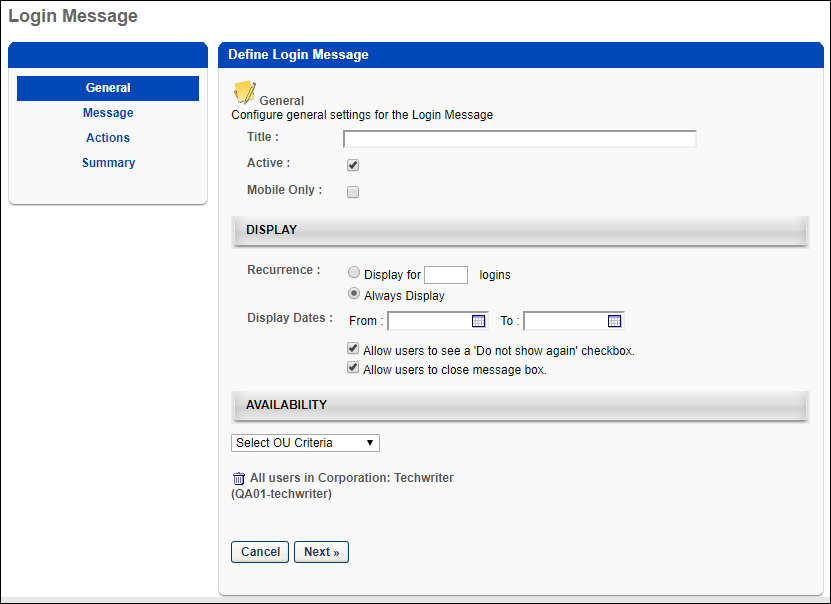
General
Complete the following information in the General section:
- Title - Enter a title for the message, up to 100 characters. This is a required field. The title appears in the Title column on the Login Message Administration page. The title does not display to end users and is not part of the login message that appears when users log in to the portal. As the title is entered in the field, the text of the title displays in the header row above the Define Login Message panel.
- Active - Select or deselect the Active checkbox to activate or inactivate the message. New login messages are active by default.
- Mobile Only - When this option is selected for a login message, the message only displays in the Cornerstone Learn app. It does not display when logging in via web browser. Similarly, if this option is not selected for a login message, the message only displays when logging in via web browser. It is not displayed when logging in to Cornerstone Learn. A mobile-only login message only displays to a user if the user is using the latest version of the Cornerstone Learn app.
- For any login messages that existed prior to the October 2019 release, this checkbox is disabled and cannot be selected. In order to create a mobile-only login message, administrators must copy an existing message or create a new one.
- A mobile-only login message only displays to a user if the user is using the latest version of the Cornerstone Learn app.
Display
Complete the following information in the Display panel:
- Recurrence - This option determines the number of instances the message displays.
- Display for [numeric text box] logins - Select this option to set the message to appear for a certain number of logins. Enter a numeric value between one and 999 in the numeric text box. Entering a value is required if this option is selected.
- Always Display - This option displays the message each time a user logs in. Note: If this option is selected and the Do not show again box is available to users when viewing the message, the message no longer appears if the user checks the box.
- Display Dates - Select a time frame during which to display the message by choosing a date in the From and To field. You can also use the calendar feature to select the dates. The From date can be set to today's date, but a best practice is to set the From date to be greater than today's date. The To date must be greater than the From date. This means that a message cannot display for only today's date. You must enter a date in both fields. Note: The selected dates are implemented in Coordinated Universal Time (UTC). For example, if the message is set to display until October 11, then the message displays until 23:59:59 UTC on October 11.
- Allow users to see a 'Do not show again' checkbox - Select this option to allow employees to disable the message from reappearing at login. This option is selected by default. Note: If this option is selected and the user checks the Do not show again box when viewing the login message, then the login message does not display again, regardless of the recurrence setting.
- Allow users to close the message box - This option allows users to close the message by clicking "Close" in the upper-right corner of the login message box. This option is selected by default. If this option is deselected, you are required to create a button on the Action step that provides users with the ability to close the message box.
Availability
The Availability panel determines to whom in the organization the message is visible. If you select any one of the organizational units listed in the drop-down list, the message appears to employees in the selected OU. By default, "All Users" is selected. You can delete the default setting by clicking the Trash Can icon to the right of the setting. However, at least one availability criteria is required.
From the drop-down, select an OU. Then, click the Search icon to the right of the drop-down. This opens the Select OU pop-up. Select an OU from the list, which closes the pop-up and adds the OU.
Next
Click to go to the Message step. See Create Login Message - Message.