The Set Approvals tab enables administrators to define the approval workflow for the SF-182 request process.
- Defining an approval workflow is not required.
- One approval step appears on the tab by default but is not defined.
- The workflow can have a maximum of five steps.
- If an approval workflow is defined, each step must have a minimum of one approver, either a relation type, user, or group.
Note: In order to allow the successful submission of SF-182 requests, you are required to configure approval steps.
Sections
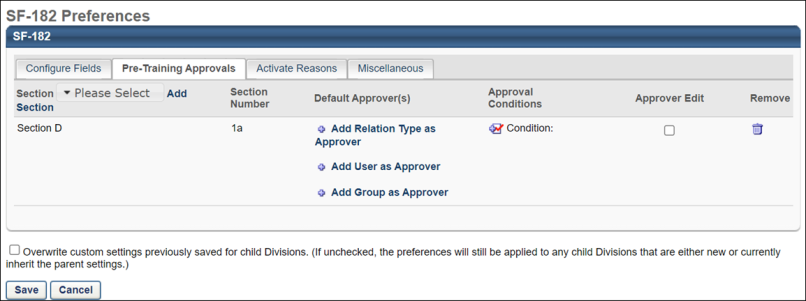
Section D 1a appears on the tab by default but is not configured. You can add Section D 2a. Section D 3a, and Section E 1a by clicking the Add icon ![]() next to the Approval Step Number column name. Each subsequent step appears in sequential order, as shown in the image below.
next to the Approval Step Number column name. Each subsequent step appears in sequential order, as shown in the image below.
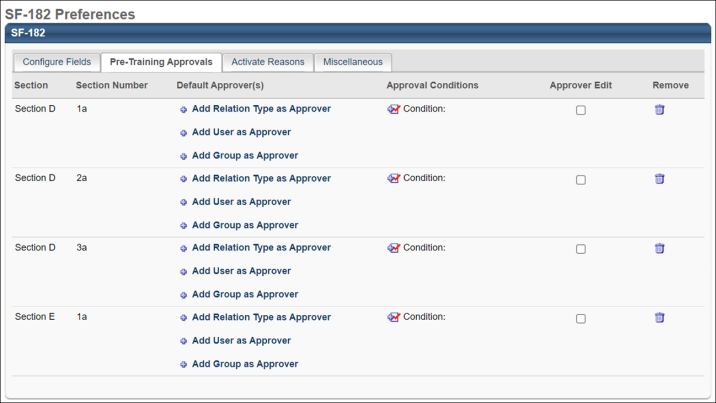
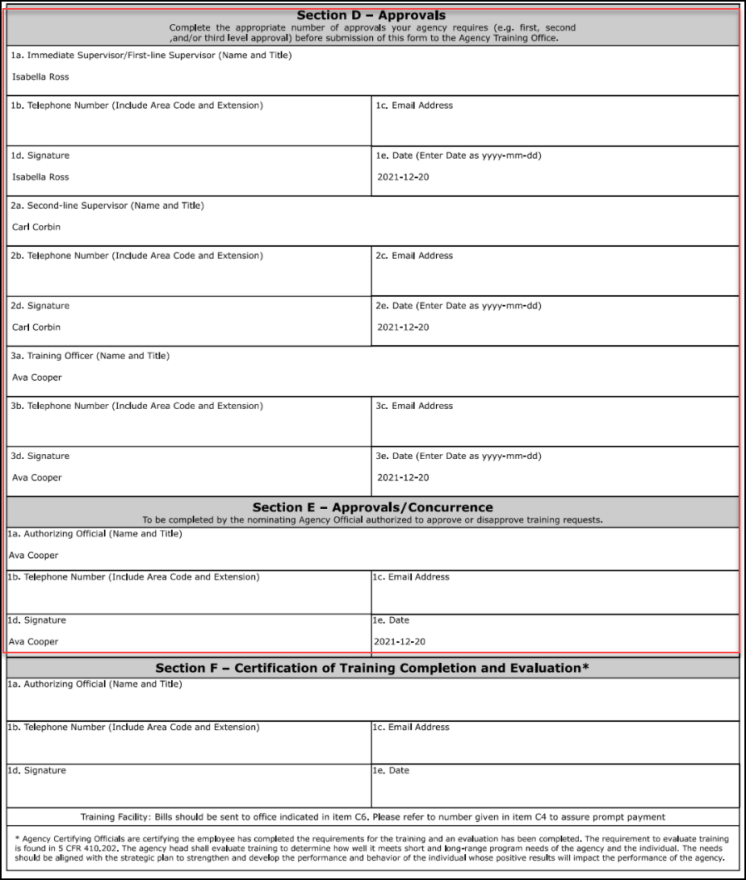
Section D
Section D allows for the printing of the following fields:
Approvers can be set for Section D-1a, Section D-2a, and Section D-3a. These approver selections determine the approvers who will be printed on the form for those sections.
Section E
Section E allows for the printing of the following fields:
- Full name
- Title
- Email address
- Phone
- Approval date
- Signature box with full name displayed
Approvers can be set for Section E-1a. This approver selection determines the approvers who will be printed on the form for Section E-1a.
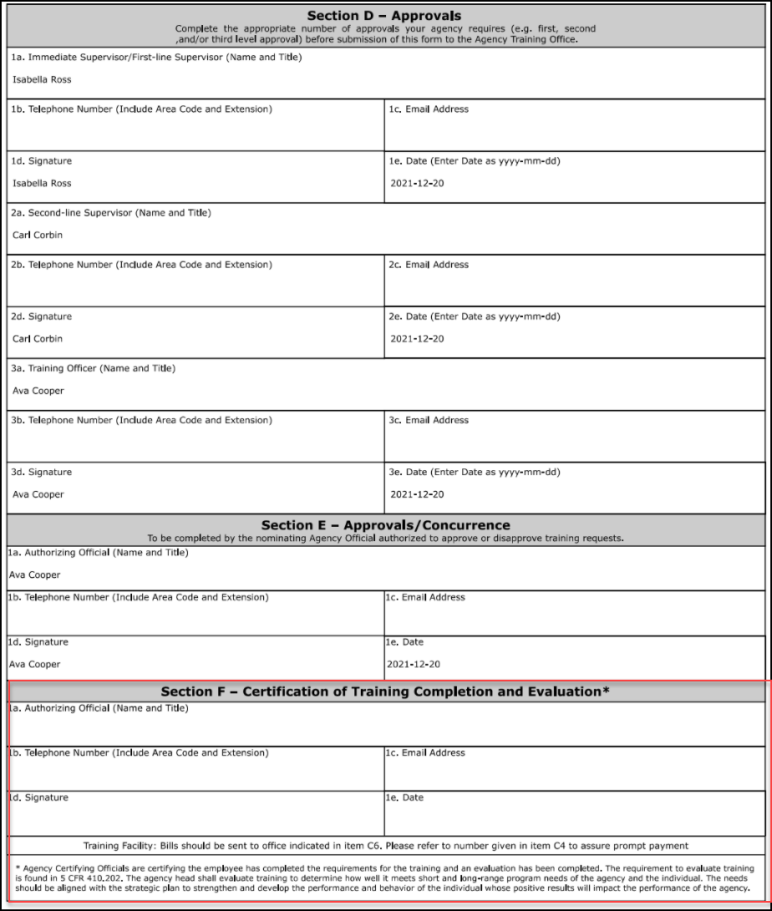
Section F
Post-training (completion) approvals can be configured via the Default Approval Workflow Templates page and the Default Approval Requirements for External Training page. The first approver who approves will now display in Section F on SF-182 forms.
Section F allows for the printing of the following fields:
- Full name
- Title
- Email address
- Phone
- Approval date
- Signature box with full name displayed
See Default Approval Requirements - External Training.
Default Approvers
The options in the Default Approvers column enable you to configure the approvers for the step. You can have relation types, groups, and users as approvers, but there must be at least one approver added.
Relation Type as Approver
A relation type approver is an approver that has a system-defined relationship to the user that submitted the form, as configured in the user record. For example, a relation type approver could be the user's manager or their indirect manager. Note: When an administrator or manager submits an SF-182 request on behalf of a user, the relation type approver is based on the user record of the user and not that of the administrator or manager.
To configure a relation type approver:
- Click the Add Relation Type as Approver link. This opens the Select Approvers pop-up. One or more of the following relation types can be selected for each step:
- Self
- Manager
- Indirect Manager - This is the user's indirect manager (i.e., the manager's manager). This is a dynamic relationship that can only be added once to each step, and it will keep traversing the user's manager hierarchy.
- Cost Center Approver
- Cost Center Owner
- User (Note: Selecting User allows you to pick a specific user.)
- Click the Add icon
 in the Add column for each relation type approver you would like to add.
If you select "User," this opens the Select User pop-up from which you can select one or more users. Once you have selected the desired users, click . This closes the Select User pop-up but does not close the Select Approvers pop-up.
- Click on the Select Approvers pop-up.
The approvers appear below the Add Relation Type as Approver link in the order in which they are added. The order in which the approvers appear does not impact the order of the approval workflow. Any of the approvers can approve the step.
User as Approver
You can select specific users to be approvers. To configure a user as an approver:
- Click the Add User as Approver link. This opens the Select User pop-up.
- Click the Add icon in the Add column for each user you would like to add. Note: Approvers that are deactivated before the SF-182 request is submitted are not sent the approval notification email. If all users that are selected as approvers are deactivated after the request is submitted, the approval step is skipped.
- Click .
The approvers appear below the Add User as Approver link in the order in which they are added. The order in which the approvers appear does not impact the order of the approval workflow. Any of the approvers can approve the step.
Group as Approver
To add a group as an approver:
- Click the Add Group as Approver link for the relevant step. This opens the Select Approvers pop-up window.
- Click the Add icon in the Add column for each group you would like to add.
- Click the button.
The group(s) you selected will be added as approvers for the step. Any user in the group can approve the step.
- Note: There is no limit on the number of users in groups or the number of groups that can be added, but only up to 100 users will display in the Training Details for Sections D and E.
- Note: Only users that were part of the group at the time of the form submission will be added as approvers for the form. Users added to the group after form submission are NOT automatically added as approvers.
Approval Conditions
The Approval Conditions option enables you to set conditions under which the approval step appears in the workflow. If the conditions are not met, the approval step does not appear in the approval workflow for the request.
To set approval conditions:
- Click the Condition icon in the Approval Conditions column. This opens the Define Approval Condition pop-up.
- Select one of the following condition types from the condition type drop-down:
- Indirect Total Cost (from Step 2 of SF-182 request)
- Total Direct Cost (from Step 2 of SF-182 request)
- Training Non Duty Hours (from Step 1 of SF-182 request)
- Training Duty Hours (from Step 1 of SF-182 request)
- Select one of the following conditions from the condition drop-down:
- Greater than
- Greater than or equal to
- Less than
- Less than or equal to
- In between
- Enter the condition's numeric value in the text box. Punctuation is not accepted. Note: For the "In between" condition, two text boxes appear in which to enter a range. For example, Total Direct Cost is between $500 and $1000. Both boxes must include a valid value in order to save the condition.
- Click . The condition appears in the Approval Conditions column.
To remove a condition:
- Click the Condition icon
 in the Approval Conditions column. This opens the Define Approval Condition pop-up.
 - Click . This closes the pop-up and removes the condition from the step.
Approver Edit
The Approver Edit option enables you to allow approvers to edit the request before they approve it. Check the Approver Edit option to allow approvers to edit the request.
Remove
The Remove option enables you to delete an approval step. To delete a step, click the Trash Can icon.
- If only one step is configured, clicking Remove deletes the contents of the step but not the step itself. Once you click or navigate to a different tab and then return to the tab, the default data in each column reappears for Step 1.
- If more than one step is configured, removing a step moves up all of the subsequent steps.
Overwrite Settings
Select this option to overwrite custom settings for child division OUs. If you overwrite custom settings for child division OUs, the selected settings are applied to both new and existing child OUs. Any previously customized child OUs are updated with the selected settings.
- If there are no customizations to the child OU, then the parent OU customizations are applied to all child OUs.
- Overwrite custom settings checkbox setting
- If this option is selected, all child OU customizations are deleted from the database, which means the parent OU customizations will be applied to new and existing child OUs.
- If this option is unselected, all existing child OU customizations will remain unchanged, and any new child OUs will inherit the parent OU customizations by default.
- If a child OU has been customized to display any widgets, then regardless of the parent OU customizations, the child OU customizations are applied.
- If a child OU has been customized to hide all widgets, then parent OU customizations will take precedence and will be applied.
Save
Once all preferences are set, click . Preference settings are not saved unless you click . This returns you to the Preferences page.
Or, to set preferences for another SF-182 Preferences tab before saving, click the tab name and configure the preferences. Then, click .