Invoice Preferences
Administrators can configure a global invoice for their entire organization, including the business phone number and invoice logo.
To access Invoice Preferences, go to . Then, click the Invoice Preferences link in the Shopping Cart and Billing Preferences section.
| PERMISSION NAME | PERMISSION DESCRIPTION | CATEGORY |
Invoice Preferences
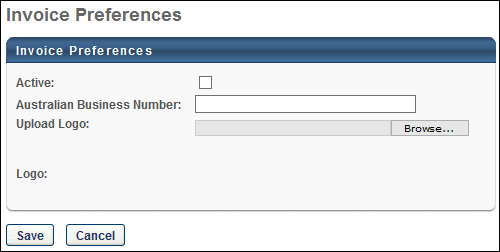
The following options are available:
-
- Australian Business Number - In this field, enter the Australian business number. This business number appears on the Order History page and the printed invoice. This field is disabled if the Active option is not checked. The character limit for this field is 100.
- Upload Logo - A logo can be added to the custom invoice. To upload a logo for the custom invoice, click the Choose File button. Then, select the file from your computer and click the button. The selected image appears in the Logo field. This field is disabled if the Active option is not checked. The system supports .jpg, .jpeg, .gif, .png, and .bmp file types.
- Logo - If a logo is uploaded for the custom invoice, then it is displayed here. If no image is displayed, then this is because no image has been uploaded via the Upload Logo field. Once a logo has been uploaded, it can be removed by clicking the button in the lower-left corner of the logo.
Submit or Cancel
Click to submit any changes to the invoice preferences. Otherwise, click to discard any unsaved changes.