Engage Invitation Email Template
The Engage Invitation email template can be configured from the Email Administration page. Once configured, the template is automatically applied to Engage campaigns with Email Link selected as the distribution method.
To access Email Administration, go to . Search for the Engage Invitation email trigger and then click the Add Email icon to the right of the trigger.
| PERMISSION NAME | PERMISSION DESCRIPTION | CATEGORY |
| Global Email Administration - View | Grants view only access to email templates/triggers and email logs at the global level for the portal. This permission can be constrained by OU, User's OU, User Self and Subordinates, and User. This is an administrator permission. | Core Administration |
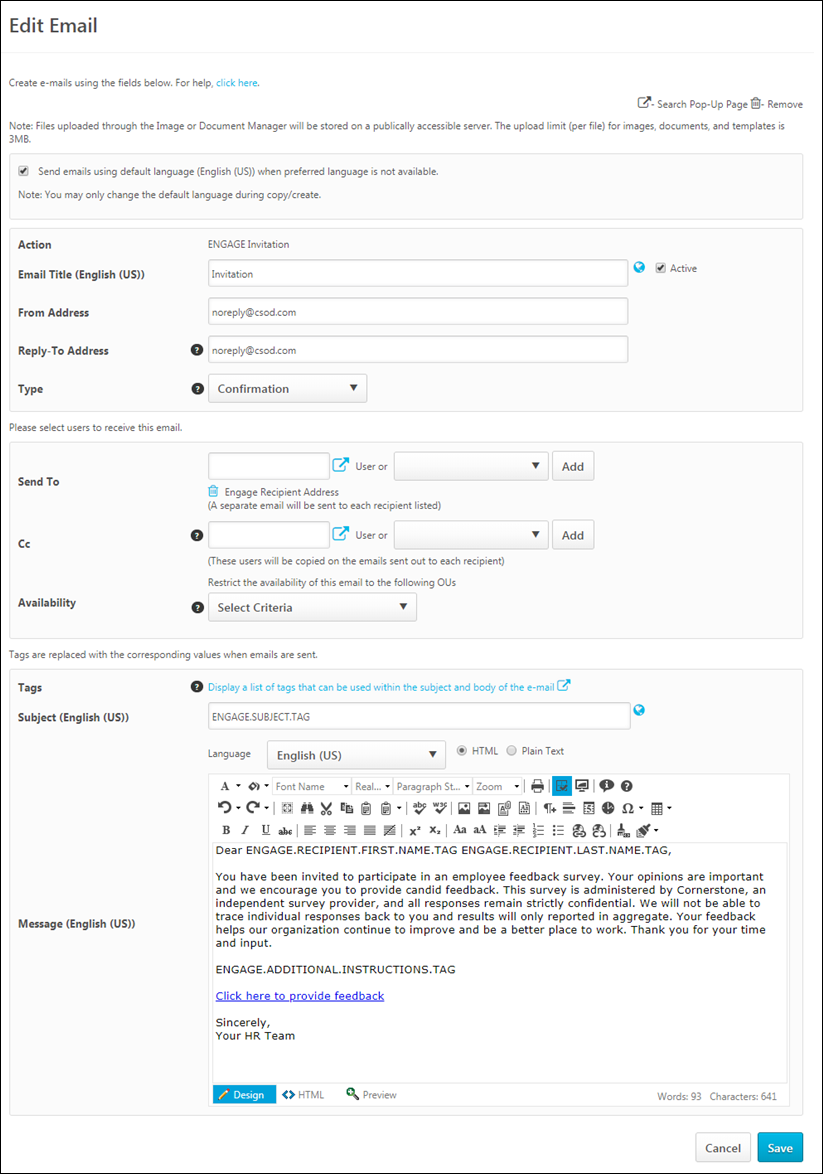
Create Engage Invitation Email
Configure the following email template settings for the initial email users will receive when they are invited to participate in a survey:
- Email Title - Enter the title for the email. This title is used to identify the email from the Email Administration page later.
- From Address - Enter the email address which will appear as the From address when users receive the email invitation.
- Reply-To Address - If a recipient of the email invitation replies to the email, this is the email address their reply is delivered to.
- Type - Select an email type from the drop-down menu. The Confirmation and Notification email types are used for organizational purposes so that administrators can categorize email triggers and more quickly locate certain email triggers when searching from the Email Management page. Note: Engage implements its own logic on sending emails and it might be conflicting with the default approach. Administrators should NOT change the Type field for Engage emails.
- Language - Select a language from drop-down list. Emails only fire to recipients that are defined in the Send To field if the template matches the user's language preference when the action is performed.
- Send To - Select either a specific user to receive the email, or select from the drop-down a list of relevant job roles. Note: Because Engage campaign distribution is configured on a per-campaign basis, Engage email templates are pre-configured to send to Engage Recipient Address. Administrators should NOT change the Send To field for Engage emails.
- Cc - Select either a specific user or select a recipient from the drop-down list. Once you have selected a user or a role, you must click the button.
- Availability - Choose whether or not to restrict the availability of the email to a specific OU. Note: Because Engage campaigns have availability filters configured on a per campaign basis, administrators should NOT change the default availability of the Engage email templates. See Create/Edit Campaign - General.
- Tags - Click the tags search icon to see a list of tags which can be used in an Engage campaign invitation. Tags are replaced with specific information when the email is sent. See Engage Invitation and Reminder Email Tags.
- Subject - Enter the subject of the email users will receive. By default, the subject, "Please provide feedback" is entered. This field can be localized into other languages.
- Message - Enter the body of the email users will receive. Let users know why their feedback is important, and use tags if needed. The email will also automatically include a link to the survey you have added to the campaign. A default email body using tags is provided, which can be changed if needed. This field can be localized into other languages.
For more information about creating emails, See Email - Create.
Save
After configuring the Engage Reminder email template, click the button at the bottom of the page.