Video Course - Create - Step 2 - General Information
To create a video course, go to . Then, click the Create a Video Course link.
| PERMISSION NAME | PERMISSION DESCRIPTION | CATEGORY |
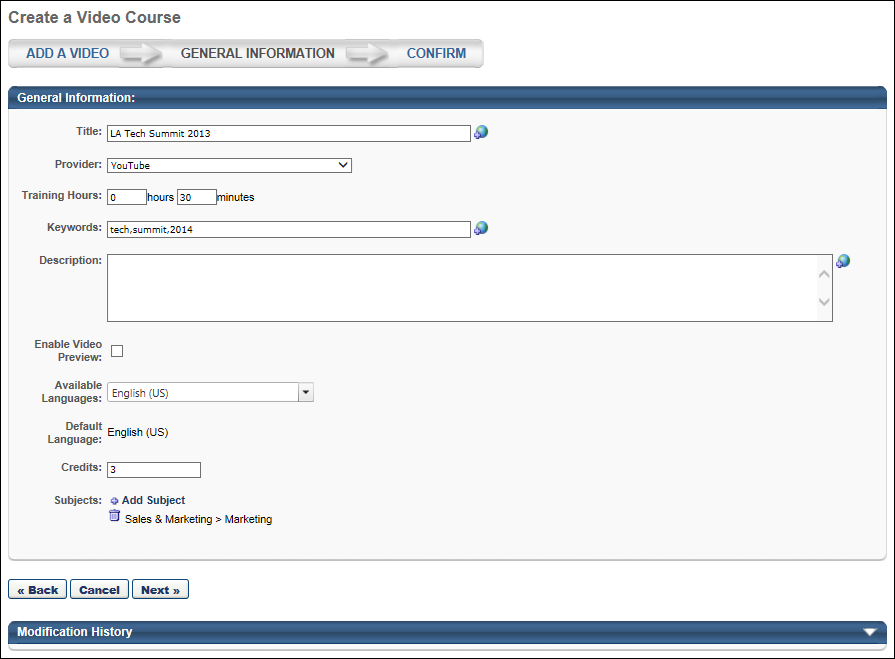
General Information
Enter the following information for the video LO:
- Title - Enter a title for the video LO. The character limit for this field is 500. If multiple languages are enabled for your portal, select the Translate icon to translate the field into other available languages.
- Provider - From the drop-down, select the appropriate provider for the LO. By default, YouTube is available as a provider.
- Training Hours - Enter the training hours associated with the video course in hours and minutes. This field is optional.
- Keywords - Enter words to associate with the LO. When a user searches for an LO and enters any of the keywords specified here, the course title will appear in the search results. If multiple languages are enabled for your portal, select the Translate icon to translate the field into other available languages.
- Description - Enter a description of the LO to display in the Training Details window. The character limit for this field is 5000. If multiple languages are enabled for your portal, select the Translate icon to translate the field into other available languages.
- Enable Video Preview - When this option is selected, a preview of the video LO is displayed on the LO Details page. By default, the video preview is disabled. Administrators may choose to disable the video preview so that users are not able to view the video without adding it to their transcript.
- Note: This feature is not supported with the new Learning Details page. See Learning Details Page .
- Available Languages - From the drop-down list, select the languages in which the LO is available. The available languages are mainly used for searching purposes and they are independent of the LO's default language. At least one language must be selected. At the top of the drop-down list, all selected languages are displayed. The drop-down list only displays the languages that are available to the user. Select the All Languages option to select all available languages.
- When a language is selected, the LO is associated with that language, and users can search for the LO by associated languages.
- Default Language - This displays the default language of the LO. If a user views an LO in a language that does not have a translation, the information is displayed in the default language for the LO. When an administrator creates an LO, the default language for the LO is the administrator's default language at the time they create the LO.
- Credits - Enter the number of credits that a user earns by completing the LO.
- Subjects - Click the Add Subject link to select subjects that apply to the LO.
- Custom Fields - Any custom fields that are enabled for video LOs appear.
After entering the appropriate information, click to proceed to the Confirm step. See Video Course - Create - Step 3 - Confirm.