When creating a video course, there are three video administration steps, followed by a fourth step configuring the video's metadata via Course Catalog. The first step is to add a video. This can be done by uploading a video file or by embedding a video from YouTube.
To create a video course, go to . Then, click the Create a Video Course link.
| PERMISSION NAME | PERMISSION DESCRIPTION | CATEGORY |
Video Considerations
- Videos that are uploaded to the system can be streamed to the user with minimal buffering and interruptions.
- When uploading a video to the system, there are Internet browser considerations that determine the default format of the video. In addition, when using mp4 videos, organizations must perform additional configurations in order to ensure that mp4 videos play properly. See Video Streaming.
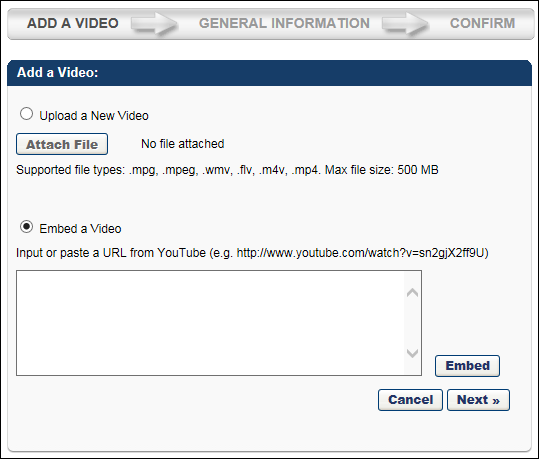
Upload a New Video
To create a video LO by uploading a video file, follow these steps:
- Select the Upload a New Video option.
- Click the button, and then navigate to and select the appropriate video file. The supported file types are .mpg, .mpeg, .wmv, .flv, .m4v, and .mp4. The maximum file size is 500 MB.
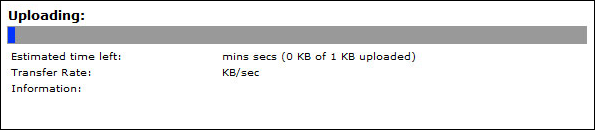
- After selecting the video file, the selected file name is displayed. An Uploading pop-up opens to display the upload progress.
- After the file is uploaded, a preview of the video is available. Click the button to preview the video and confirm that it is the correct video.
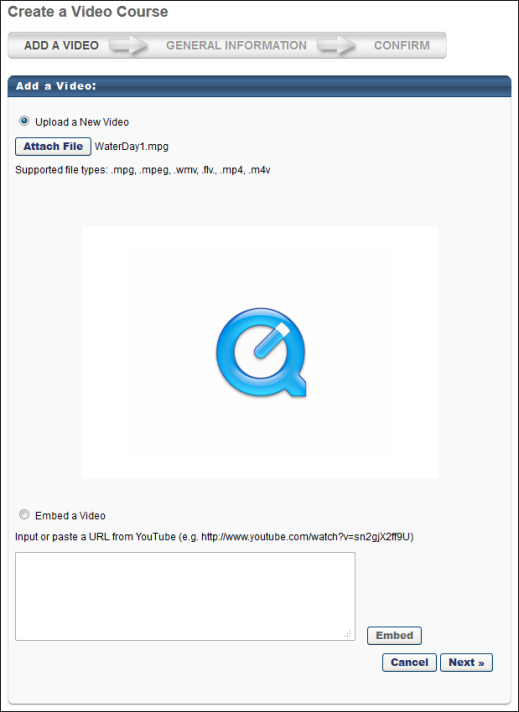
If the wrong video is uploaded, click the button to select and upload another video file. Only one video file can be attached. Selecting another video file will remove the previously attached file.
If the correct video is uploaded, click to proceed to the General Information step. See Video Course - Create - Step 2 - General Information.
Embed a Video
To create a video LO by embedding a video URL, follow these steps:
- Select the Embed a Video option.
- In the text box, enter the URL from YouTube. The character limit for this field is 150.
- Click the button to view a preview of the video. If the provided URL does not generate an embedded video, an error message is displayed.
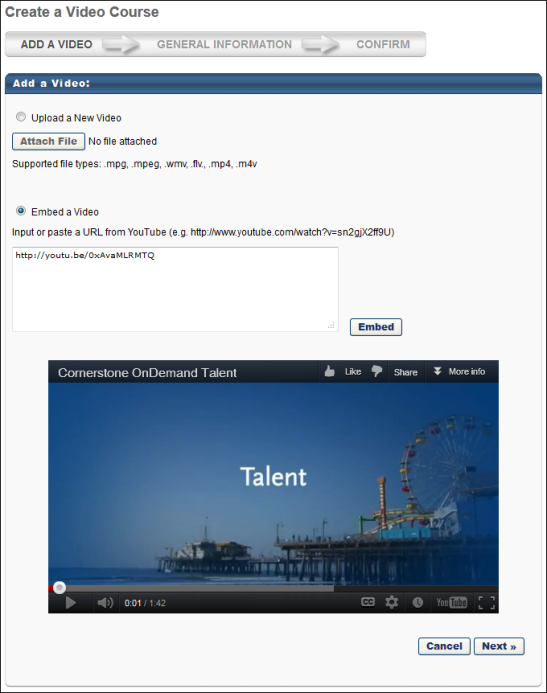
If the wrong video is embedded, modify the URL or Embed tag and click the button to verify the new video. Only one video file can be embedded. Entering a new URL will remove the previously embedded video. If the correct video is embedded, click to proceed to the General Information step. See Video Course - Create - Step 2 - General Information.
Modification History
For portals with multiple languages enabled, if the translation of a title or description is modified, the Modification History panel displays the change. However, only changes to languages that were added when the learning object was initially created are tracked.
The initial creation and changes to the title and description display in the panel as follows:
- Title at Initial Creation - <Learning Object Type> created with <Language of Title> Title "<Title>" by <User Full Name> (<User ID>) on <Date/Time of Creation>.
- Description at Initial Creation - <Learning Object Type> created with <Language of Description> Description of "<Description>" by <User Full Name> (<User ID>) on <Date/Time of Creation>.
- Change to Title - Title in <Language of Title> was changed to "<New Title>" by <User Full Name> (<User ID>) on <Date/Time of Creation>.
- Change to Description - Description in <Language of Description> was changed to "<New Description>" by <User Full Name> (<User ID>) on <Date/Time of Creation>.
- Title/Description Translation Change - Title/Description in <Language> "<New Title/Description>" was added by <User Full Name> (<User ID>) on <Date/Time of Creation>.