To access Level 2 (Knowledge) evaluations, go to . Then, click the Level 2 (Knowledge) link on the left navigation panel. These evaluations are non-scored.
| PERMISSION NAME | PERMISSION DESCRIPTION | CATEGORY |
| Level 2 Knowledge (Non-Scored) Evaluation Administration | Grant Access to create and manage level 2 knowledge (non-scored) evaluations associated with learning objects. This permission cannot be constrained. This is an administrator permission. | Learning - Administration |
To create an evaluation, click the Create New Evaluation link, or copy an existing evaluation by clicking the Copy icon in the Options column.
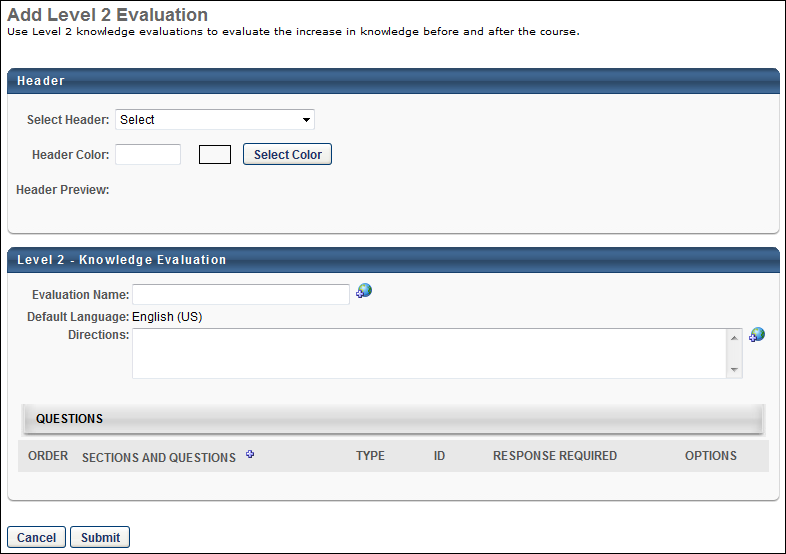
Header
- Select Header - From the drop-down list, select a header image for the evaluation. The available images are taken from the Corporate Preferences images. A preview of the header image is displayed in the Header Preview field. This is optional.
- Header Color - Select the header color, which is the color that fills the header in areas that the header image does not fill. You may enter a hex value for the color or select a color by clicking the button. This is optional.
- Header Preview - This displays a preview of what the header will look like on the evaluation. The selected image is always aligned in the upper-left portion of the header. Any empty space in the header is filled with the selected header color. The selected logo is not resized.
General Information
Enter the following information for the evaluation:
- Evaluation Name - Enter the evaluation title. For portals with multiple languages enabled, localize the field by using the Translate icon to enter localized text.
- Default Language - This displays the evaluation's default language. When adding an evaluation, the default language is the language of the administrator adding the evaluation. When editing or copying an evaluation, the default language is the language of the administrator that created the evaluation. The default language is read-only and cannot be changed.
- Directions - Enter instructions for the evaluation. The instructions appear on a separate page when the user launches the evaluation. If the field is left blank, an introductory page does not appear when users access the evaluation. For portals with multiple languages enabled, localize the field by using the Translate icon to enter localized text.
Add a Section to the Evaluation
When creating or editing an evaluation, administrators must add at least one section to the evaluation to which they can then add questions. Each section is considered a page break on the evaluation. See Add a Section to an Evaluation.
To remove a section, select the Remove icon in the Options column. Note: Removing a section also removes all questions in the section.
Add Questions to an Evaluation Section
When creating or editing an evaluation, administrators must add questions to a section within the evaluation. See Add a Question to an Evaluation Section.
Configure Questions Within the Evaluation Section
When creating or editing an evaluation, administrators can reorder, configure, and preview the questions that have been added to an evaluation section. See Configure Questions Within an Evaluation Section.
Submit
Click to finalize the evaluation.