Check-Ins administrators can use the Customize Check-Ins Home Page to customize the look and feel of the Check-Ins main pages.
Check-Ins has two different customizable main pages:
- Check-Ins Home Page: View and manage meeting information only. This is the default main page.
- Check-Ins Insights: View and manage meetings, notifications and follow-up action items all on the same screen. Enabling the Insights page replaces the default home page.
The customizable fields are the same for both main pages. You can view one main page at a time and can switch between the pages at anytime.
To open the Customize Check-Ins Home Page, go to . In the Check-Ins section, click Home Page Customization, and then select a division name.
From the Customize Check-Ins Home page, administrators can perform the following tasks:
- Switch the Check-Ins main page
- Select an OU for a customized home page
- Customize a page for new users
- Customize a page for returning users
- Edit or hide home page welcome content
- Hide the welcome graphic
- Edit or hide the instructional steps
- Change the text on the Get Started button
- Change the text on the Create new check-in button
- Hide the Getting Started videos
- Localize content
Select an OU
- In the Organizational Unit Selected area, click Change.
- On the Home Page Customization page, select the appropriate OU.
To overwrite the custom page settings for the associated child OUs: Click , select Overwrite custom settings for all children, and then click .
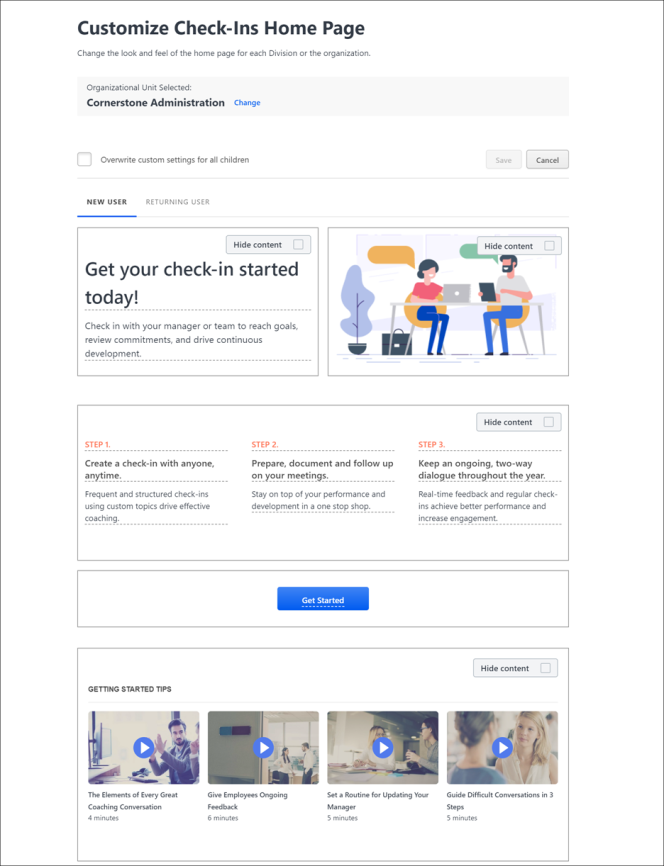
New User Tab
Click the New User tab to customize a home page that users see when they log into Check-Ins for the first time.
Returning User Tab
- Click the Returning User tab to customize the main page that users see after the first log-in.
- Enable the Enable Check-Ins Insights toggle to view the Check-Ins Insights page. The Insights main page provides a way to view and manage meetings, notifications and follow-up action items all on the same screen.See Check-Ins Insights Page. Note: If you enable the Check-In Insights page, it replaces the Check-Ins Home Page. To switch back to the default Check-Ins Home Page, disable the Enable Check-Ins Insights toggle.
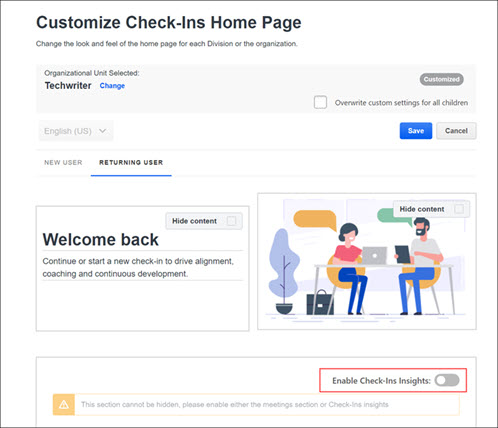
Note: The Returning User tab contains non-editable sections that do not appear on the New User tab.
Welcome Content
Administrators can replace the welcome messages or hide them.
- To replace the welcome messages, overwrite the current welcome message.
- To hide the welcome messages, click Hide content.
Welcome Image
Click Hide content in the image area to hide the welcome image.
Check-Ins Instructions
Administrators can edit the check-ins instructions or hide them. Instructions are only visible on the New User tab.
- To replace the instructions, place the cursor in the instructions area and enter the appropriate changes.
- To hide the instructions, click Hide content. The instructions will not appear on the home page.
Get Started Button
To change the text on the button, click the button to open edit mode and type your preferred button text. When you are done, click in a blank area outside of the button to save your change. This option is only visible on the New User tab.
Create New Check-In Button
To change the text on the button, click the button to open edit mode and type your preferred button text. When you are done, click in a blank area outside of the button to save your change. This option is only visible on the Returning User tab.
Getting Started Tips
To hide the getting started videos, click Hide content. The videos will not appear on the home page.
Localization
All of the text on the home page can be localized. In edit mode, click the localization globe and enter the appropriate text on the flyout.
Save
Click the button at the top of the screen to save all changes on this page.